
DIY Blackhead Strips: Simple Homemade Remedies for Clearer Skin
You can easily remove blackheads with a homemade pore strip.


DIY Nasenpflaster: Einfache Hausmittel zur Mitesserentfernung für reine Haut
4 minutes
Written by Carolina Betancourth
Last updated: July 18, 2022
A pore strip removes sebum that appears in your pores as blackheads, those unsightly dark spots, and frees your pores from blockages. With a strip like this, your skin looks much clearer, very quickly!
Blackheads: The Harbingers of Acne
Blackheads are more accurately called comedones. This happens when the channels of your sebaceous follicle ducts become clogged due to excessive keratinization. When exposed to oxygen from the air, the trapped sebum oxidizes, and the spot gets darker the longer it’s there. Blackheads can appear in various places but are most commonly found on the nose and the so-called “T-zone,” which includes the forehead, nose, and chin.

A closed sebaceous follicle can become inflamed, forming a pimple. This isn’t caused by dirt from the outside, even though the “black spot” might suggest it. It’s simply because the pore is blocked, and the sebum can no longer flow out. Therefore, a blackhead has nothing to do with dirt but is a precursor to acne pimples. It’s wise to remove blackheads to prevent pimples from forming.
Removing Blackheads
Please do not try to squeeze blackheads out at home on your own! This can worsen the condition and lead to severe inflammation! Opening comedones is best left to a professional esthetician! You can also use ointments that help dissolve the blockage and promote healing of any inflammation underneath. Between appointments with your esthetician, you can try removing stubborn comedones with pore strips. These are available commercially as “clear up strips,” but you can also make them yourself.
Homemade Pore Strips for Blackhead Removal!
According to test results, commercially available pore strips aren’t very effective but are expensive. Generally, we recommend seeing an esthetician, but before you spend money on pricey strips, you can make your own. That way, you know there are no chemicals involved, nothing that could cause allergies, and nothing you don’t recognize or can’t pronounce when reading the ingredients. You can find all the ingredients at your local drugstore or supermarket – or you might already have them at home!

Ingredients for Homemade Pore Strips
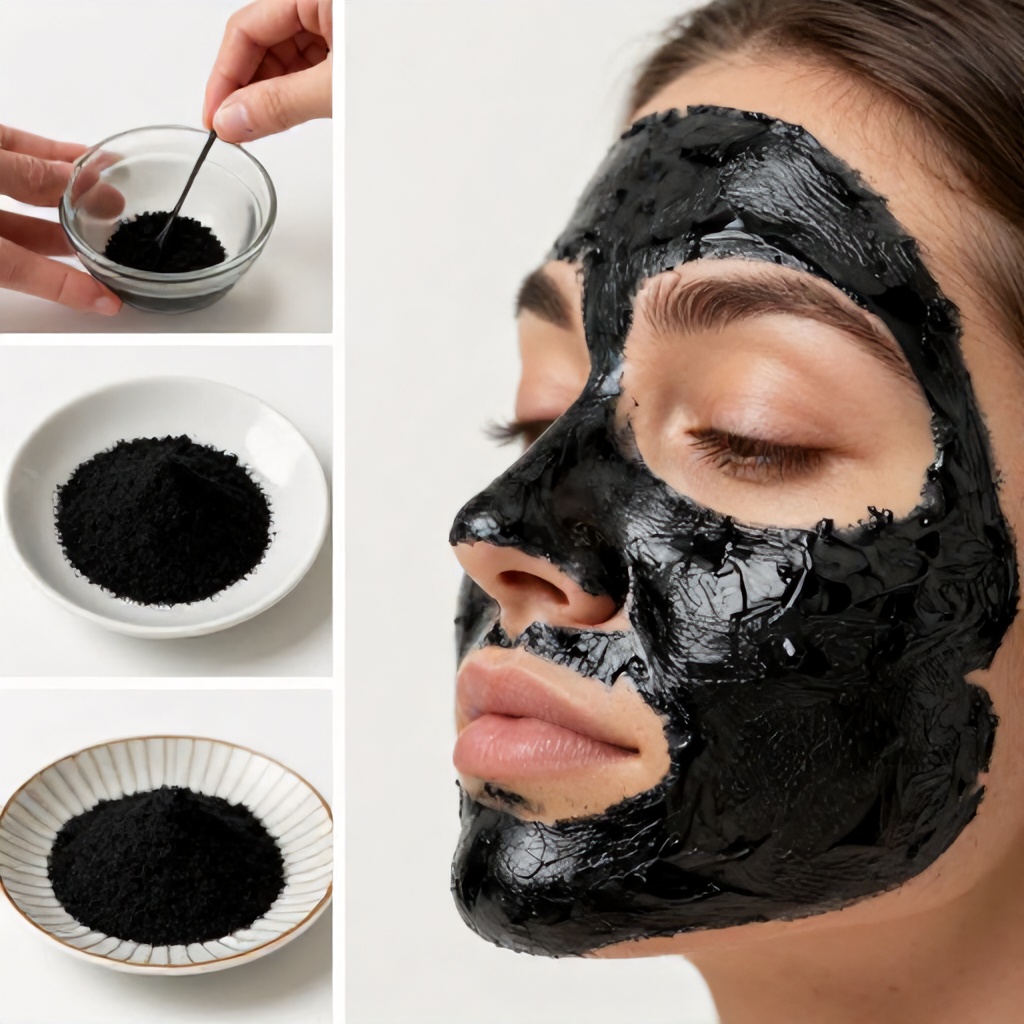
The ingredients are significantly cheaper than a single pack of store-bought pore strips. And the best part: you can make new pore strips again and again! You’ll only need some milk, gelatin, and activated charcoal.
Activated charcoal has antibacterial and purifying properties. Don’t worry; it won’t make your “black spots” even blacker! The black or dark color comes from the charcoal itself, which acts like a magnet to draw out impurities from your pores.
How to Make Your Own Pore Strips
Making these is surprisingly simple and requires minimal effort. You’ll be on your way to smoother skin in no time.
- Prepare Your Workspace: Gather your ingredients and a small, heat-safe bowl. Make sure your skin is clean and dry before you begin.
- Mix the Ingredients: In your bowl, combine one tablespoon of milk with one tablespoon of gelatin powder. Stir until it forms a paste.
- Add Activated Charcoal: Stir in half a teaspoon of activated charcoal powder. Mix well until you have a smooth, dark paste. This is your active ingredient for blackhead removal.
- Warm the Mixture: Gently warm the mixture. You can do this by placing the bowl over a pot of simmering water (a double boiler method) or by microwaving it for very short intervals (10-15 seconds), stirring in between, until it’s a spreadable consistency. Be careful not to overheat it.
- Apply the Strip: Using a clean brush or your fingertips, apply a thin, even layer of the mixture to the areas where you have blackheads, typically your nose or T-zone. Avoid applying it too close to your eyes or eyebrows.
- Let It Dry: Allow the strip to dry completely. This usually takes about 15-20 minutes. It should feel firm and slightly stiff to the touch.
- Peel It Off: Once completely dry, gently peel the strip off your skin. Start from an edge and pull slowly and steadily. You should see the impurities that were trapped in your pores on the strip.
- Rinse and Moisturize: Rinse your face with cool water to remove any residue. Pat your skin dry and apply a gentle moisturizer to keep your skin hydrated.
Why This Works: The Science Behind the Ingredients
The magic of these homemade strips lies in their simple yet effective ingredients. Gelatin acts as a binder, creating a flexible film when it dries. Milk contains lactic acid, a mild exfoliant that can help loosen dead skin cells and sebum. Activated charcoal is the star player here; its porous nature allows it to absorb toxins and impurities from your pores, effectively pulling out that stubborn sebum and debris that form blackheads, or Komedonen.
Beyond the Strip: Essential Skincare Habits for Clearer Skin
While these DIY strips offer a satisfying way to tackle blackheads, consistent skincare habits are key to maintaining skin clarity and preventing future breakouts. Think of pore strips as a helpful tool in your facial care arsenal, not a standalone solution.
- Cleanse Daily: Wash your face twice a day with a gentle cleanser to remove dirt, oil, and makeup. This helps prevent the buildup that leads to clogged pores.
- Exfoliate Regularly: Incorporate a gentle exfoliant into your routine a few times a week. This helps remove dead skin cells that can contribute to pore blockages. You can use a chemical exfoliant with ingredients like salicylic acid or glycolic acid, or a gentle physical scrub.
- Tone Your Skin: After cleansing, a toner can help balance your skin’s pH and remove any remaining impurities. Look for toners with ingredients like witch hazel or tea tree oil, which have astringent and antibacterial properties.
- Moisturize: Even oily skin needs hydration. Choose an oil-free, non-comedogenic moisturizer to keep your skin balanced and prevent it from overproducing oil.
- Don’t Touch! Resist the urge to pick or squeeze pimples or blackheads. This can lead to scarring and more inflammation.
When to Seek Professional Help
While DIY remedies and consistent skincare can go a long way, some skin concerns may require professional attention. If you have persistent or severe acne, deep cystic pimples, or if your blackheads are causing significant distress, consulting a dermatologist or a qualified esthetician is the best course of action. They can offer advanced treatments and personalized advice for your specific skin type and concerns, ensuring your journey to acne-free skin is safe and effective.
Important Warning: Always perform a patch test on a small area of your skin before applying any new homemade treatment to your entire face. This helps ensure you don’t have an adverse reaction to any of the ingredients. If irritation occurs, discontinue use immediately.
By combining effective DIY treatments with a solid skincare routine, you’re well on your way to achieving clearer, healthier-looking skin and saying goodbye to those pesky blackheads.