Effective Treatments and Prevention for Razor Burn and Ingrown Hairs

Soothe Your Skin: Taming Razor Burn and Banish Ingrown Hairs

Razor burn and ingrown hairs are common skin irritations that can turn a smooth shave into a painful ordeal. Understanding why they happen is the first step to preventing them and finding effective remedies.

Understanding the Culprits: Razor Burn vs. Ingrown Hairs

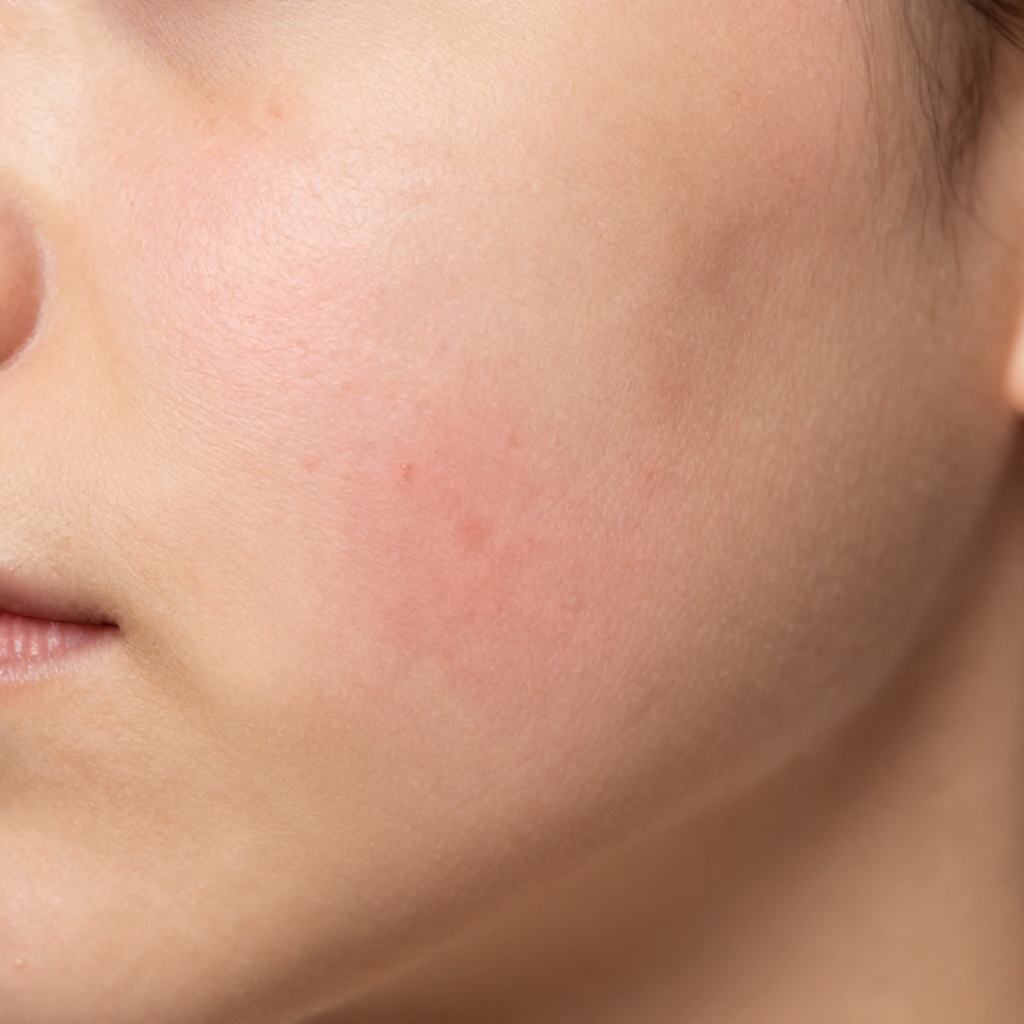
Razor burn often appears as redness and a burning sensation immediately after shaving. It’s essentially a mild form of skin inflammation caused by the friction of the razor blade against the skin, especially when the skin is dry or the blade is dull.

Ingrown hairs, on the other hand, are hairs that curl back or grow sideways into the skin instead of rising out of the hair follicle. This can lead to small, red, inflamed bumps that might resemble pimples, and sometimes they can become infected, causing more significant discomfort and even pus. This particular skin concern is often seen with stubble growth.

Prevention is Key: Strategies for a Smoother Shave

The best approach to dealing with razor burn and ingrown hairs is to prevent them from occurring in the first place. Implementing a few simple changes to your shaving routine can make a world of difference.

Prep Your Skin for Success

Don’t just jump straight to the razor. Your skin needs preparation.

  1. Warm Water is Your Friend: Before you even pick up a razor, spend a few minutes in a warm shower or apply a warm, damp cloth to the area you plan to shave. This softens the hair and opens up the pores, making hair removal easier and reducing the chance of the hair being pulled or cut unevenly below the skin’s surface.
  2. Exfoliate Gently: A gentle exfoliation before shaving can help lift hairs away from the skin and remove dead skin cells that might trap hairs. You can use a soft washcloth, a gentle scrub, or an exfoliating brush. Be careful not to overdo it, as too much scrubbing can also cause irritation.

Choose the Right Tools and Techniques

Your razor and shaving cream play a significant role.

  • Sharp Blade, Happy Skin: Always use a sharp, clean razor blade. A dull blade tugs at the hair and skin, increasing the likelihood of razor burn and ingrown hairs. Change your razor blades frequently – typically every 5-10 shaves, or as soon as you notice any pulling or tugging.
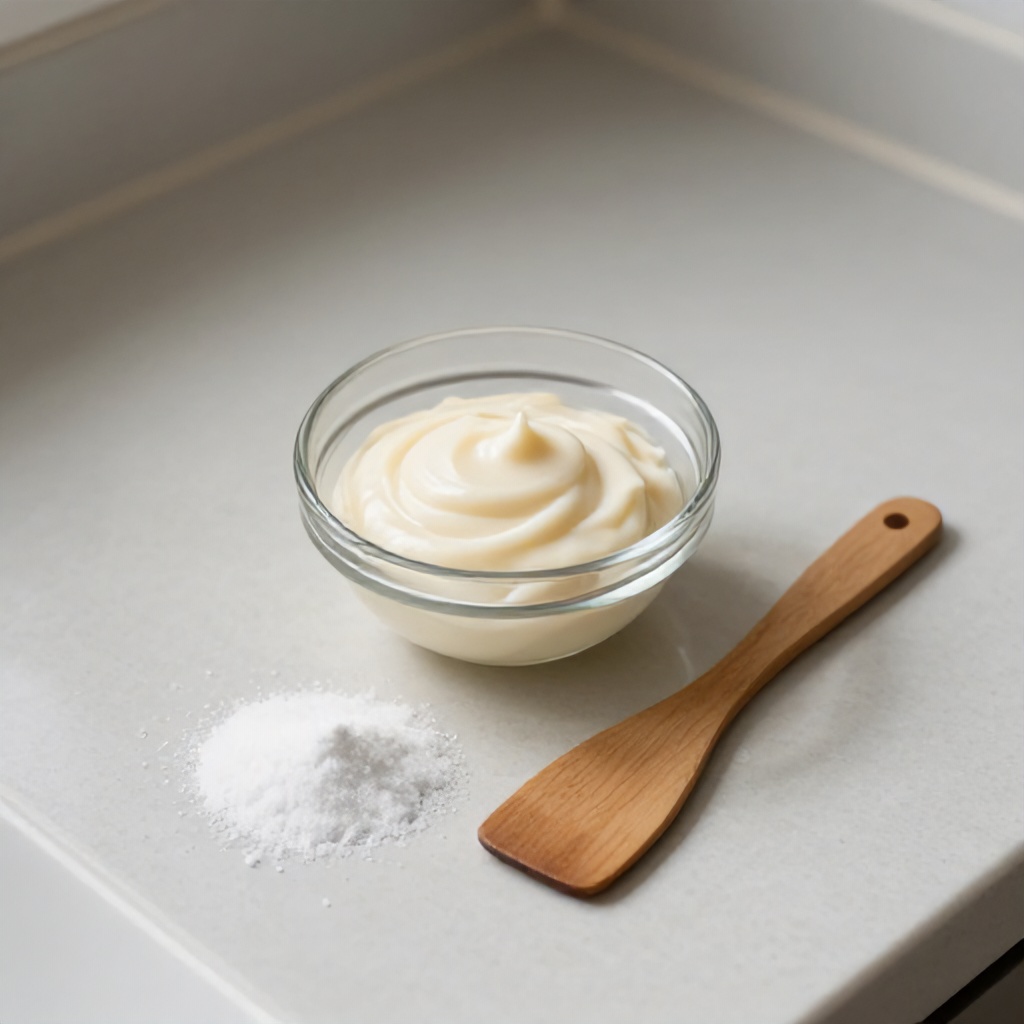
  • Shaving Cream or Gel: Never shave dry. Use a good quality shaving cream, gel, or oil. These products create a slick barrier between the razor and your skin, allowing the blade to glide smoothly and reducing friction. Look for formulas designed for sensitive skin if you’re prone to irritation.
  • Shave with the Grain: This is a big one for preventing ingrown hairs. Shave in the direction that your hair grows. Shaving against the grain might give you a closer shave initially, but it’s a major contributor to ingrown hairs and irritation because it can cut the hair too close to the follicle, allowing it to curl back into the skin. If you need a closer shave, go over the area a second time, but always try to follow the direction of hair growth.
  • Rinse Frequently: Rinse your razor blade under hot water after every stroke or two. This prevents hair clippings and shaving cream from clogging the blade, ensuring a cleaner, more efficient shave.
  • Avoid Over-Shaving: Don’t go over the same spot repeatedly. If you’ve shaved an area and need a little more, reapply shaving cream and shave gently.

Post-Shave Care Matters

The work isn’t done once the razor is put away.

  • Rinse with Cool Water: After you’ve finished shaving, rinse your skin thoroughly with cool water. This helps to close the pores and soothe any immediate redness or irritation.
  • Pat Dry, Don’t Rub: Gently pat your skin dry with a clean, soft towel. Rubbing can further irritate sensitive skin.
  • Moisturize: Apply a gentle, fragrance-free moisturizer or a post-shave balm. This helps to rehydrate the skin and create a protective barrier. Look for ingredients like aloe vera, chamomile, or hyaluronic acid, which are known for their soothing and hydrating properties.

Effective Treatments for Existing Razor Burn and Ingrown Hairs

Despite your best efforts, you might still experience razor burn or ingrown hairs. Fortunately, there are several effective remedies to help calm your skin and get rid of those pesky bumps.

Calming Razor Burn

Razor burn often resolves on its own within a day or two, but these steps can speed up the healing process and provide immediate relief.

  • Cool Compresses: Apply a cool, damp cloth or an ice pack wrapped in a thin towel to the affected area for 10-15 minutes at a time. This can help reduce redness and inflammation.
  • Aloe Vera Gel: Pure aloe vera gel is a natural anti-inflammatory and can be incredibly soothing for irritated skin. Apply it liberally to the burned areas.
  • Oatmeal Baths: For larger areas of irritation, an oatmeal bath can be very beneficial. Colloidal oatmeal has anti-inflammatory and skin-soothing properties.
  • Hydrocortisone Cream: Over-the-counter hydrocortisone cream (0.5% or 1%) can help reduce redness and itching associated with razor burn. Use it sparingly for a few days.
  • Avoid Further Irritation: Stay away from shaving, tight clothing, and harsh skincare products on the affected areas until the skin has healed.

Tackling Ingrown Hairs

Ingrown hairs can be more stubborn, but with patience and the right approach, you can help them resolve and prevent future occurrences.

  • Warm Compresses: Similar to razor burn, applying warm compresses can help soften the skin and encourage the ingrown hair to surface. Do this several times a day.
  • Gentle Exfoliation: Once the inflammation has subsided a bit, gentle exfoliation can help release the trapped hair. You can use a soft washcloth, a gentle scrub, or a chemical exfoliant containing salicylic acid or glycolic acid. These ingredients are particularly effective at breaking down the debris that can trap hairs.
  • Tweezers (with Caution): If the ingrown hair has surfaced and you can clearly see the hair loop, you can carefully try to lift it out with a sterile pair of tweezers. Sterilize the tweezers with rubbing alcohol first. Do NOT dig into your skin. If you can’t easily access the hair, leave it alone and let it resolve on its own or seek professional help. Attempting to dig out a deeply embedded hair can lead to infection and scarring.
  • Topical Treatments: Products containing salicylic acid or benzoyl peroxide can help unclog pores and reduce inflammation. They can be applied directly to the ingrown hair bump.
  • Prevent Re-occurrence: Once the ingrown hair has resolved, continue with your preventative measures, especially shaving with the grain and exfoliating regularly.

When to Seek Professional Help

While most cases of razor burn and ingrown hairs can be managed at home, there are times when you should consult a healthcare professional, such as a dermatologist.

  • Signs of Infection: If an ingrown hair becomes very painful, swollen, filled with pus, or if you develop a fever, it could be infected. This requires medical attention.
  • Persistent or Severe Issues: If you experience frequent, severe ingrown hairs or razor burn that doesn’t improve with home care, a dermatologist can offer stronger prescription treatments or discuss alternative hair removal methods.
  • Scarring: If you are concerned about scarring from ingrown hairs, a dermatologist can recommend treatments to minimize their appearance.

Beyond the Razor: Alternative Hair Removal Methods

For some individuals, the best way to avoid razor burn and ingrown hairs altogether is to explore alternative hair removal methods. While each has its own pros and cons, they might offer a solution to persistent skin concerns.

  • Waxing: This method removes hair from the root. While it can sometimes cause temporary irritation or ingrown hairs if not done correctly, many find it leads to smoother skin for longer periods and can reduce the incidence of ingrown hairs over time compared to shaving.
  • Sugaring: Similar to waxing, sugaring removes hair from the root. It’s often considered gentler on the skin and can be a good option for sensitive individuals.
  • Epilating: Epilators are devices that pull multiple hairs out from the root. Like waxing, it can cause initial irritation but may lead to fewer ingrown hairs with regular use.
  • Laser Hair Removal/IPL: These are longer-term solutions that target hair follicles to reduce hair growth. They require multiple sessions and are an investment, but many find them highly effective in preventing ingrown hairs and razor burn permanently or for extended periods.
  • Depilatory Creams: These creams dissolve hair at the skin’s surface. While they can be convenient, some people experience allergic reactions or irritation. Always patch-test first.

Managing razor burn and ingrown hairs is largely about adopting a mindful approach to hair removal and skincare. By understanding your skin, preparing it properly, using the right tools, and following up with consistent care, you can significantly reduce these common skin irritations and enjoy smoother, more comfortable skin.

How to Remove Blackheads at Home Naturally and Gently

Banish Blackheads: Gentle, Natural Ways to Clear Your Skin

Getting rid of blackheads doesn’t require harsh chemicals or expensive spa treatments; you can achieve clearer skin with simple, natural ingredients you likely already have in your pantry.

Understanding Blackheads

Blackheads, those pesky little dark spots on your skin, are essentially open comedones. They form when a hair follicle becomes clogged with excess sebum (your skin’s natural oil) and dead skin cells. The dark color isn’t dirt; it’s the result of the trapped oil and debris oxidizing when exposed to the air. While they most commonly appear on the face, particularly the nose and chin, they can pop up on your back, chest, and shoulders too. Squeezing them might seem tempting, but it often leads to inflammation, infection, and even scarring, making natural removal methods a much safer bet.

Gentle Exfoliation is Key

The foundation of blackhead removal is regular, gentle exfoliation. This helps to slough away dead skin cells before they have a chance to mix with oil and clog your pores. Think of it as sweeping your pores clean.

Baking Soda Paste

Baking soda is a fantastic natural exfoliant with mild antibacterial properties. Its fine granules can help to gently buff away dead skin cells without being too abrasive.

  1. Mix 1 tablespoon of baking soda with enough water to form a thick paste.
  2. Gently massage the paste onto the affected areas in a circular motion for about 30 seconds.
  3. Rinse thoroughly with lukewarm water.
  4. Pat your skin dry and follow up with a light moisturizer.

Use this remedy 1-2 times per week. Overdoing it can dry out your skin, which might actually prompt it to produce more oil, defeating the purpose.

Oatmeal Scrub

Oatmeal is not just for breakfast; it’s a super ingredient for sensitive skin. It’s soothing, anti-inflammatory, and a gentle exfoliant. It can absorb excess oil and leave your skin feeling soft and smooth.

  1. Cook about 1/4 cup of plain oatmeal with water until it’s soft. Let it cool completely.
  2. Add a tablespoon of honey (which has antibacterial properties) and a teaspoon of olive oil or jojoba oil if your skin is on the drier side.
  3. Apply the mixture to your face, focusing on areas prone to blackheads.
  4. Gently massage in a circular motion for a minute or two.
  5. Rinse off with cool water.

This oatmeal scrub is gentle enough to use 2-3 times a week.

Drawing Out Impurities with Masks

Once you’ve exfoliated, you can use masks to help draw out impurities and excess oil from deep within your pores.

Clay Masks

Clays like bentonite or kaolin clay are excellent for absorbing excess oil and toxins. They work by creating a negative charge that attracts positively charged impurities in your pores.

  1. In a non-metal bowl, mix 1 tablespoon of bentonite or kaolin clay with enough apple cider vinegar or water to create a smooth paste. Apple cider vinegar has alpha hydroxy acids that can help with exfoliation and tightening pores.
  2. Apply a thin layer to your clean face, avoiding the delicate eye and lip areas.
  3. Let it dry completely, which usually takes about 10-15 minutes. You’ll feel your skin tighten.
  4. Rinse off with warm water, gently massaging as you do.
  5. Follow with a hydrating moisturizer.

Use a clay mask once a week. If you have dry or sensitive skin, you might want to limit it to every other week or add a few drops of a nourishing oil to the mask mixture.

Egg White Mask

Egg whites are a surprising but effective natural remedy. They can help to tighten pores and draw out impurities. The protein in egg whites can also help to firm the skin.

  1. Separate one egg white from the yolk.
  2. Whisk the egg white lightly until it’s slightly frothy.
  3. Apply a thin layer of the egg white to your clean face.
  4. For an extra pore-clearing boost, place a thin piece of tissue paper or a facial mask sheet over the egg white and gently press it down.
  5. Apply a second layer of egg white over the tissue paper.
  6. Let it dry completely, which can take 15-20 minutes. It will feel tight and may crack slightly.
  7. Peel off the mask starting from the edges. You might see some blackheads stuck to the tissue.
  8. Rinse your face with cool water and pat dry.
  9. Apply a moisturizer.

This egg white mask is best used once a week. Be mindful if you have a known allergy to eggs.

Targeted Treatments for Stubborn Blackheads

Sometimes, you need a little extra help to tackle those persistent blackheads. These targeted treatments can offer a more concentrated approach.

Honey and Cinnamon Mask

Honey is a natural humectant and has antibacterial properties, while cinnamon can increase blood flow to the skin, which may help to bring impurities to the surface. The combination can be quite effective.

  1. Mix 1 tablespoon of raw honey with 1 teaspoon of ground cinnamon to form a paste.
  2. Apply the paste to your face, focusing on blackhead-prone areas.
  3. Leave it on for 10-15 minutes. You might feel a slight tingling sensation, which is normal due to the cinnamon. If it becomes uncomfortable, rinse it off immediately.
  4. Rinse thoroughly with warm water.
  5. Follow with your usual skincare routine.

Use this mask 1-2 times a week. Be cautious if you have very sensitive skin, as cinnamon can be irritating for some.

Lemon Juice and Honey Spot Treatment

Lemon juice contains citric acid, a natural alpha hydroxy acid (AHA), which can help to exfoliate and lighten the skin. When combined with honey, it becomes a gentler, yet effective spot treatment.

  1. Mix equal parts fresh lemon juice and raw honey.
  2. Dip a cotton swab into the mixture and apply it directly to individual blackheads.
  3. Leave it on for about 10-15 minutes.
  4. Rinse off with cool water.
  5. Apply a moisturizer.

Use this spot treatment sparingly, perhaps 2-3 times a week, as lemon juice can make your skin more sensitive to the sun. Always wear sunscreen during the day when using lemon-based treatments.

Steam Your Way to Clearer Pores

Steaming your face is a simple yet highly effective way to prepare your skin for other treatments. The steam helps to open up your pores, making it easier to remove blockages and allowing masks and other treatments to penetrate more deeply.

  1. Fill a large bowl with hot water.
  2. You can add a few drops of essential oil like tea tree oil (known for its antibacterial properties) or chamomile (for soothing) if you wish, but it’s not necessary.
  3. Drape a towel over your head and lean over the bowl, keeping your face about 10-12 inches from the water.
  4. Close your eyes and let the steam work its magic for 5-10 minutes.
  5. Carefully step away from the bowl.
  6. Immediately follow with your chosen exfoliant or mask while your pores are still open and receptive.

Facial steaming can be done once or twice a week. Be careful not to get too close to the hot water to avoid burns.

Lifestyle Habits for Blackhead Prevention

While home remedies are fantastic for treating existing blackheads, adopting certain lifestyle habits can significantly prevent them from forming in the first place.

Cleanse Regularly, But Gently

Washing your face twice a day is essential to remove excess oil, dirt, and makeup that can contribute to clogged pores. However, avoid harsh scrubbing or using very hot water, as this can strip your skin of its natural oils, leading to increased oil production.

  • Use a mild, sulfate-free cleanser.
  • Wash your face in the morning and before bed.
  • Remove all makeup thoroughly before sleeping.

Hydrate from Within and Without

Drinking plenty of water helps to keep your skin hydrated and healthy, which can contribute to better oil regulation. On the outside, using a lightweight, non-comedogenic moisturizer is crucial, even if you have oily skin. Dehydrated skin often overcompensates by producing more oil.

  • Aim for at least 8 glasses of water a day.
  • Choose moisturizers labeled “non-comedogenic” or “oil-free.”

Diet Matters

While the link between diet and acne is complex and varies from person to person, some find that reducing their intake of high-glycemic index foods (like sugary snacks and refined carbohydrates) and dairy can help improve their skin.

  • Focus on whole foods, fruits, vegetables, and lean proteins.
  • Pay attention to how your skin reacts to different foods.

Keep Your Hands Off Your Face

Your hands carry a lot of bacteria and oil. Constantly touching your face can transfer these impurities to your pores, leading to breakouts and blackheads.

  • Make a conscious effort to avoid touching your face throughout the day.
  • Wash your hands frequently, especially before and after touching your face.

Consistency is Your Best Friend

Achieving and maintaining clear skin is a marathon, not a sprint. Natural remedies work best when used consistently over time. Don’t get discouraged if you don’t see dramatic results overnight. Stick with your chosen routine, be patient, and celebrate the small victories as your skin begins to clear.

Exit mobile version