5 Things Learned From Daily Legs-Up-The-Wall Pose Practice

5 Surprising Benefits of Daily Legs-Up-The-Wall Pose Practice

Practicing the legs-up-the-wall pose, also known as Viparita Karani, every day can lead to noticeable improvements in your physical well-being, especially if you spend a lot of time standing or sitting. This simple inversion uses gravity to your advantage, helping to alleviate common issues like fluid retention and promoting a sense of calm.

What Exactly Is Legs-Up-The-Wall Pose?

Legs-up-the-wall pose is a restorative yoga posture where you lie on your back with your legs extended straight up against a wall. Your hips can be close to the wall or a few inches away, depending on your comfort level. It’s a gentle inversion, meaning your legs are higher than your heart, which creates a unique physiological effect.

This pose is a cornerstone of restorative yoga, designed to relax the body and mind. It’s accessible to most people, regardless of their yoga experience, and can be done with minimal props. The beauty of Viparita Karani lies in its simplicity and profound therapeutic effects.

Why This Simple Pose Makes a Big Difference

The primary reason legs-up-the-wall pose is so effective is its ability to counteract the constant pull of gravity we experience throughout the day. When we stand or sit for extended periods, fluids can pool in our lower extremities, leading to that familiar heavy, tired feeling. By flipping the script and elevating your legs, you encourage these stagnant fluids to move back towards your core.

This movement is key to improving circulation and reducing swelling. It’s not just about feeling lighter; it’s about supporting your body’s natural processes. Think of it as giving your circulatory and lymphatic systems a gentle, much-needed break.

The 5 Key Things I Learned from Daily Practice

1. Relief from Edema and Swelling

One of the most immediate and noticeable benefits I experienced was a significant reduction in edema in my legs and feet. If you’ve ever dealt with fluid retention, or swelling due to long hours on your feet, you know how uncomfortable it can be. Viparita Karani directly addresses this by reversing the effects of gravity.

By allowing stagnant fluids to drain away from the lower limbs, the pose helps to alleviate that puffy, heavy sensation. This is particularly helpful for those with conditions that contribute to swelling or for anyone who simply wants to give their tired legs a break. The improved venous return is palpable.

2. A Calming Effect on the Nervous System

Beyond the physical, this pose is a powerful tool for mental and emotional well-being. The gentle inversion and the act of stillness encourage a deep sense of relaxation. It’s a signal to your nervous system that it’s safe to switch off the “fight or flight” mode and enter a state of rest and digest.

This can be incredibly beneficial for stress management. In our often-hectic lives, finding moments of true calm is essential. The quiet contemplation that comes with holding legs-up-the-wall pose can help to quiet a racing mind and promote a more balanced emotional state. It’s a form of mindful movement that nourishes the soul.

3. Improved Body Alignment and Posture

While it might seem counterintuitive, spending time with your legs elevated can actually improve your overall body alignment and posture. When you’re upright all day, your spine is constantly working against gravity. This pose offers a gentle release for the lower back and hips.

As the muscles in your legs and back relax, it allows for a natural release of tension. This can lead to a subtle lengthening of the spine and a more open chest over time. Practicing Viparita Karani can help undo some of the postural habits we develop from prolonged sitting or standing, contributing to better body awareness and support.

4. A Gentle Boost to Circulation

The inversion aspect of legs-up-the-wall pose is fantastic for encouraging better blood flow. When your legs are raised, gravity assists the blood in returning to your heart, which can help improve overall circulation. This is especially beneficial for those who experience poor circulation in their extremities.

This isn’t about intense physical exertion; it’s about creating an environment where your body’s natural circulatory mechanisms can work more efficiently. The gentle flow helps to oxygenate tissues and remove waste products, contributing to a feeling of rejuvenation. It’s a simple yet effective way to support your cardiovascular health.

5. Enhanced Flexibility and Stretching

While not a deep stretch in the traditional sense, holding legs-up-the-wall pose for an extended period provides a wonderful, passive stretch for the hamstrings, calves, and the backs of the knees. For many, especially those with tight hamstrings, this can be a welcome release.

The sustained, gentle stretch helps to improve flexibility over time. It allows the muscles to lengthen and release without strain. This can be particularly helpful for preparing the body for more active forms of exercise or simply for increasing overall range of motion and comfort in daily activities. It’s a key component of a holistic yoga practice focused on well-being.

Incorporating Legs-Up-The-Wall Pose into Your Daily Routine

Making Viparita Karani a part of your day is incredibly easy. You don’t need a dedicated yoga studio or a lot of time. Find a quiet spot near a wall and simply lie down.

  1. Find your spot: Choose a wall that is free of obstructions.
  2. Position yourself: Sit sideways against the wall, then gently lie down on your back, swinging your legs up the wall as you do so.
  3. Get comfortable: Scoot your hips as close to the wall as is comfortable. Some people like to place a folded blanket or bolster under their hips for added support or a deeper release.
  4. Relax: Let your arms rest by your sides, palms facing up, or place one hand on your belly and the other on your heart. Close your eyes and breathe deeply.
  5. Hold: Aim to stay in the pose for at least 5-10 minutes. You can stay longer if you feel comfortable and benefit from it.
  6. Come out gently: Bend your knees and roll onto one side before slowly pressing yourself back up to a seated position.

Quick Tip:

If your hamstrings feel tight, try placing a folded blanket or pillow under your hips. You can also bend your knees slightly and let the soles of your feet rest against the wall, creating a modified version of the pose.

Important Note:

While generally safe, if you have any medical conditions, especially those related to blood pressure or glaucoma, it’s always a good idea to consult with your doctor or a qualified yoga instructor before starting a new practice, including daily inversion poses like legs-up-the-wall.

The beauty of this practice is its adaptability. You can do it first thing in the morning to energize your day, during a midday break to de-stress, or in the evening to wind down before sleep. The key is consistency.

Even just a few minutes each day can make a significant difference in how your body feels. It’s a simple act of self-care that yields profound results, supporting your overall well-being and promoting better body alignment through mindful movement.

Gentle Lying Down Yoga Flow for Improved Flexibility and Relaxation

Gentle Lying Down Yoga Flow for Improved Flexibility and Relaxation

This gentle lying down yoga flow is designed to boost your flexibility and melt away tension, all from the comfort of your yoga mat. You don’t need to be a seasoned yogi to enjoy these simple yet effective poses. We’ll focus on mindful movement and deep breaths, creating a peaceful sanctuary for your body and mind.

Why Choose a Lying Down Yoga Practice?

Sometimes, the idea of a full yoga practice can feel a bit daunting, especially if you’re feeling tired or stiff. That’s where a lying down yoga flow shines. It’s incredibly accessible, requiring minimal effort and offering maximum benefits. This type of practice, often referred to as supine yoga or floor yoga, is perfect for beginners, those recovering from injury, or anyone seeking a deeply relaxing stretching routine.

The beauty of lying down yoga is its inherent gentleness. Gravity assists you in many of the poses, allowing for a deeper stretch without strain. It’s a fantastic way to cultivate body awareness, gently coaxing tight muscles to release their grip. This mindful movement can also significantly improve your physical well-being and serve as a powerful tool for relaxation techniques.

Preparing Your Space

Before you begin your yoga practice, take a moment to set the scene. Find a quiet space where you won’t be disturbed. Lay out your yoga mat, ensuring it’s comfortable and provides adequate cushioning. Dim the lights if you like, or light a candle to create a calming ambiance. You might even want to put on some soft, instrumental music.

Having a bolster or firm pillow nearby can be helpful for some poses, offering extra support and deepening the sense of relaxation. If you don’t have a bolster, a rolled-up blanket or a few firm pillows will do the trick. Wear comfortable clothing that allows for free movement. The goal is to feel completely at ease.

Your Gentle Lying Down Yoga Sequence

This yoga sequence focuses on poses that can be done entirely lying down, making it ideal for a restorative yoga session. Each pose is held for several breaths, allowing you to sink into the stretch and connect with your body. Remember to breathe deeply and evenly throughout the practice. Inhale through your nose, expanding your belly and chest, and exhale slowly through your nose or mouth, releasing any tension.

1. Reclining Butterfly Pose (Supta Baddha Konasana)

Start by lying on your back. Bring the soles of your feet together, letting your knees fall open to the sides. This is a wonderful hip opener and a great way to begin releasing tension in the lower body. If your knees feel strained, place blocks or rolled-up towels under your outer thighs for support.

Allow your arms to rest by your sides, palms facing up, or place one hand on your heart and the other on your belly to feel your breath. Close your eyes and focus on the gentle opening in your hips and groin. Hold for 5-10 deep breaths, allowing your body to relax into the pose.

2. Supine Spinal Twist (Supta Matsyendrasana)

From Reclining Butterfly, gently draw your knees back together. Extend your arms out to the sides in a T-shape, palms down. Inhale, and as you exhale, slowly let both knees fall to one side. Keep both shoulders grounded on the mat as much as possible.

Turn your head to look in the opposite direction of your knees, if comfortable for your neck. This pose is excellent for releasing tension in the spine and can aid digestion. If your knees don’t reach the floor, place a block or pillow underneath them. Hold for 5-8 breaths on each side, breathing into the gentle twist.

3. Knees-to-Chest Pose (Apanasana)

Return to lying flat on your back. On an exhale, draw both knees into your chest. Wrap your arms around your shins or clasp your hands behind your thighs. Gently rock from side to side, massaging your lower back against the mat. This pose is incredibly soothing for the back and helps to release tension in the hips and hamstrings.

Focus on deep, even breaths. Imagine each exhale releasing a little more tightness from your body. Hold for 5-10 breaths. This is a simple yet effective part of any floor yoga practice.

4. Reclining Pigeon Pose (Supta Kapotasana)

From Knees-to-Chest, lower your feet to the mat, knees bent. Cross your right ankle over your left thigh, just above the knee. Flex your right foot to protect your knee. You should feel a stretch in your right hip and glute.

For a deeper stretch, lift your left foot off the floor and interlace your fingers behind your left thigh, drawing both legs closer towards your chest. Keep your head and shoulders relaxed on the mat. Hold for 5-8 breaths, then switch sides. This variation of pigeon pose is much gentler on the joints than the traditional seated version, making it a great flexibility exercise.

5. Bridge Pose (Setu Bandhasana) – Gentle Variation

Lie on your back with your knees bent and feet flat on the floor, hip-width apart. Your arms should be by your sides, palms down. Inhale and gently lift your hips off the floor, just a few inches. Keep your neck long and avoid pushing your chin towards your chest.

This gentle lift helps to open the chest and strengthen the back muscles. You can interlace your fingers underneath your back and gently roll your shoulders under to deepen the chest opening, or keep your arms by your sides. Hold for 3-5 breaths, then exhale and slowly lower your hips back down. Repeat 3-5 times. This pose can also be supported by placing a block under your sacrum for a more restorative experience.

6. Legs-Up-the-Wall Pose (Viparita Karani) – Modified

This is a wonderfully restorative pose that can be done with a wall or without. If you have a wall available, scoot your hips close to it and extend your legs straight up the wall. Your arms can rest by your sides, palms up, or you can place them on your belly. If you don’t have a wall, simply lie on your back and extend your legs straight up towards the ceiling.

This pose is excellent for improving circulation, calming the nervous system, and relieving tired legs and feet. It’s a cornerstone of many restorative yoga sequences. Sink into the pose and breathe deeply. Stay here for 5-10 minutes, allowing yourself to completely relax.

7. Corpse Pose (Savasana)

The most important pose in any yoga practice! Lie flat on your back, letting your legs extend long and fall open. Allow your arms to rest by your sides, a little away from your body, with your palms facing up. Let your shoulders relax away from your ears.

Close your eyes and consciously release any tension you are holding in your body, starting from your toes and moving all the way up to the crown of your head. Allow your breath to become natural and effortless. Simply be present in this moment of stillness and deep relaxation. Stay here for at least 5-10 minutes, or as long as you feel comfortable. This is where the true healing and integration of your yoga practice happens.

Tips for Enhancing Your Practice

Consistency is key when it comes to improving flexibility and relaxation. Aim to practice this lying down yoga flow a few times a week. Even a short 15-20 minute session can make a significant difference.

Listen to your body. This is not about pushing yourself to your limits. If a pose feels uncomfortable or causes pain, ease out of it or modify it. The goal is gentle movement and mindful awareness, not strain.

Incorporate breathwork. Deep, conscious breathing is a powerful relaxation technique. Focus on your inhales and exhales, letting them guide you deeper into the poses and into a state of calm.

Consider using props. Bolsters, blankets, and blocks can make poses more accessible and comfortable, allowing you to relax more fully and experience the full benefits of this gentle yoga practice. They are essential tools for therapeutic yoga.

Mindfulness is paramount. Pay attention to the sensations in your body. Notice where you feel tightness, where you feel release. This heightened body awareness is a core benefit of any yoga practice, including this supine yoga sequence.

Beyond the Mat

The benefits of this gentle lying down yoga flow extend beyond your mat time. By regularly practicing mindful movement and relaxation techniques, you can cultivate a greater sense of peace and resilience in your daily life. This practice can help reduce stress, improve sleep quality, and foster a more positive outlook on your physical well-being.

Whether you’re looking for a simple stretching routine, a way to unwind after a long day, or a gentle introduction to yoga for beginners, this lying down yoga sequence offers a nurturing and effective approach. Enjoy the journey of discovering greater flexibility and profound relaxation, one breath at a time.

20 Minute Beginner Yoga Routine for Flexibility and Toning

Your 20-Minute Beginner Yoga Routine for Flexibility and Toning

If you’re curious about yoga but feel a bit lost on where to begin, this 20-minute beginner yoga routine is your perfect starting point. It gently guides you through fundamental yoga poses designed to stretch, calm, and tone your entire body. Whatever your reason for exploring yoga, I’m genuinely happy you’ve started this journey, and I’m here to share the incredible benefits yoga offers.

This beginner yoga routine features 16 poses. Aim to hold each pose for about 15 seconds, or roughly five slow, deep breaths. Follow the sequence up to Downward Facing Dog (pose 13), then repeat the first side of the sequence on your other side before moving into the cool-down poses.

This particular 20 minute yoga workout is excellent for building foundational strength, toning your muscles, and significantly improving your flexibility. Remember, this is your practice. Move at your own pace and listen to your body. If holding poses for 15 seconds feels like too much right now, that’s absolutely fine! The most important thing is that you are moving, growing, and learning.

Some of these yoga postures might seem a bit challenging at first glance. However, all the poses in this yoga sequence are beginner friendly, meaning you can easily modify them to suit your current level. I’ve chosen these specific poses because they are dynamic and form essential base poses for developing your yoga practice.

For modifications, having a couple of yoga blocks and a yoga strap can be incredibly helpful. You can find recommendations for these useful yoga tools on our dedicated page.

Tip: If you’re new to yoga, consider having a yoga mat for comfort and grip. Yoga blocks can help bring the floor closer to you, and a yoga strap can assist in reaching further in stretches. These yoga tools are great for supporting your yoga journey.

The poses included in this 20 minute yoga routine are:

  1. Cat-Cow – 3 rounds
  2. Downward Facing Dog – 5 breaths
  3. Standing Forward Fold – 5 breaths
  4. Mountain Pose – 5 breaths
  5. Standing Backbend – 5 breaths
  6. Warrior II – 5 breaths
  7. Triangle Pose – 5 breaths
  8. Extended Side Angle Pose – 5 breaths
  9. Chair Pose – 5 breaths
  10. Standing Forward Fold – 5 breaths
  11. Four Limbed Staff Pose – 5 breaths
  12. Cobra Pose – 5 breaths
  13. Downward Facing Dog – 5 breaths
  14. Pigeon Pose – 5 breaths
  15. Seated Straight Legged Forward Fold – 5 breaths
  16. Savasana (Corpse Pose) – 1-2 minutes

Understanding the Benefits: Tone, Flexibility, and Beyond

Toning Your Body

As you move through this yoga sequence, you’ll notice how many different muscle groups are engaged. Poses like Warrior II and Chair Pose build strength in your legs and core. Even poses that feel more restorative, like Cobra, work to strengthen your back muscles. Consistent practice contributes to overall muscle toning, giving you a more sculpted physique over time. This isn’t just about aesthetics; stronger muscles support your joints and improve your posture.

Improving Flexibility

Flexibility yoga is a cornerstone of many people’s practice, and this routine is designed to enhance just that. Poses like Standing Forward Fold and Seated Straight Legged Forward Fold gently stretch the hamstrings and spine. Cat-Cow warms up the spine, preparing it for deeper movements. Pigeon Pose is excellent for opening up the hips, a common area of tightness for many. Regularly incorporating this stretching routine will lead to noticeable improvements in your range of motion, making everyday movements feel easier and reducing the risk of injury.

Calming Your Mind

Beyond the physical benefits, yoga is profoundly beneficial for mental well-being. The focus required to hold poses and move with your breath helps to quiet the constant chatter of the mind. Savasana at the end of the practice is a vital period of relaxation, allowing your body and mind to integrate the benefits of the session. This mindful approach is a key aspect of the yoga lifestyle, promoting stress reduction and a sense of inner peace.

How Many Calories Does a 20-Minute Yoga Routine Burn?

Many people are turning to yoga for its holistic benefits, including its effectiveness in weight management. A fundamental principle of weight loss involves burning more calories than you consume, and incorporating exercise is a key part of this equation. You might be wondering precisely how many calories a 20-minute yoga workout can burn.

Using a simple online calorie calculator, a person weighing around 150 pounds might burn approximately 62 calories during 20 minutes of Hatha yoga. The actual number of calories burned can vary significantly based on the type of yoga and the intensity of your practice.

For comparison, Vinyasa yoga, which is typically more dynamic and faster-paced, can burn around 198 calories in the same 20-minute period. This substantial difference is because Vinyasa yoga raises your heart rate more significantly than Hatha yoga, which tends to focus more on foundational alignment and basic yoga postures.

Frequently Asked Questions

What if I can’t do a pose perfectly?

That’s completely okay! Yoga is a personal journey, and modifications are your best friend. Don’t worry about perfection; focus on how the pose feels in your body. The goal is progress, not perfection. For example, if a forward fold is too intense, bend your knees generously.

How often should I do this beginner yoga routine?

Consistency is key for seeing results in flexibility and toning. Aim to practice this routine at least 3-4 times a week. You can also sprinkle in individual poses throughout your day as a quick stretching routine whenever you feel the need.

What are the most important yoga foundations to focus on?

For beginners, focusing on your breath (pranayama) and proper yoga alignment is paramount. Pay attention to how your body feels in each pose and try to maintain a steady, even breath. These yoga foundations will support your entire yoga practice as you advance.

Can this routine help with weight loss?

While this routine isn’t as intense as some cardio workouts, it contributes to calorie expenditure and muscle toning, both of which are beneficial for weight loss. When combined with a balanced diet, a regular yoga practice can certainly support your weight loss goals.

What’s the difference between Hatha and Vinyasa yoga?

Hatha yoga generally involves holding poses for longer periods and focuses on breath control and alignment. Vinyasa yoga is more fluid, linking poses together with the breath in a continuous flow. This beginner routine incorporates elements that are accessible from both styles.

Getting Started with Your Yoga Practice

Embarking on your yoga journey is a wonderful decision. This 20-minute routine is designed to be accessible, allowing you to build confidence and strength gradually. Remember that every experienced yogi started somewhere, and this beginner yoga routine provides a solid starting point.

As you become more comfortable, you might explore different types of yoga, like Hatha yoga for its focus on alignment or Vinyasa yoga for a more dynamic workout. The most important thing is to find a yoga lifestyle that resonates with you and supports your overall well-being.

Don’t be discouraged if some yoga postures feel challenging initially. The beauty of yoga is its adaptability. Listen to your body, be patient with yourself, and celebrate every small victory. Your commitment to this practice is the most significant step.

Yoga Tips for Beginners:

  • Listen to your body: Never push yourself into pain. Modify poses as needed.
  • Focus on your breath: Your breath is your anchor. Try to keep it steady and deep.
  • Be patient: Progress takes time. Enjoy the process of learning and growing.
  • Find a comfortable space: A quiet, uncluttered area will help you focus.
  • Don’t compare: Everyone’s yoga journey is unique.

Gentle Morning Yoga Stretches to Improve Flexibility and Reduce Stiffness

Starting your day with a gentle morning yoga stretch routine can significantly enhance your flexibility, setting a positive tone for hours ahead and easing stiffness that builds overnight.

Why Morning Yoga is a Game-Changer for Flexibility

Many people wake up feeling stiff, a natural result of hours spent in one position. A dedicated morning stretch routine helps to gently warm up your muscles, lubricate your joints, and increase blood flow throughout your body. This isn’t just about feeling less “creaky”; it’s about actively improving your range of motion over time.

Beyond the physical benefits, morning yoga offers a valuable mental reset. It provides a quiet moment before the day’s demands begin, allowing you to connect with your breath and body. This mindful practice can reduce stress, improve focus, and cultivate a sense of calm that carries you through your busy schedule. Consistency is often easier to achieve in the morning, before other commitments derail your plans.

Getting Started: Your Simple Setup

You don’t need much to begin a morning yoga practice. The beauty of these stretches is their accessibility.

  • A Yoga Mat: While not strictly necessary, a mat provides cushioning and grip, making poses more comfortable and stable. If you don’t have one, a soft rug or even a towel on a non-slip floor works just fine.
  • Comfortable Clothing: Choose clothes that allow for a full range of movement without restricting your breath or pinching your skin. Think soft, stretchy fabrics.
  • A Quiet Space: Find a corner where you won’t be disturbed for 15-30 minutes. Natural light can be invigorating, but any peaceful spot will do.
  • No Equipment Needed: Forget about fancy blocks, straps, or bolsters for now. Your body is all you need.

Essential Principles for Your Morning Stretch

Approaching your morning routine with intention makes all the difference. Keep these guidelines in mind as you move.

  • Listen to Your Body: This is perhaps the most important rule. Never force a stretch or push into pain. Your body’s sensations are your best guide. Some days you’ll feel more open, other days less so. Honor that.
  • Breath is Key: Connect your movement with your breath. Inhale to lengthen, exhale to deepen. Deep, steady breaths, often through the nose, oxygenate your muscles and calm your nervous system. Try to make your inhales and exhales roughly equal in length.
  • Hold Poses Gently: Aim to hold each stretch for 3-5 slow breaths. This gives your muscles time to relax and lengthen without triggering a “stretch reflex” that can cause them to contract.
  • Be Gentle, Not Aggressive: Morning muscles are often cooler and less pliable. Approach your stretches with kindness and patience. Think of it as waking up your body, not conquering it.
  • Consistency Over Intensity: A short, regular practice is far more effective than sporadic, intense sessions. Even 10-15 minutes daily will yield noticeable results over time.

Your Morning Yoga Stretch Routine for Enhanced Flexibility

This routine is designed to be gentle yet effective, progressively opening your body from head to toe. Remember to move slowly and mindfully through each pose.

1. Gentle Awakening: Grounding and Spinal Mobility

Child’s Pose (Balasana)

Start your practice here, grounding yourself. Kneel on your mat, bringing your big toes to touch and spreading your knees wide, or keep them hip-width apart for a more restorative feel. Sink your hips back towards your heels. Extend your arms forward, resting your forehead on the mat. Allow your shoulders to relax and your spine to lengthen. Breathe deeply into your back body, feeling your rib cage expand with each inhale. This pose calms the mind and gently stretches the hips, thighs, and ankles.

Cat-Cow Stretch (Marjaryasana-Bitilasana)

From Child’s Pose, shift onto your hands and knees, aligning your wrists directly under your shoulders and your knees under your hips. Your fingers should be spread wide. This dynamic movement warms up the spine.

  1. Cow Pose: As you inhale, drop your belly towards the mat, lift your chest and tailbone towards the ceiling. Gaze gently forward or slightly up, without crunching your neck.
  2. Cat Pose: As you exhale, round your spine towards the ceiling, tucking your chin to your chest and drawing your navel towards your spine. Imagine pressing the mat away from you.

Flow between Cat and Cow for 5-8 rounds, coordinating each movement with your breath. Feel the articulation of each vertebra. This improves spinal flexibility and mobility.

Gentle Supine Spinal Twist

Lie on your back with your knees bent and feet flat on the floor, hip-width apart. Extend your arms out to a “T” shape, palms facing up or down.

  1. Lift your hips slightly and shift them a few inches to the right.
  2. Let both knees fall slowly to the left, keeping your right shoulder grounded as much as possible.
  3. You can gaze to the right, opposite your knees, for a deeper neck stretch.

Hold for 5 breaths, feeling the gentle twist in your lower back and the stretch across your chest and shoulder. Bring your knees back to center, recenter your hips, then repeat on the other side, letting your knees fall to the right and gazing left. This pose releases tension in the spine and hips.

2. Standing Stretches: Building Warmth and Lengthening

Standing Forward Fold (Uttanasana)

Stand at the top of your mat with your feet hip-width apart.

  1. Inhale, lengthen your spine.
  2. Exhale, hinge from your hips, folding forward. Keep a slight bend in your knees, especially if your hamstrings are tight. The goal is to lengthen your spine, not necessarily to touch your toes with straight legs.
  3. Let your head hang heavy. You can grab opposite elbows, let your hands dangle, or place them on your shins or the floor.

Hold for 5 breaths, feeling the stretch in your hamstrings and along your spine. This pose calms the brain and helps relieve stress, while stretching the hamstrings and calves.

Low Lunge (Anjaneyasana)

From a Standing Forward Fold, step your right foot back into a lunge position, dropping your right knee to the mat. You can place a blanket under your knee for comfort.

  1. Ensure your left knee is stacked directly over your left ankle.
  2. Keep your left hand on the floor or a block for balance, or bring both hands to your left thigh.
  3. Gently press your hips forward and down, feeling the stretch in the front of your right hip and thigh (hip flexor).
  4. For an added stretch, inhale and sweep your arms overhead, palms facing each other.

Hold for 5 breaths, then release and switch sides. This pose is excellent for opening tight hip flexors, which often become stiff from prolonged sitting.

Triangle Pose (Trikonasana)

Step your feet wide apart, about 3-4 feet. Turn your right foot out 90 degrees, and your left foot slightly in.

  1. Extend your arms out to a “T” shape, parallel to the floor.
  2. Inhale, reach forward with your right hand, lengthening your right side.
  3. Exhale, hinge at your right hip, bringing your right hand to your shin, ankle, or a block. Your left arm reaches straight up towards the ceiling.
  4. Keep your chest open and stacked. Imagine you’re between two panes of glass.
  5. Gaze up at your left thumb, forward, or down at your right foot for neck comfort.

Hold for 3-5 breaths, feeling the stretch in your hamstrings, groin, and along the side of your torso. Inhale to come back up, then repeat on the other side. Triangle Pose strengthens the legs and core while stretching the hamstrings, groin, hips, and spine.

3. Floor Stretches: Deepening Flexibility and Release

Seated Forward Fold (Paschimottanasana)

Sit on your mat with your legs extended straight out in front of you, feet flexed (toes pointing up).

  1. Inhale, sit tall, lengthening your spine.
  2. Exhale, hinge from your hips, folding forward over your legs. Keep your spine long, avoiding rounding your back.
  3. Rest your hands on your shins, ankles, or feet.
  4. Keep a micro-bend in your knees if your hamstrings are very tight.

Hold for 5-8 breaths, allowing your body to soften into the stretch. This pose deeply stretches the hamstrings, calves, and back, and can calm the brain.

Bound Angle Pose (Baddha Konasana)

From Seated Forward Fold, bring the soles of your feet together, letting your knees fall open to the sides. You can bring your heels closer to your groin for a deeper stretch, or further away for a gentler one.

  1. Hold onto your feet, ankles, or shins.
  2. Inhale, sit tall, lengthening your spine.
  3. Exhale, gently fold forward from your hips, allowing your elbows to press lightly into your inner thighs if you wish to deepen the stretch.

Hold for 5-8 breaths, feeling the opening in your inner thighs and hips. This pose stimulates abdominal organs, improves general circulation, and stretches the inner thighs, groin, and knees.

Happy Baby Pose (Ananda Balasana)

Lie on your back.

  1. Bend your knees and draw them towards your chest.
  2. Grab the outside edges of your feet with your hands, keeping your knees bent and stacked over your ankles.
  3. Open your knees wider than your torso, drawing them towards your armpits.
  4. Keep the soles of your feet parallel to the ceiling.
  5. Gently press your lower back into the mat. You can rock gently side to side for a massage.

Hold for 5-8 breaths. This pose gently stretches the inner groins and back, and calms the brain and helps relieve stress.

Reclined Pigeon Pose (Eka Pada Rajakapotasana Variation)

Lie on your back with your knees bent and feet flat on the floor.

  1. Cross your right ankle over your left thigh, just above the knee.
  2. If you already feel a stretch in your right hip, stay here.
  3. For a deeper stretch, lift your left foot off the floor and interlace your fingers behind your left thigh.
  4. Gently draw your left thigh towards your chest, keeping your right foot flexed to protect your knee.

Hold for 5-8 breaths, feeling the deep stretch in your outer right hip and glute. Release and repeat on the other side. This is an excellent stretch for the outer hips and piriformis muscle.

4. Cool-down and Relaxation: Integrating Your Practice

Savasana (Corpse Pose)

Extend your legs long on the mat, letting your feet fall open naturally. Let your arms rest alongside your body, palms facing up, slightly away from your torso. Close your eyes. Allow your entire body to relax and surrender to the mat. Feel the effects of your practice. Let your breath be natural. Stay here for 5-10 minutes, allowing your body and mind to fully integrate the benefits of the stretches. This final pose is essential for relaxation and absorbing the practice.

Making It a Consistent Habit

Building a new routine takes time and patience. Don’t expect perfection from day one.

  • Start Small: Even 5-10 minutes of gentle stretching is better than nothing. You can gradually increase the duration as you feel more comfortable and dedicated.
  • Set a Specific Time: Waking up 15-30 minutes earlier and dedicating that time to your yoga practice can create a powerful anchor for your day.
  • Be Patient with Progress: Flexibility doesn’t happen overnight. Celebrate small improvements, like reaching a little further or feeling less tension in a particular area.
  • Focus on How it Feels: Shift your attention from how a pose looks to how it feels in your body. This internal focus makes the practice more personal and sustainable.
  • Listen to Your Body’s Signals: Some days you might feel more flexible than others. Adjust your practice accordingly.

Common Mistakes to Avoid

Even with the best intentions, it’s easy to fall into habits that hinder progress or risk injury.

  • Holding Your Breath: Restricting your breath creates tension. Always focus on smooth, steady breathing to help your muscles relax and lengthen.
  • Forcing Stretches: Pushing past your body’s natural limits can lead to muscle strains or injury. A gentle pull is good; sharp pain is a warning sign to back off.
  • Comparing Yourself to Others: Everyone’s body is different. Your flexibility journey is unique. Focus on your own progress and sensations, not on what others can do.
  • Skipping Warm-up or Cool-down: These phases are crucial. The warm-up prepares your muscles, and the cool-down allows your body to relax and integrate the benefits.
  • Ignoring Discomfort: While some sensation is normal during a stretch, sharp or shooting pain is not. Always adjust or back out of a pose if you feel pain.

Benefits Beyond Flexibility

While enhanced flexibility is a primary goal, a morning yoga routine offers a cascade of other positive effects that ripple through your entire day.

  • Improved Posture: By lengthening your spine and strengthening your core, yoga helps counteract the slouching that often comes from sitting at desks or looking at screens.
  • Reduced Stress and Anxiety: The combination of mindful movement and deep breathing actively calms the nervous system, providing a natural antidote to daily stressors.
  • Increased Energy Levels: Moving your body and increasing blood flow in the morning can be more invigorating than a cup of coffee, without the jitters.
  • Better Sleep Quality: Even a morning practice can contribute to better sleep by regulating your body’s rhythms and reducing overall stress throughout the day.
  • Stronger Mind-Body Connection: Regular practice fosters a deeper awareness of your physical sensations and emotional states, leading to greater self-understanding and presence.

Embracing a morning yoga stretch routine is a simple yet profound act of self-care. It doesn’t require hours of dedication, just a willingness to show up for yourself, even for a few minutes. Over time, you’ll discover not only a more flexible body but also a calmer, more focused mind ready to meet the day with renewed energy and grace.

Printable Illustrated Yoga Poses Guide for Boosting Flexibility

A printable illustrated yoga poses guide offers a direct, screen-free way to boost your flexibility, providing a clear visual reference for effective physical postures right where you need it.

Why Flexibility Matters for Everyone

Flexibility often gets overlooked in our daily fitness routines, yet it’s a fundamental component of overall wellness. It’s not just about touching your toes; it deeply impacts how your body moves through life, from simple tasks to more strenuous physical activity. Improving your flexibility means enhancing your range of motion in joints, which allows for smoother, more efficient body movements.

Think about the everyday actions you perform: bending down to tie your shoes, reaching for something on a high shelf, or even turning your head to check your blind spot while driving. All these actions rely on a certain degree of flexibility. When your muscles are tight and restricted, these movements become more challenging, sometimes even painful. A consistent yoga practice, even with gentle exercises, can significantly improve these aspects of your physical well-being.

Beyond daily convenience, flexibility plays a crucial role in injury prevention. Stiff muscles are more prone to strains and tears, especially during sudden movements or intense exercise. By gradually lengthening your muscles and increasing joint mobility through a dedicated flexibility guide, you create a more resilient body, better equipped to handle the demands of life and sport. This also contributes to better posture, as flexible muscles allow your body to naturally align itself more effectively, reducing strain on your spine and other joints.

  • Reduced muscle stiffness and tension
  • Improved posture and body alignment
  • Enhanced athletic performance and range of motion
  • Significant injury prevention
  • Better circulation and reduced muscle soreness
  • Increased body awareness and relaxation

The Power of a Printable Illustrated Guide

In a world saturated with digital content, a physical, printable resource stands out as a uniquely effective tool for learning and practicing yoga. It removes the distractions of screens and notifications, allowing for a more focused and intentional yoga practice. This kind of instructional content is designed to be immediately accessible and incredibly practical.

Why Visual Learning Works Best

Our brains are wired for visual learning. When it comes to understanding complex physical postures, seeing an image is often far more effective than reading a detailed description. An illustrated guide breaks down each yoga pose into its core visual components, showing you exactly where your limbs should be, how your spine should align, and the general shape your body should form. This visual guide streamlines the learning process, making yoga instruction approachable for beginners and a quick reference for experienced practitioners alike.

A well-designed visual guide uses stylized illustrations to highlight key alignment points, making it easier to grasp the nuances of each pose. These exercise illustrations act as a silent teacher, guiding your body movements without the need for constant verbal cues. This method of learning is particularly beneficial for developing a strong foundation in your yoga practice, ensuring you’re performing each pose safely and effectively.

The Benefits of a Physical Resource

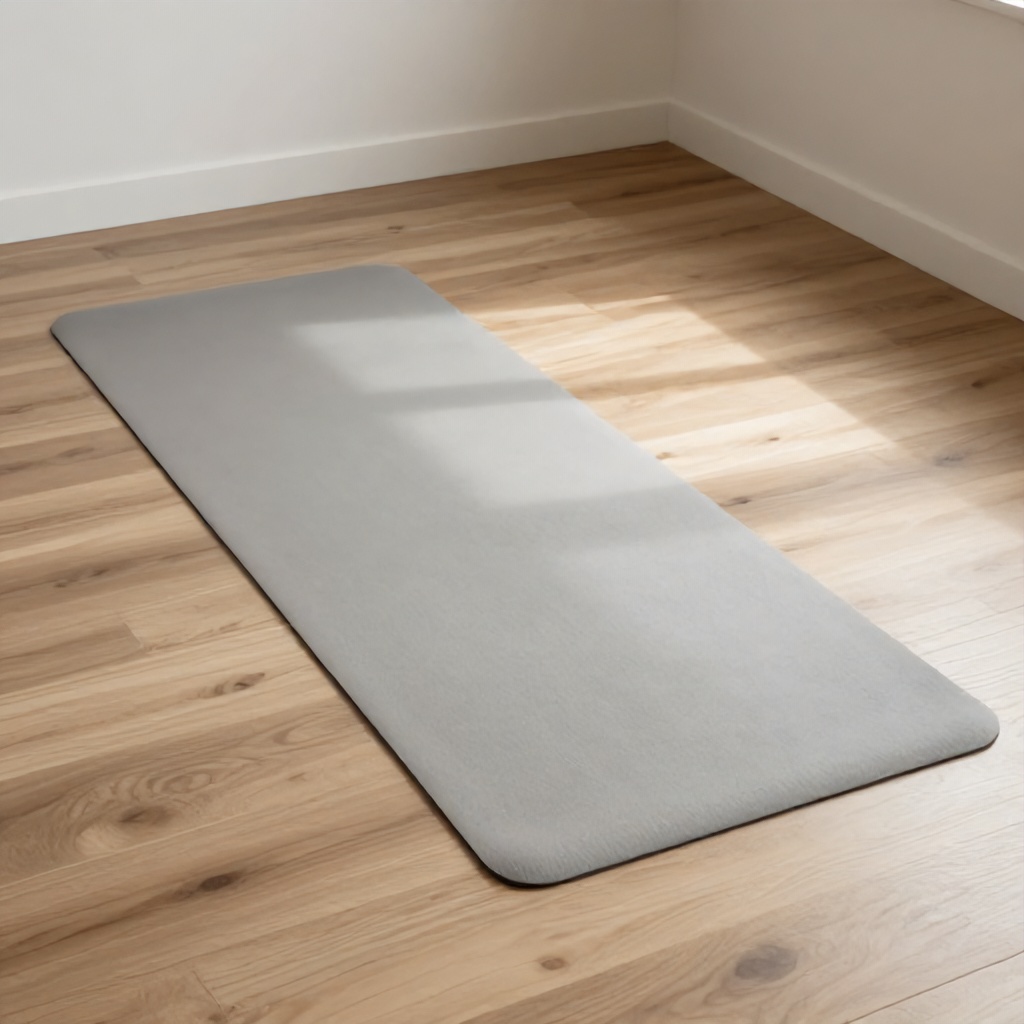
Having a physical, printable resource offers several distinct advantages over digital alternatives. You can place it on the floor next to your yoga mat, tape it to a wall, or even laminate it for durability. This means no more fumbling with a phone, no more screen glare, and no more interruptions from incoming messages. It’s a dedicated tool for your fitness routine, fostering a deeper connection to your physical activity.

  • No screen distractions, allowing for full immersion in your yoga practice.
  • Easy to position anywhere in your practice space for constant reference.
  • Durable when printed on sturdy paper or laminated, enduring many sessions.
  • Personalization potential; you can mark favorite poses or add notes.
  • Accessible to everyone, regardless of tech savviness or device availability.
  • A tangible reminder of your commitment to your wellness routine.

What Makes a Great Illustrated Guide?

Not all illustrated guides are created equal. A truly effective printable illustrated yoga poses guide prioritizes clarity, simplicity, and accuracy. The best guides feature clean, clear, and simple illustrations that are easy to interpret at a glance. They avoid overly complex backgrounds or busy details that might distract from the pose itself.

Look for a minimalist design, often employing a flat graphic style. This ensures that the focus remains squarely on the body movements and the physical postures. Each illustration should accurately depict the pose, with subtle cues for proper alignment—perhaps an arrow indicating the direction of a stretch, or a highlighted area showing where to engage a muscle. This type of instructional content becomes an invaluable part of your health and fitness journey, supporting a safe and effective exercise routine.

  • Clear, simple illustrations that are easy to understand.
  • Accurate posture depiction with correct body alignment.
  • Minimalist design and a clean aesthetic.
  • A flat graphic style that emphasizes form over unnecessary detail.
  • Inclusion of key alignment cues and modifications where appropriate.
  • Sequential layout for building a logical yoga sequence.

Getting Started: Your Flexibility Journey

Beginning a flexibility routine, especially with a new yoga practice, can feel exciting. The key is to approach it with patience and self-awareness. Your printable resource will be your constant companion, guiding you through each step.

Preparing Your Space and Mind

Before you even unroll your mat, take a moment to prepare your practice space. Find a quiet corner where you won’t be disturbed. Clear any clutter to create a sense of calm and openness. Lay out your yoga mat, and place your printable resource nearby, easily visible. You might want to wear comfortable athletic wear that allows for a full range of motion without restriction.

Equally important is preparing your mind. Take a few deep breaths to center yourself. Let go of any stress or distractions from your day. This brief mental preparation helps you transition into a mindful state, allowing you to fully engage with your body movements and the present moment. This dedicated time becomes a sacred part of your wellness routine.

Understanding Your Body’s Limits

Yoga is not about competition or pushing yourself into painful positions. It’s about listening to your body and respecting its current capabilities. Every body is different, and your flexibility guide is there to support your journey, not to dictate perfection. As you move through the physical postures, pay close attention to any sensations. A gentle stretch is good; sharp pain is a signal to ease off.

Consistency over intensity is the mantra for flexibility. It’s far better to practice gentle exercises regularly than to attempt extreme stretches sporadically. Over time, with consistent yoga instruction and mindful practice, you’ll notice gradual improvements in your range of motion. Remember, this is your personal fitness routine, tailored to your body’s unique needs.

Essential Yoga Poses for Flexibility

A good printable resource will feature a range of yoga poses specifically chosen to target major muscle groups and enhance overall flexibility. These exercise illustrations will guide you through a balanced yoga sequence, ensuring you work various parts of your body effectively. Here are some fundamental poses that are excellent for building flexibility.

Gentle Warm-Up Poses

Always begin your yoga practice with a few warm-up poses to prepare your muscles and joints for deeper stretches. These gentle movements increase blood flow and awaken your body.

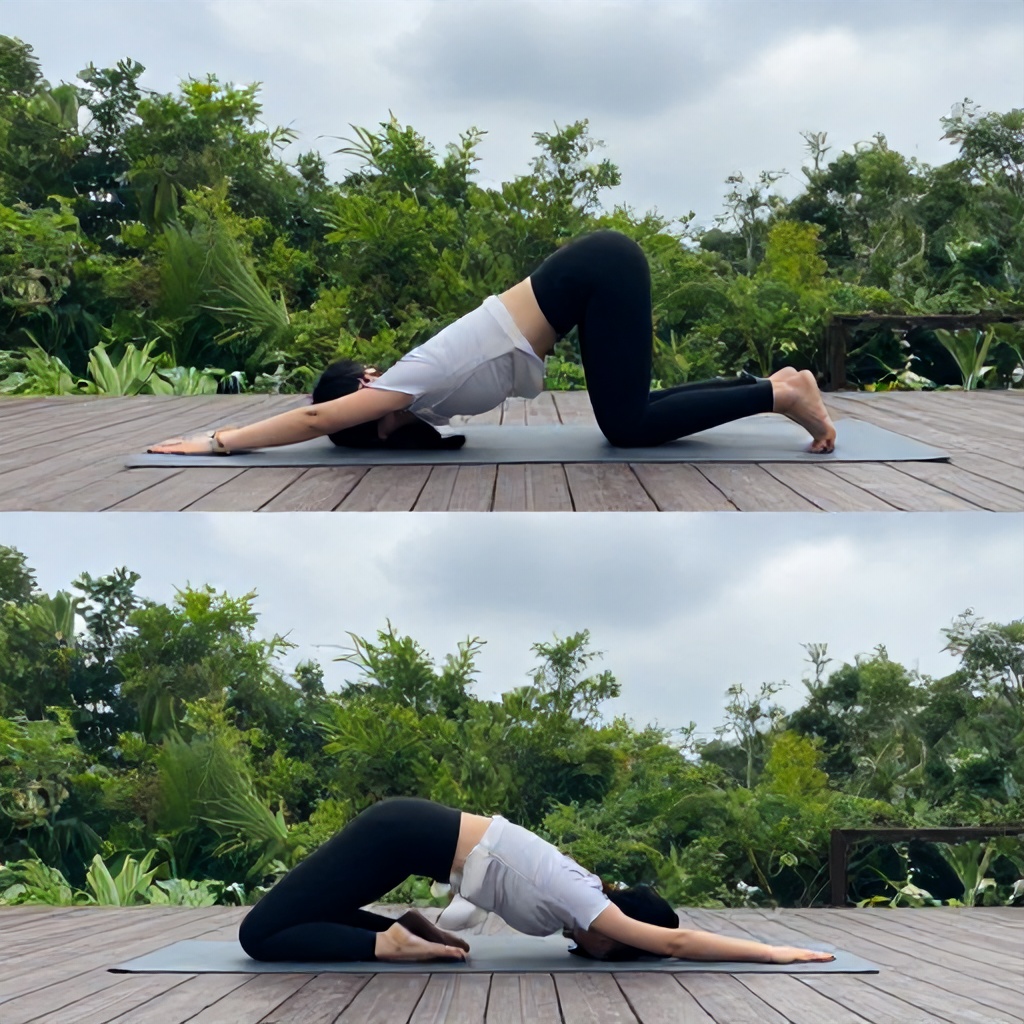
  • Cat-Cow Stretch (Marjaryasana-Bitilasana): This flowing movement warms the spine, shoulders, and hips. On an inhale, arch your back and lift your head (Cow). On an exhale, round your spine and tuck your chin (Cat). Repeat several times.
  • Child’s Pose (Balasana): A calming and restorative pose that gently stretches the hips, thighs, and ankles while relieving stress and fatigue. Kneel on your mat, sit your hips back towards your heels, and fold your torso forward, resting your forehead on the mat.

Standing Poses for Leg and Hip Flexibility

These poses build strength while simultaneously lengthening the muscles in your legs and opening your hips, which are often tight from sitting.

  • Downward-Facing Dog (Adho Mukha Svanasana): A foundational pose that stretches the hamstrings, calves, and shoulders while strengthening the arms and legs. It’s an excellent full-body stretch.
  • Triangle Pose (Trikonasana): This pose stretches the hamstrings, groin, and hips, while also opening the chest and shoulders. It improves balance and strengthens the legs.
  • Warrior II (Virabhadrasana II): Strengthens the legs and core while opening the hips and stretching the groins. This pose also builds stamina and focus.

Seated Poses for Spine and Hamstrings

Seated poses are wonderful for deepening stretches, particularly in the hamstrings and along the spine, promoting a more flexible back.

  • Seated Forward Fold (Paschimottanasana): A classic pose for stretching the entire back of the body, especially the hamstrings and spine. It also calms the mind.
  • Bound Angle Pose (Baddha Konasana): Excellent for opening the hips and inner thighs. Sit with the soles of your feet together, knees out to the sides, gently pulling your heels towards your pelvis.
  • Spinal Twist (Ardha Matsyendrasana): This pose deeply twists the spine, improving spinal mobility and digestion. It also stretches the hips, shoulders, and neck.

Cool-Down and Relaxation

Always conclude your yoga sequence with poses that help your body and mind relax, integrating the benefits of your practice.

  • Supine Spinal Twist (Supta Matsyendrasana): A gentle, restorative twist that releases tension in the spine, hips, and lower back. Lie on your back, hug one knee to your chest, then let it fall across your body.
  • Savasana (Corpse Pose): The ultimate relaxation pose. Lie flat on your back, arms and legs extended, palms facing up. Allow your body to completely relax, absorbing the benefits of your yoga practice. This pose is vital for physical and mental integration.

Building Your Personalized Yoga Sequence

One of the greatest advantages of a printable resource is the ability to customize your exercise routine. You can select the yoga poses that best suit your current needs and goals, creating a truly personalized fitness routine. This movement guide empowers you to be your own instructor, drawing from a library of effective physical postures.

Creating a Daily Exercise Routine

Start by assessing your current flexibility and identifying areas you want to improve. Your illustrated guide will provide a visual learning roadmap. For a balanced routine, aim to include poses that target different parts of your body. A good yoga sequence typically lasts between 15-30 minutes, but even 10 minutes of focused stretching can make a difference.

  1. Choose 5-7 yoga poses from your flexibility guide. Select a mix of warm-ups, standing poses, seated poses, and a cool-down.
  2. Begin with 2-3 gentle warm-up poses to prepare your body. Hold each for 30 seconds to 1 minute.
  3. Move into your main flexibility poses. Hold each stretch for 30 seconds to 1 minute, focusing on deep, steady breaths.
  4. Finish with 1-2 cool-down and relaxation poses, like a gentle twist and Savasana, for 2-5 minutes.
  5. Listen to your body throughout. If a pose feels too intense, ease off or choose a modification.

Consistency is more important than duration. Even short, daily sessions of gentle exercises will yield better results than long, infrequent ones. Your printable resource makes it easy to stick to this schedule, providing a constant visual reminder and instruction.

Making It a Consistent Wellness Routine

Integrating a new physical activity into your daily life requires intention and strategy. A printable illustrated guide can be a powerful tool for habit formation. By making your yoga instruction visible and accessible, you increase the likelihood of sticking with it.

  • Set a specific time each day for your yoga practice, even if it’s just 10 minutes. This creates a routine.
  • Keep your printable resource visible and ready, perhaps rolled up with your mat or taped to a wall in your practice area.
  • Track your progress. Notice how you feel after each session, and celebrate small improvements in your flexibility.
  • Pair your yoga routine with another existing habit, like having your morning coffee or winding down before bed.
  • Consider inviting a friend or family member to join you, creating a shared commitment to health and fitness.
  • Remember your “why.” Reconnect with the reasons you started this wellness routine whenever motivation wanes.

Maintaining Your Illustrated Yoga Poses Guide

To ensure your printable resource serves you well for a long time, consider how you’ll print and store it. A durable guide means consistent, uninterrupted access to your yoga instruction, supporting your ongoing health and fitness goals.

Printing and Lamination Tips

For the best experience, print your illustrated guide on sturdy paper, such as cardstock. This will prevent it from tearing easily and make it more resistant to wear and tear. If you plan to use it frequently or in an area where it might get damp (like near a water bottle), consider laminating the pages. Lamination protects the exercise illustrations from spills, creases, and general handling, ensuring your posture guide remains pristine and readable.

You can also bind the pages together using a simple ring binder or spiral binding, creating a compact and easy-to-flip booklet. This keeps all your yoga poses organized and prevents individual sheets from getting lost. A well-maintained printable resource is a long-term investment in your physical activity and overall wellness routine.

Keeping Your Practice Fresh

While your flexibility guide provides a solid foundation, remember to keep your yoga practice engaging. As your flexibility improves, you might explore variations of poses or introduce new ones from your guide. The beauty of a comprehensive visual guide is that it offers a wealth of options, allowing you to continually challenge yourself.

Don’t be afraid to experiment with different yoga sequences or focus on specific areas of your body on different days. One day might be dedicated to hip openers, another to hamstring stretches. This dynamic approach keeps your fitness routine exciting and prevents plateaus. Your journey to greater flexibility is ongoing, and your printable illustrated yoga poses guide is an adaptable tool designed to support every step of the way.

Exit mobile version