Gentle Home Remedies for Ingrown Hairs and Soothing Skin Irritation

Banish Bumps: Gentle Home Remedies for Ingrown Hairs and Soothing Skin Irritation

Dealing with those pesky ingrown hairs and the resulting skin irritation doesn’t require a trip to the dermatologist or expensive creams. You can often find relief using simple, natural ingredients already in your pantry or medicine cabinet. Ingrown hairs happen when hair curls back or grows sideways into the skin, leading to inflamed bumps, redness, and sometimes even pain, especially after shaving or waxing. This common skin issue can affect anyone, anywhere on the body – from your legs and bikini area to your face and scalp.

Understanding why ingrown hairs form is the first step to preventing and treating them. Typically, they occur when hair follicles become blocked by dead skin cells, or when coarse or curly hair types struggle to emerge from the skin. This can lead to a condition known as folliculitis, where the hair follicle itself becomes inflamed. While sometimes a minor annoyance, persistent or severe ingrown hairs can be quite uncomfortable and even lead to infection if not managed properly. Fortunately, a variety of home remedies can effectively soothe inflamed bumps, reduce redness, and encourage the trapped hair to release.

Understanding Ingrown Hairs and Skin Irritation

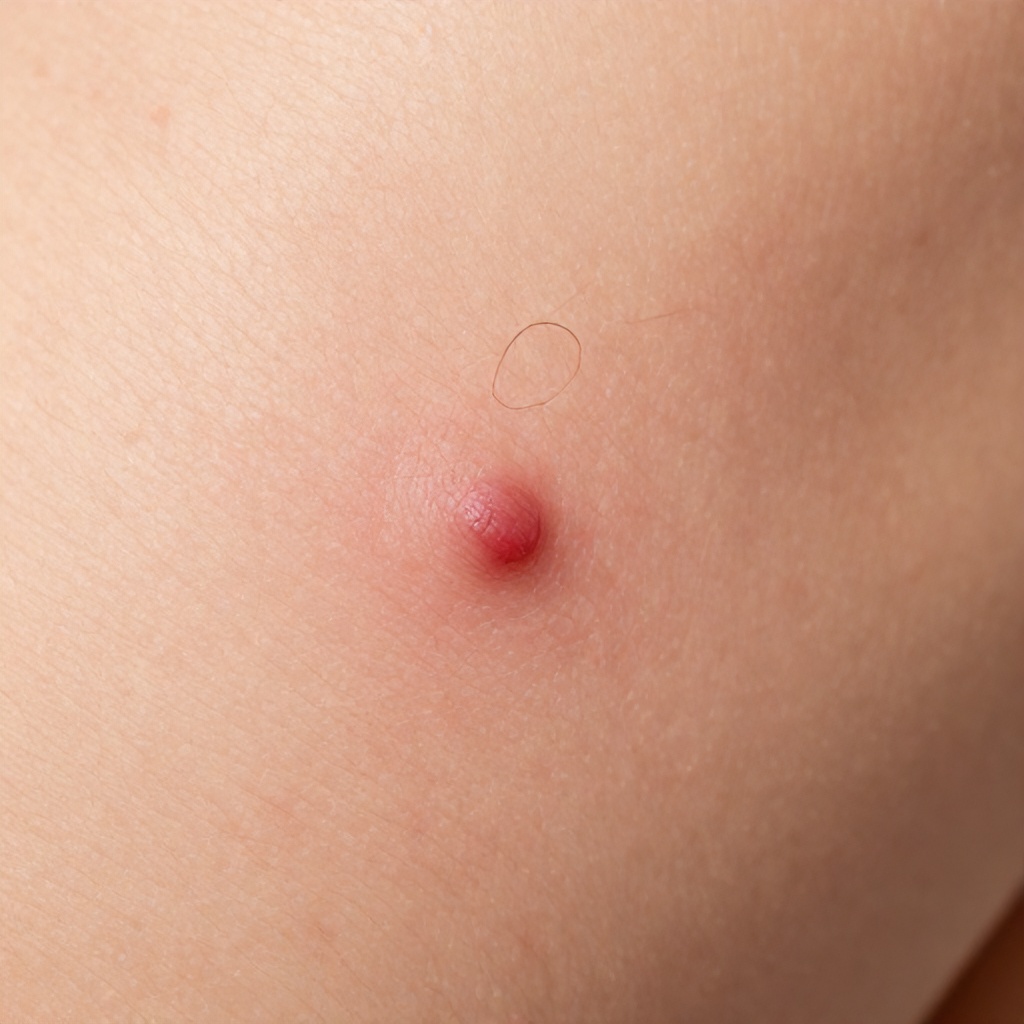
Ingrown hairs are a common skin concern, often appearing as red bumps that can resemble pimples. These bumps form when a hair, usually after being cut by a razor or removed by waxing, fails to grow out of the hair follicle properly. Instead, it can curl back and penetrate the epidermis, the outermost layer of your skin, or even grow sideways within the follicle. This foreign body reaction triggers inflammation, resulting in those characteristic red, sometimes painful, bumps.

Several factors contribute to the likelihood of developing ingrown hairs. Shaving, particularly with dull razors or against the direction of hair growth, is a major culprit. Waxing and epilating can also contribute if the hair breaks beneath the skin’s surface. People with naturally curly or coarse hair are often more prone to ingrown hairs because their hair texture makes it harder to break through the skin. Even tight clothing can sometimes trap hairs, leading to irritation. The result is often a localized skin irritation, characterized by redness, itching, and tenderness around the affected hair follicle.

The Science Behind the Bump

When a hair fails to exit the skin cleanly, it can become trapped. Your body’s immune system recognizes this as a minor intrusion. Inflammatory responses are triggered, leading to the swelling and redness you see and feel. In some cases, the trapped hair can cause a pustule to form, similar to a pimple, filled with pus. This is the body’s way of trying to expel the offending hair. While often superficial, deeper ingrown hairs can be more challenging to treat and may require patience and gentle care to encourage release without causing further damage to the dermis or epidermis.

Common Triggers and Areas

The most frequent trigger for ingrown hairs is hair removal. Shaving is notorious for causing ingrown hairs, especially on the face (beard area for men), legs, and underarms. Waxing and epilating, while offering longer-lasting results, can also lead to ingrown hairs if not performed correctly or if the hair breaks off below the skin. Areas where hair is coarse or curly, like the pubic region, are particularly susceptible. Even something as seemingly simple as an ingrown eyelash or an ingrown toenail can be a form of ingrown hair, though these are less common and often have different underlying causes.

Gentle Home Remedies for Relief

The good news is that you don’t need harsh chemicals to tackle ingrown hairs and the resulting skin irritation. Many effective remedies leverage natural ingredients known for their anti-inflammatory, antiseptic, and skin-soothing properties. The key is to be gentle, avoid further irritation, and allow the skin to heal.

Warm Compress: The Gentle Opener

One of the simplest yet most effective home remedies for an ingrown hair is a warm compress. This helps to soften the skin and the trapped hair, making it easier for the hair to emerge. It also increases blood flow to the area, which can aid in reducing inflammation and promoting healing.

  1. Heat a clean washcloth with warm water. Ensure it’s not too hot to avoid burning your skin.
  2. Wring out the excess water.
  3. Gently hold the warm compress against the affected area for 10-15 minutes.
  4. Repeat this process several times a day, especially before attempting any gentle extraction.

Exfoliation: Unblocking the Path

Once the skin is softened by a warm compress, gentle exfoliation can help to lift the trapped hair to the surface. This removes dead skin cells that might be blocking the hair follicle. Avoid harsh scrubs, which can worsen inflammation. Opt for natural exfoliants or gentle physical methods.

  • Sugar Scrub: Mix one part brown sugar with two parts olive oil or coconut oil. Gently massage this mixture onto the affected area in a circular motion. Rinse with warm water.
  • Oatmeal Paste: Grind plain oatmeal into a fine powder. Mix with water to form a paste. Apply to the skin and let it sit for about 10-15 minutes before rinsing. Oatmeal is known for its soothing properties.
  • Loofah or Gentle Brush: After showering, when skin is soft, gently use a soft loofah or a dedicated exfoliating brush in a circular motion over the ingrown hair area.

It’s important to exfoliate after the ingrown hair has surfaced or is close to the surface, not when the bump is very inflamed and painful, as this could worsen the irritation.

Aloe Vera: Nature’s Soother

Aloe vera is a powerhouse for skin healing. Its natural anti-inflammatory and cooling properties can significantly reduce redness and soothe the irritation associated with ingrown hairs. It also aids in skin repair.

  • Extract fresh gel from an aloe vera leaf. If you don’t have a plant, pure aloe vera gel (check for minimal additives) from a store works well.
  • Apply a generous amount of the gel directly to the ingrown hair and surrounding inflamed skin.
  • Let it air dry. You can reapply it several times a day.

Tea Tree Oil: The Natural Antiseptic

Tea tree oil is a potent natural antiseptic and anti-inflammatory agent. It can help to combat any potential bacterial infection and reduce swelling. However, it’s very concentrated and must be diluted before applying to the skin.

  • Mix 1-2 drops of pure tea tree oil with a tablespoon of a carrier oil, such as coconut oil, jojoba oil, or olive oil.
  • Using a cotton swab, carefully apply the diluted mixture directly to the ingrown hair bump.
  • Leave it on for a few hours or overnight.
  • Always perform a patch test on a small area of skin first to ensure you don’t have a reaction.

Witch Hazel: Astringent Action

Witch hazel is a natural astringent that can help to reduce inflammation and dry out the bump. It also has mild antiseptic properties.

  • Soak a cotton ball or pad in witch hazel extract.
  • Gently dab it onto the affected area.
  • Allow it to dry. You can use this a few times a day.

Cucumber Slices: Cooling Comfort

For immediate cooling relief and to reduce redness and swelling, cucumber slices are a fantastic option. They are naturally hydrating and contain antioxidants.

  • Chill a fresh cucumber in the refrigerator.
  • Slice it thinly.
  • Place the cool slices directly onto the inflamed bumps for 10-15 minutes.
  • This can be done as often as needed for soothing comfort.

Gentle Extraction Techniques (When Ready)

Once the ingrown hair has surfaced and the inflammation has subsided, you might be able to gently encourage its release. Patience is key here. Never dig or force the hair out, as this can lead to scarring, infection, or deeper inflammation.

  1. Cleanliness is Paramount: Wash your hands thoroughly with soap and water. Cleanse the skin around the ingrown hair with a mild, antiseptic cleanser.
  2. Warm Compress Again: Apply a warm compress for a few minutes to soften the skin further.
  3. Sterilize Tools: If you plan to use tweezers or a needle (use with extreme caution), sterilize them first by wiping them with rubbing alcohol.
  4. Gentle Lifting: If the hair is visible just under the skin’s surface, try to gently lift the loop of the hair with the tip of a sterilized needle or the fine point of sterilized tweezers.
  5. Never Dig: If you cannot easily see or access the hair, do not dig into the skin. Leave it alone and continue with soothing remedies.
  6. Post-Extraction Care: Once the hair is out, gently cleanse the area again and apply an antiseptic like tea tree oil (diluted) or aloe vera.

If the ingrown hair is deep, painful, or shows signs of infection (pus, increased redness, warmth, swelling), it’s best to leave it alone and consult a healthcare professional. Trying to force out a deep ingrown hair can cause significant damage.

Preventing Future Ingrown Hairs

The best defense against ingrown hairs is prevention. Incorporating a few simple habits into your routine can significantly reduce their occurrence.

  • Exfoliate Regularly: Make gentle exfoliation a part of your skincare routine, not just when you have an ingrown hair. Aim for 2-3 times a week. This keeps dead skin cells from blocking follicles.
  • Shave Smart: Always use a sharp, clean razor. Shave in the direction of hair growth, not against it. Use a shaving cream or gel to create a smooth glide. Avoid shaving over the same area multiple times.
  • Moisturize: Keeping your skin hydrated can help hair grow out more easily. Use a gentle, non-comedogenic moisturizer.
  • Consider Alternatives: If shaving is a constant source of ingrown hairs, explore other hair removal methods like waxing, sugaring, or epilating, and ensure they are performed correctly. Laser hair removal is a longer-term solution for many.
  • Wear Loose Clothing: Especially after hair removal, opt for loose-fitting clothing to avoid friction and irritation that can trap hairs.

When to Seek Professional Help

While home remedies are often effective for minor ingrown hairs and skin irritation, there are times when professional dermatological advice is necessary. If you experience severe pain, significant swelling, or signs of infection like pus, fever, or spreading redness, it’s important to see a doctor. Persistent or recurring ingrown hairs that don’t respond to home treatment may also warrant a visit to a dermatologist. They can offer advanced treatment options and help identify underlying causes.

Managing ingrown hairs and the resulting skin irritation is often about patience, gentle care, and using the right natural ingredients. By understanding what causes these pesky bumps and employing these simple home remedies, you can achieve smoother, calmer skin without the discomfort.

Does Baking Soda and Lemon Effectively Remove Blackheads?

Does Baking Soda and Lemon Actually Get Rid of Blackheads?

Blackheads are those little bumps that pop up when your hair follicles get blocked. They happen when pores get clogged with oil and dead skin cells, and then get exposed to air, causing them to oxidize and turn dark. Think of them as a mild form of acne, often showing up on your nose, chin, or forehead. Sometimes, things like hormonal shifts, certain medications, or even just irritation from dead skin cells piling up can lead to these stubborn little things.

Understanding Blackheads

Blackheads are essentially oxidized pores. Your skin has tiny openings called pores, which are the openings to your hair follicles. These follicles produce sebum, an oil that keeps your skin moisturized. When excess oil, dead skin cells, and sometimes dirt get trapped in these pores, they can become clogged. If this mixture is exposed to the air, it oxidizes and turns black, hence the name “blackhead.” This is different from dirt being stuck in your pores; it’s the reaction of the trapped material with oxygen.

Several factors can contribute to the formation of blackheads. Hormonal changes, common during puberty or pregnancy, can increase oil production. Certain medications might have side effects that affect your skin’s oil balance. Even irritation from dead skin cells that aren’t shedding properly can lead to clogged pores. Understanding these causes is the first step to tackling them.

The Baking Soda and Lemon Approach for Blackheads

You might have heard about using a baking soda and lemon juice mixture as a home remedy for blackheads. Let’s break down what each ingredient is supposed to do and if it really works.

Baking Soda’s Role

Baking soda, also known as sodium bicarbonate, is a mild abrasive. When used in a paste, it’s thought to help exfoliate the skin, removing dead skin cells that can contribute to clogged pores. The idea is that by unclogging pores of dead skin, it leaves the skin feeling softer and smoother. Some also suggest that baking soda can help neutralize the skin’s pH level, which might lead to less oil production. This could theoretically help prevent new blackheads from forming.

Lemon Juice’s Contribution

Lemon juice is acidic and contains citric acid, an alpha-hydroxy acid (AHA). AHAs are known for their exfoliating properties. Lemon juice is believed to penetrate the skin to help break down the mixture of excess oil and dirt in pores. It’s also packed with vitamin C and other essential vitamins, which are good for overall skin health. Because of these components, it’s often considered suitable for various skin types, though its acidity is a key point to consider.

The DIY Paste Mixture

If you’re curious to try this home remedy, here’s a common way to prepare and use it:

  1. Gather your ingredients: You’ll need about 1 teaspoon of baking soda and half a teaspoon of fresh lemon juice.
  2. Create the paste: Mix the baking soda and lemon juice together in a small bowl until you form a thick paste.
  3. Application: Gently apply this paste directly onto the areas where you have blackheads.
  4. Let it dry: Allow the paste to sit on your skin until it dries, which usually takes a few minutes.
  5. Rinse off: Wash the mixture off thoroughly with lukewarm water.
  6. Frequency: It’s generally recommended to use this treatment only once a week to avoid over-exfoliating or irritating your skin.

The supposed benefits are that the baking soda helps slough off dead skin cells, while the lemon juice works to open up those clogged pores and potentially tighten them, making them less likely to get blocked again. It’s a two-pronged attack on those stubborn blackheads.

Important Precautions and Potential Side Effects

While the baking soda and lemon mixture might sound appealing, it’s really important to be aware of the potential dangers and take precautions. This isn’t a one-size-fits-all solution, and some people can experience negative side effects.

Dangers and Precautions

  • Sun Sensitivity: Lemon juice can make your skin more sensitive to the sun. If you use this remedy, it’s crucial to avoid direct sun exposure afterward. If you must go outside, apply a broad-spectrum sunscreen lotion with a high SPF to protect your skin from harmful UV rays.
  • Skin Patch Test: Before applying the mixture to your entire face, always perform a skin patch test. Apply a small amount to an inconspicuous area (like behind your ear or on your inner arm) and wait 24 hours to check for any signs of an allergic reaction or adverse side effects. This is especially important if you have sensitive skin.
  • Avoid Scrubbing and Squeezing: Resist the urge to scrub the paste into your skin vigorously or to squeeze your blackheads. Both actions can cause significant skin irritation, inflammation, and potentially worsen the problem, leading to more breakouts or even scarring.
  • Prevent Excessive Drying: Baking soda and lemon juice can be drying to the skin. Over-drying your skin can actually trigger your sebaceous glands to produce even more oil in an attempt to compensate, which can lead to more clogged pores and breakouts.

Adding Honey to the Mix?

Some variations of this home remedy include honey. Honey is often praised for its skin benefits, and when combined with baking soda and lemon, it’s thought to offer a more balanced approach.

Honey’s Skin-Loving Properties

Honey is a natural humectant, meaning it draws moisture to the skin, helping with skin hydration. It also possesses natural anti-bacterial, anti-oxidant, and antiseptic properties. These qualities are beneficial for fighting the bacteria that can contribute to acne and for promoting overall skin health. Some believe honey can also have a skin-tightening effect, which might help pores appear smaller, acting as a pore minimizer.

The Baking Soda, Lemon, and Honey Paste

Here’s how you might prepare and use this enhanced mixture:

  1. Ingredients: You’ll need 1 tablespoon of honey, 1 tablespoon of fresh lemon juice, and 1 tablespoon of baking soda.
  2. Mixing: Combine all three ingredients in a clean glass bowl and mix them thoroughly until you have a consistent paste.
  3. Application: Apply the paste evenly to your face and neck, avoiding the delicate eye area.
  4. Duration: Leave the mask on for a maximum of 15 minutes.
  5. Removal: Rinse off the mask completely with lukewarm water.
  6. Frequency: Like the simpler version, limit this treatment to once a week.

The benefits of this trio are multifaceted. Honey’s anti-bacterial properties can help reduce bacteria in pores, while its moisturizing and soothing effect makes it a good option for dry and sensitive skin types. Lemon, as mentioned, can help brighten the skin and fight signs of aging. Together, they aim to cleanse, hydrate, and potentially improve skin clarity.

Who Should Steer Clear of Baking Soda on Blackheads?

While baking soda might seem like a simple kitchen staple, it’s not suitable for everyone’s skin, especially when used in a DIY skincare concoction. Baking soda has an alkaline pH (around 9), while healthy skin has an acidic pH (around 4.5-5.5). Applying an alkaline substance like baking soda can disrupt your skin’s natural pH balance.

Who Shouldn’t Use Baking Soda on Blackheads?

  • Those with Dry Skin: Baking soda can strip the skin of its natural oils, leading to excessive dryness, flakiness, and discomfort.
  • Individuals with Sensitive Skin: The abrasive nature of baking soda and the acidity of lemon juice can easily irritate sensitive skin, causing redness, itching, and burning sensations.
  • People Prone to Dermatitis: If you have conditions like dermatitis or eczema, using baking soda can exacerbate these inflammatory skin conditions and trigger flare-ups.
  • Anyone with Compromised Skin Barrier: If your skin barrier is already weakened due to over-exfoliation, harsh products, or environmental factors, baking soda can cause further damage.

Disrupting your skin’s pH level can weaken its natural defenses, making it more susceptible to irritation, infection, and premature aging signs. If your skin feels tight, red, or irritated after using this remedy, it’s a clear sign that it’s not agreeing with your skin type.

The Verdict: Effective or Just a Home Remedy?

So, does the baking soda and lemon concoction effectively remove blackheads? The short answer is: it’s complicated and often not the best approach.

While baking soda can act as a physical exfoliant and lemon juice contains acids that can help shed dead skin cells, these ingredients are harsh. The alkalinity of baking soda can significantly disrupt your skin’s natural pH balance, leading to dryness, irritation, and a weakened skin barrier. Lemon juice, while an acid, can also be too potent for direct application, potentially causing photosensitivity and irritation, especially for sensitive skin types or those prone to dermatitis.

The “unclogging” effect might be temporary, and the potential for skin irritation, excessive drying, and even stimulating more oil production (as your skin tries to rebalance) often outweighs the benefits. Instead of truly clearing out clogged pores, you might be causing more harm than good.

Better Skincare Habits for Blackhead Prevention

Focusing on consistent, gentle skincare habits is a more reliable way to manage blackheads and achieve skin clarity. These practices help keep your pores clean and prevent future blockages.

Tips for Managing Blackheads

  • Gentle Cleansing: Wash your face twice daily with a mild, pH-balanced cleanser. This removes excess oil, dirt in pores, and dead skin cells without stripping your skin.
  • Exfoliation: Incorporate a chemical exfoliant containing ingredients like salicylic acid (a beta-hydroxy acid, or BHA) or glycolic acid (an AHA). Salicylic acid is particularly effective because it’s oil-soluble and can penetrate into the pore to break down blockages.
  • Clay Masks: Use a clay mask once or twice a week. Clay helps to absorb excess oil and draw impurities from the pores, acting as a gentle pore minimizer.
  • Non-Comedogenic Products: Choose makeup and skincare products labeled “non-comedogenic,” meaning they are formulated not to clog pores.
  • Retinoids: Over-the-counter retinoids (like retinol) or prescription retinoids can be very effective for blackheads. They help speed up cell turnover, preventing dead skin cells from clogging pores.
  • Moisturize: Even oily skin needs hydration. Use a lightweight, oil-free moisturizer to keep your skin balanced and prevent it from producing more oil.
  • Avoid Touching Your Face: Try not to touch your face unnecessarily, as this can transfer bacteria and dirt to your pores.

Building these consistent skincare habits is key to maintaining clear skin and preventing future blackheads, rather than relying on potentially harsh home remedies.

Exit mobile version