Yellow Resistance Bands: Light Tension for Home Fitness Beginners

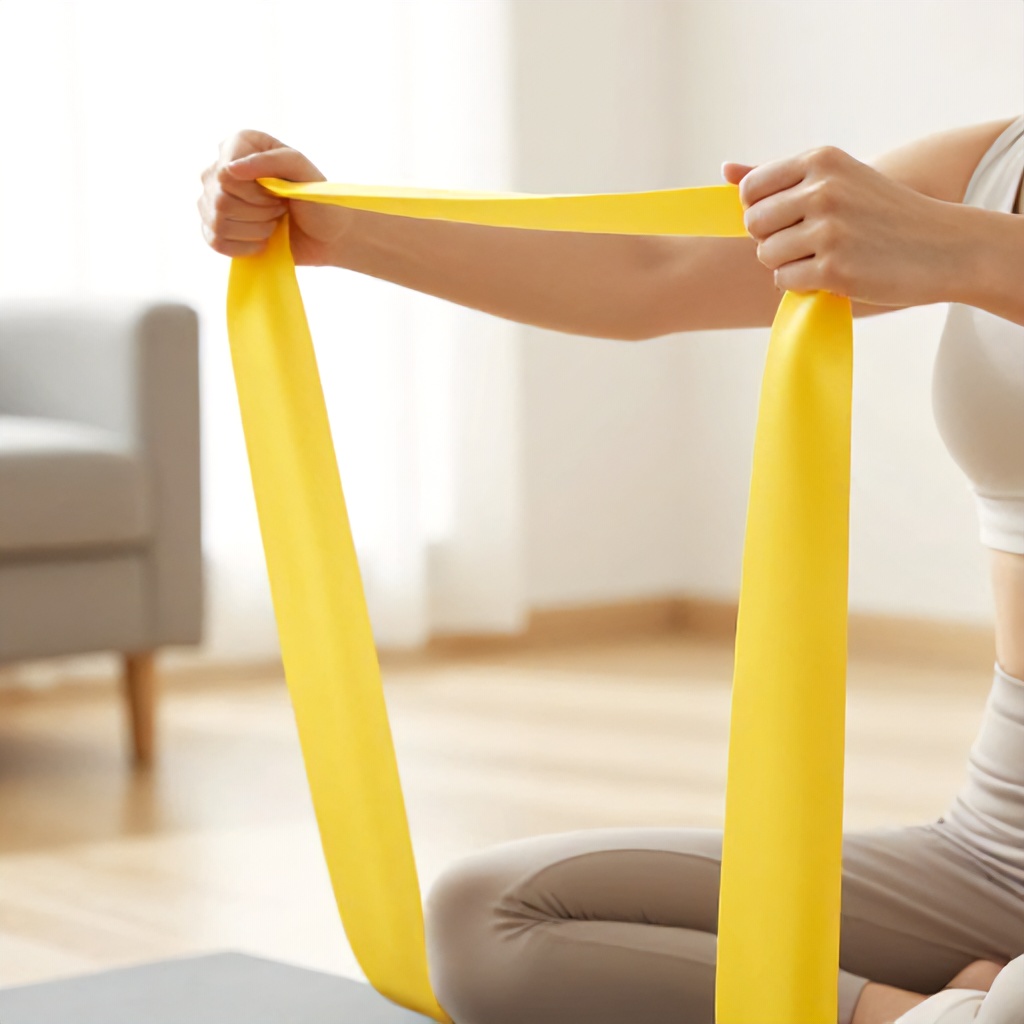
Yellow resistance bands are an incredibly effective and accessible tool for building strength, increasing flexibility, and enhancing your overall physical fitness right from the comfort of your home.

Understanding Yellow Resistance Bands

Yellow resistance bands typically represent the lightest level of tension in a set of exercise bands. This makes them an excellent starting point for beginners, individuals recovering from injury, or those looking to focus on high repetitions and muscle endurance rather than maximal strength.

Despite their lighter resistance, these bands are far from ineffective. They provide consistent tension throughout an exercise’s range of motion, which can activate stabilizing muscles that traditional free weights might miss. This constant engagement contributes to better form, improved muscle control, and a more comprehensive workout experience, making them a staple in any home fitness setup.

Why Start with Yellow?

  • They are ideal for learning new movements and perfecting your form without excessive strain.
  • Excellent for rehabilitation exercises, helping to gently rebuild strength and mobility.
  • Perfect for warm-ups and cool-downs, preparing muscles for more intense work or aiding in recovery.
  • They allow for high-repetition sets, which are fantastic for muscle toning and endurance.
  • Their low resistance makes them versatile for targeting smaller, often overlooked muscle groups.

The Broad Benefits of Resistance Bands for Home Fitness

Integrating resistance bands into your home workout routine offers a wealth of advantages that support a holistic health and wellness journey. These simple pieces of workout equipment are a game-changer for anyone seeking an active lifestyle without needing a gym membership.

One of the most compelling aspects is their incredible portability. A full set of resistance bands can easily fit into a small bag, transforming any space into a portable gym. This means you can maintain your fitness routine whether you’re at home, traveling, or even taking a quick break at the office. They are also remarkably affordable compared to bulky weights or complex machines, making effective strength training accessible to nearly everyone.

Resistance bands provide low-impact exercise, which is gentler on your joints than many traditional forms of weightlifting. This makes them suitable for people of all ages and fitness levels, including those with joint pain or those looking for a safer way to build muscle. They offer a unique form of resistance that challenges your muscles differently, promoting muscle building and toning without the need for heavy loads. This unique resistance profile also means they are fantastic for functional movements, mimicking real-life activities and improving overall body mechanics.

Essential Safety and Setup for Your Band Workouts

Before you jump into any exercise, a quick check of your equipment and surroundings is always a smart move. Ensuring your resistance bands are in good condition and your workout space is clear helps prevent injuries and makes for a more productive session.

Inspecting Your Bands

Always take a moment to look over your resistance bands for any signs of wear and tear. Check for small tears, nicks, or areas where the material looks stretched thin. Even a tiny imperfection can lead to a band snapping during an exercise, which can be startling and potentially cause injury. If you spot any damage, it’s time to replace that band. Your safety is paramount, and a fresh band is a small investment for uninterrupted physical activity.

Setting Up Your Workout Space

Clear a dedicated area for your home workout. Make sure there’s enough room to extend your limbs fully in all directions without hitting furniture, walls, or other obstacles. A non-slip surface is also beneficial, especially when performing exercises that require balance or quick movements. If you’re using a door anchor, ensure the door is securely closed and locked, and pull on the anchor firmly before attaching the band to confirm it’s stable. Wearing comfortable athletic apparel that allows for a full range of motion will also enhance your experience.

Warm-Up with Your Yellow Resistance Band

A proper warm-up is non-negotiable for preparing your muscles and joints for the workout ahead. Your yellow resistance band is perfect for gentle activation, increasing blood flow, and improving flexibility before you tackle more challenging strength conditioning exercises.

Gentle Warm-Up Exercises

  1. Arm Circles: Hold the band taut between both hands, arms extended in front of you at shoulder height. Keeping tension on the band, slowly make small circles with your arms, gradually increasing the size. Perform 10-15 circles forward and then backward. This activates your shoulders and upper back.

  2. Band Pull-Aparts: Hold the band with an overhand grip, hands shoulder-width apart, arms extended in front of you. Keeping your arms straight, pull the band apart, squeezing your shoulder blades together. Control the movement as you return to the start. Do 10-15 repetitions to warm up your upper back and shoulders.

  3. Leg Swings (with optional band assist): Loop the band around one ankle and hold the other end with your hand for stability, or just use it for gentle resistance by stepping on it with the opposite foot. Gently swing your leg forward and backward, gradually increasing the range of motion. Perform 10-15 swings per leg. This warms up your hips and hamstrings.

  4. Glute Bridge Activation: Loop the band just above your knees. Lie on your back with knees bent, feet flat on the floor hip-width apart. Press your knees slightly out against the band, then lift your hips off the floor, squeezing your glutes at the top. Lower slowly. Aim for 10-15 repetitions to activate your glutes and core.

Full-Body Workout with Yellow Resistance Bands

This comprehensive workout leverages the unique resistance profile of your yellow band to target major muscle groups, promoting muscle building and effective toning. Remember to focus on controlled movements and proper form for each exercise.

Lower Body and Glutes

  1. Band Squats: Loop the band just above your knees. Stand with feet shoulder-width apart, toes slightly out. Keeping tension on the band by pressing your knees outward, lower into a squat as if sitting in a chair. Ensure your chest stays up and your back remains straight. Drive through your heels to stand back up. Perform 3 sets of 12-15 repetitions.

  2. Glute Bridges: Lie on your back with knees bent, feet flat on the floor, hip-width apart. Place the band just above your knees. Press your knees slightly out against the band. Lift your hips off the floor until your body forms a straight line from shoulders to knees, squeezing your glutes at the top. Slowly lower back down. Aim for 3 sets of 15-20 repetitions.

  3. Lateral Band Walks: Loop the band around your ankles or just above your knees. Get into a slight squat position. Take small, controlled steps sideways, keeping tension on the band the entire time. Move 10-15 steps in one direction, then switch directions. Complete 3 sets.

  4. Clamshells: Lie on your side with knees bent and stacked, band just above your knees. Keep your feet together and lift your top knee towards the ceiling, rotating from the hip. Control the movement as you lower your knee back down. Do 3 sets of 15-20 repetitions per side. This is excellent for hip abductor strength.

Upper Body and Back

  1. Bicep Curls: Stand on the middle of the band with one foot (or both for more resistance). Hold an end of the band in each hand, palms facing forward. Keeping your elbows tucked into your sides, curl your hands towards your shoulders, squeezing your biceps. Slowly lower back down. Perform 3 sets of 12-15 repetitions.

  2. Tricep Extensions: Stand on the middle of the band with one foot. Hold one end of the band in your hand, bringing it behind your head. Extend your arm straight up, pushing against the band’s resistance. Control the descent. Alternatively, loop the band around an anchor point, face away, and push the band down and back. Do 3 sets of 12-15 repetitions per arm.

  3. Shoulder Press: Stand on the middle of the band with both feet. Hold an end in each hand, bringing your hands to shoulder height, palms facing forward. Press your hands straight overhead, extending your arms fully. Slowly lower back to the start. Aim for 3 sets of 10-12 repetitions.

  4. Band Rows: Sit on the floor with legs extended, looping the band around the soles of your feet. Hold an end in each hand. Keeping your back straight, pull the band towards your torso, squeezing your shoulder blades together. Control the return. Complete 3 sets of 12-15 repetitions. This is excellent for back muscle building and strength conditioning.

Core Strength

  1. Banded Crunches: Lie on your back with knees bent, feet flat. Hold the band taut above your chest with both hands. As you crunch up, push the band towards your knees, engaging your core. Lower slowly. Perform 3 sets of 15-20 repetitions.

  2. Russian Twists (with band): Sit on the floor with knees bent, feet slightly lifted or on the floor. Hold the band taut with both hands in front of you. Twist your torso from side to side, bringing the band towards the floor on each side. Keep your core engaged. Do 3 sets of 10-12 twists per side.

Flexibility and Cool-Down with Your Yellow Band

After a good workout, it’s just as important to cool down and stretch your muscles. Your yellow resistance band is a fantastic tool for assisting with flexibility exercises, helping to lengthen muscles and improve your range of motion, which is vital for recovery and preventing stiffness.

Assisted Stretching Exercises

  1. Hamstring Stretch: Lie on your back. Loop the middle of the band around the sole of one foot. Hold both ends of the band and gently pull your leg straight up towards the ceiling, keeping it as straight as possible. Feel the stretch in your hamstring. Hold for 20-30 seconds per leg.

  2. Quad Stretch: Stand tall and loop the band around one ankle. Hold the other end of the band with the hand on the same side. Gently pull your heel towards your glute, feeling the stretch in the front of your thigh. Use a wall or chair for balance if needed. Hold for 20-30 seconds per leg.

  3. Shoulder and Chest Stretch: Hold the band with both hands, wider than shoulder-width apart. Gently raise your arms overhead and slightly behind you, feeling a stretch across your chest and shoulders. Be mindful not to overextend. Hold for 20-30 seconds.

  4. Calf Stretch: Sit with one leg extended. Loop the band around the ball of your foot. Hold the ends of the band and gently pull your toes towards your shin, keeping your leg straight. Hold for 20-30 seconds per leg.

Integrating Bands into Your Regular Fitness Routine

Making resistance bands a consistent part of your fitness routine is key to seeing lasting results and maintaining an active lifestyle. They offer incredible versatility, allowing you to adapt your workouts to fit your schedule and energy levels.

Consider dedicating specific days to full-body resistance band workouts, or integrate them into existing bodyweight training sessions for added challenge. For example, you might do a full-body band workout two to three times a week, focusing on strength conditioning and muscle building. On other days, you could use the yellow band for dynamic warm-ups or targeted flexibility exercises after a run or walk. The beauty of these exercise bands is their adaptability; they can be the main event or a supportive player in your wellness journey.

Progression and Variation in Your Workouts

As your strength and endurance improve, you’ll naturally want to progress. While the yellow band is fantastic, there are ways to increase the challenge and keep your home workout engaging. This ensures continued physical activity and prevents your muscles from plateauing.

Increasing the Challenge

  • Increase Repetitions: Perform more repetitions per set, pushing your muscle endurance further.
  • Increase Sets: Add an extra set to each exercise.
  • Slow Down Movements: Focus on slower, more controlled concentric (lifting) and eccentric (lowering) phases of each exercise to maximize time under tension.
  • Combine Movements: Incorporate compound exercises, like a squat with a bicep curl, to work multiple muscle groups simultaneously.
  • Shorten the Band: For some exercises, gripping the band closer to the anchor point or shortening the loop will naturally increase the resistance.
  • Progress to Heavier Bands: When the yellow band feels too easy for most exercises, it’s time to introduce a green, red, or blue band (typically indicating medium to heavy resistance) for strength training.

Remember, the goal is continuous improvement. Listen to your body, maintain proper form, and gradually introduce new challenges to keep your muscles adapting and growing. This thoughtful approach to exercise guidance ensures you’re always moving forward in your home fitness journey.

Tips for Sustained Success with Resistance Bands

Achieving your fitness goals with resistance bands, or any workout equipment, comes down to more than just performing the exercises. It involves consistency, attention to detail, and a mindful approach to your physical activity.

First and foremost, consistency is paramount. Aim to establish a regular fitness routine that you can stick to. Even short, frequent sessions are more beneficial than sporadic, intense ones. Schedule your home workouts like any other important appointment. Secondly, always prioritize form over speed or resistance. Incorrect form can lead to ineffective workouts and potential injury. If you’re unsure about an exercise, watch reputable online tutorials or consult a fitness professional. Even with the lightest yellow resistance band, proper execution is key for effective toning and muscle building.

Stay hydrated throughout the day, especially around your workout times. Fuel your body with nutritious foods to support muscle recovery and energy levels. Lastly, listen to your body. Some muscle soreness is normal after a workout, but sharp pain is a signal to stop and rest. Rest days are crucial for muscle repair and growth. Incorporating resistance bands into your active lifestyle is a powerful step towards better health and wellness, but it’s a journey that requires patience and self-care.

Printable Illustrated Yoga Poses Guide for Boosting Flexibility

A printable illustrated yoga poses guide offers a direct, screen-free way to boost your flexibility, providing a clear visual reference for effective physical postures right where you need it.

Why Flexibility Matters for Everyone

Flexibility often gets overlooked in our daily fitness routines, yet it’s a fundamental component of overall wellness. It’s not just about touching your toes; it deeply impacts how your body moves through life, from simple tasks to more strenuous physical activity. Improving your flexibility means enhancing your range of motion in joints, which allows for smoother, more efficient body movements.

Think about the everyday actions you perform: bending down to tie your shoes, reaching for something on a high shelf, or even turning your head to check your blind spot while driving. All these actions rely on a certain degree of flexibility. When your muscles are tight and restricted, these movements become more challenging, sometimes even painful. A consistent yoga practice, even with gentle exercises, can significantly improve these aspects of your physical well-being.

Beyond daily convenience, flexibility plays a crucial role in injury prevention. Stiff muscles are more prone to strains and tears, especially during sudden movements or intense exercise. By gradually lengthening your muscles and increasing joint mobility through a dedicated flexibility guide, you create a more resilient body, better equipped to handle the demands of life and sport. This also contributes to better posture, as flexible muscles allow your body to naturally align itself more effectively, reducing strain on your spine and other joints.

  • Reduced muscle stiffness and tension
  • Improved posture and body alignment
  • Enhanced athletic performance and range of motion
  • Significant injury prevention
  • Better circulation and reduced muscle soreness
  • Increased body awareness and relaxation

The Power of a Printable Illustrated Guide

In a world saturated with digital content, a physical, printable resource stands out as a uniquely effective tool for learning and practicing yoga. It removes the distractions of screens and notifications, allowing for a more focused and intentional yoga practice. This kind of instructional content is designed to be immediately accessible and incredibly practical.

Why Visual Learning Works Best

Our brains are wired for visual learning. When it comes to understanding complex physical postures, seeing an image is often far more effective than reading a detailed description. An illustrated guide breaks down each yoga pose into its core visual components, showing you exactly where your limbs should be, how your spine should align, and the general shape your body should form. This visual guide streamlines the learning process, making yoga instruction approachable for beginners and a quick reference for experienced practitioners alike.

A well-designed visual guide uses stylized illustrations to highlight key alignment points, making it easier to grasp the nuances of each pose. These exercise illustrations act as a silent teacher, guiding your body movements without the need for constant verbal cues. This method of learning is particularly beneficial for developing a strong foundation in your yoga practice, ensuring you’re performing each pose safely and effectively.

The Benefits of a Physical Resource

Having a physical, printable resource offers several distinct advantages over digital alternatives. You can place it on the floor next to your yoga mat, tape it to a wall, or even laminate it for durability. This means no more fumbling with a phone, no more screen glare, and no more interruptions from incoming messages. It’s a dedicated tool for your fitness routine, fostering a deeper connection to your physical activity.

  • No screen distractions, allowing for full immersion in your yoga practice.
  • Easy to position anywhere in your practice space for constant reference.
  • Durable when printed on sturdy paper or laminated, enduring many sessions.
  • Personalization potential; you can mark favorite poses or add notes.
  • Accessible to everyone, regardless of tech savviness or device availability.
  • A tangible reminder of your commitment to your wellness routine.

What Makes a Great Illustrated Guide?

Not all illustrated guides are created equal. A truly effective printable illustrated yoga poses guide prioritizes clarity, simplicity, and accuracy. The best guides feature clean, clear, and simple illustrations that are easy to interpret at a glance. They avoid overly complex backgrounds or busy details that might distract from the pose itself.

Look for a minimalist design, often employing a flat graphic style. This ensures that the focus remains squarely on the body movements and the physical postures. Each illustration should accurately depict the pose, with subtle cues for proper alignment—perhaps an arrow indicating the direction of a stretch, or a highlighted area showing where to engage a muscle. This type of instructional content becomes an invaluable part of your health and fitness journey, supporting a safe and effective exercise routine.

  • Clear, simple illustrations that are easy to understand.
  • Accurate posture depiction with correct body alignment.
  • Minimalist design and a clean aesthetic.
  • A flat graphic style that emphasizes form over unnecessary detail.
  • Inclusion of key alignment cues and modifications where appropriate.
  • Sequential layout for building a logical yoga sequence.

Getting Started: Your Flexibility Journey

Beginning a flexibility routine, especially with a new yoga practice, can feel exciting. The key is to approach it with patience and self-awareness. Your printable resource will be your constant companion, guiding you through each step.

Preparing Your Space and Mind

Before you even unroll your mat, take a moment to prepare your practice space. Find a quiet corner where you won’t be disturbed. Clear any clutter to create a sense of calm and openness. Lay out your yoga mat, and place your printable resource nearby, easily visible. You might want to wear comfortable athletic wear that allows for a full range of motion without restriction.

Equally important is preparing your mind. Take a few deep breaths to center yourself. Let go of any stress or distractions from your day. This brief mental preparation helps you transition into a mindful state, allowing you to fully engage with your body movements and the present moment. This dedicated time becomes a sacred part of your wellness routine.

Understanding Your Body’s Limits

Yoga is not about competition or pushing yourself into painful positions. It’s about listening to your body and respecting its current capabilities. Every body is different, and your flexibility guide is there to support your journey, not to dictate perfection. As you move through the physical postures, pay close attention to any sensations. A gentle stretch is good; sharp pain is a signal to ease off.

Consistency over intensity is the mantra for flexibility. It’s far better to practice gentle exercises regularly than to attempt extreme stretches sporadically. Over time, with consistent yoga instruction and mindful practice, you’ll notice gradual improvements in your range of motion. Remember, this is your personal fitness routine, tailored to your body’s unique needs.

Essential Yoga Poses for Flexibility

A good printable resource will feature a range of yoga poses specifically chosen to target major muscle groups and enhance overall flexibility. These exercise illustrations will guide you through a balanced yoga sequence, ensuring you work various parts of your body effectively. Here are some fundamental poses that are excellent for building flexibility.

Gentle Warm-Up Poses

Always begin your yoga practice with a few warm-up poses to prepare your muscles and joints for deeper stretches. These gentle movements increase blood flow and awaken your body.

  • Cat-Cow Stretch (Marjaryasana-Bitilasana): This flowing movement warms the spine, shoulders, and hips. On an inhale, arch your back and lift your head (Cow). On an exhale, round your spine and tuck your chin (Cat). Repeat several times.
  • Child’s Pose (Balasana): A calming and restorative pose that gently stretches the hips, thighs, and ankles while relieving stress and fatigue. Kneel on your mat, sit your hips back towards your heels, and fold your torso forward, resting your forehead on the mat.

Standing Poses for Leg and Hip Flexibility

These poses build strength while simultaneously lengthening the muscles in your legs and opening your hips, which are often tight from sitting.

  • Downward-Facing Dog (Adho Mukha Svanasana): A foundational pose that stretches the hamstrings, calves, and shoulders while strengthening the arms and legs. It’s an excellent full-body stretch.
  • Triangle Pose (Trikonasana): This pose stretches the hamstrings, groin, and hips, while also opening the chest and shoulders. It improves balance and strengthens the legs.
  • Warrior II (Virabhadrasana II): Strengthens the legs and core while opening the hips and stretching the groins. This pose also builds stamina and focus.

Seated Poses for Spine and Hamstrings

Seated poses are wonderful for deepening stretches, particularly in the hamstrings and along the spine, promoting a more flexible back.

  • Seated Forward Fold (Paschimottanasana): A classic pose for stretching the entire back of the body, especially the hamstrings and spine. It also calms the mind.
  • Bound Angle Pose (Baddha Konasana): Excellent for opening the hips and inner thighs. Sit with the soles of your feet together, knees out to the sides, gently pulling your heels towards your pelvis.
  • Spinal Twist (Ardha Matsyendrasana): This pose deeply twists the spine, improving spinal mobility and digestion. It also stretches the hips, shoulders, and neck.

Cool-Down and Relaxation

Always conclude your yoga sequence with poses that help your body and mind relax, integrating the benefits of your practice.

  • Supine Spinal Twist (Supta Matsyendrasana): A gentle, restorative twist that releases tension in the spine, hips, and lower back. Lie on your back, hug one knee to your chest, then let it fall across your body.
  • Savasana (Corpse Pose): The ultimate relaxation pose. Lie flat on your back, arms and legs extended, palms facing up. Allow your body to completely relax, absorbing the benefits of your yoga practice. This pose is vital for physical and mental integration.

Building Your Personalized Yoga Sequence

One of the greatest advantages of a printable resource is the ability to customize your exercise routine. You can select the yoga poses that best suit your current needs and goals, creating a truly personalized fitness routine. This movement guide empowers you to be your own instructor, drawing from a library of effective physical postures.

Creating a Daily Exercise Routine

Start by assessing your current flexibility and identifying areas you want to improve. Your illustrated guide will provide a visual learning roadmap. For a balanced routine, aim to include poses that target different parts of your body. A good yoga sequence typically lasts between 15-30 minutes, but even 10 minutes of focused stretching can make a difference.

  1. Choose 5-7 yoga poses from your flexibility guide. Select a mix of warm-ups, standing poses, seated poses, and a cool-down.
  2. Begin with 2-3 gentle warm-up poses to prepare your body. Hold each for 30 seconds to 1 minute.
  3. Move into your main flexibility poses. Hold each stretch for 30 seconds to 1 minute, focusing on deep, steady breaths.
  4. Finish with 1-2 cool-down and relaxation poses, like a gentle twist and Savasana, for 2-5 minutes.
  5. Listen to your body throughout. If a pose feels too intense, ease off or choose a modification.

Consistency is more important than duration. Even short, daily sessions of gentle exercises will yield better results than long, infrequent ones. Your printable resource makes it easy to stick to this schedule, providing a constant visual reminder and instruction.

Making It a Consistent Wellness Routine

Integrating a new physical activity into your daily life requires intention and strategy. A printable illustrated guide can be a powerful tool for habit formation. By making your yoga instruction visible and accessible, you increase the likelihood of sticking with it.

  • Set a specific time each day for your yoga practice, even if it’s just 10 minutes. This creates a routine.
  • Keep your printable resource visible and ready, perhaps rolled up with your mat or taped to a wall in your practice area.
  • Track your progress. Notice how you feel after each session, and celebrate small improvements in your flexibility.
  • Pair your yoga routine with another existing habit, like having your morning coffee or winding down before bed.
  • Consider inviting a friend or family member to join you, creating a shared commitment to health and fitness.
  • Remember your “why.” Reconnect with the reasons you started this wellness routine whenever motivation wanes.

Maintaining Your Illustrated Yoga Poses Guide

To ensure your printable resource serves you well for a long time, consider how you’ll print and store it. A durable guide means consistent, uninterrupted access to your yoga instruction, supporting your ongoing health and fitness goals.

Printing and Lamination Tips

For the best experience, print your illustrated guide on sturdy paper, such as cardstock. This will prevent it from tearing easily and make it more resistant to wear and tear. If you plan to use it frequently or in an area where it might get damp (like near a water bottle), consider laminating the pages. Lamination protects the exercise illustrations from spills, creases, and general handling, ensuring your posture guide remains pristine and readable.

You can also bind the pages together using a simple ring binder or spiral binding, creating a compact and easy-to-flip booklet. This keeps all your yoga poses organized and prevents individual sheets from getting lost. A well-maintained printable resource is a long-term investment in your physical activity and overall wellness routine.

Keeping Your Practice Fresh

While your flexibility guide provides a solid foundation, remember to keep your yoga practice engaging. As your flexibility improves, you might explore variations of poses or introduce new ones from your guide. The beauty of a comprehensive visual guide is that it offers a wealth of options, allowing you to continually challenge yourself.

Don’t be afraid to experiment with different yoga sequences or focus on specific areas of your body on different days. One day might be dedicated to hip openers, another to hamstring stretches. This dynamic approach keeps your fitness routine exciting and prevents plateaus. Your journey to greater flexibility is ongoing, and your printable illustrated yoga poses guide is an adaptable tool designed to support every step of the way.

Exit mobile version