Easy 
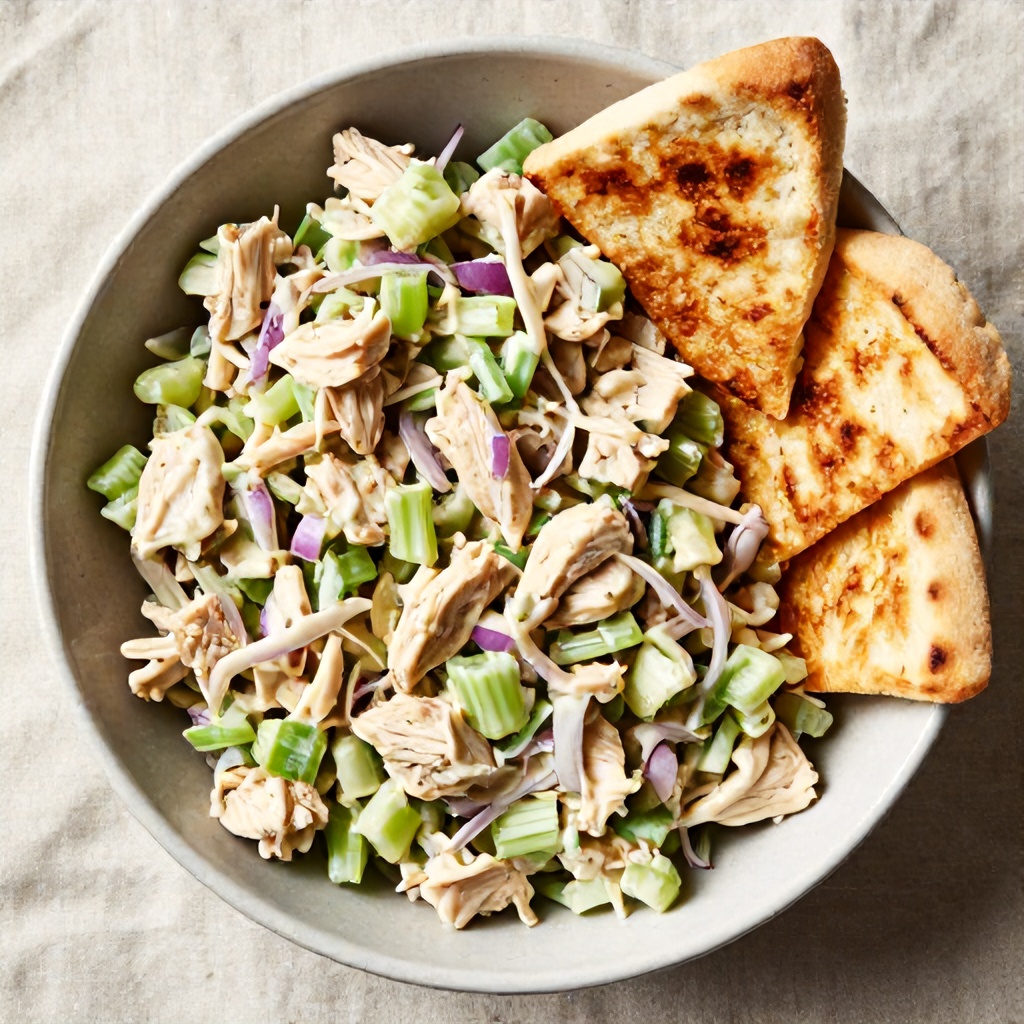
Rotisserie Chicken Salad Recipe for Quick Healthy Meal Prep

Rotisserie chicken salad serves as a reliable solution for anyone needing high-protein meals that require minimal effort during a busy week. By utilizing pre-cooked poultry, you bypass the longest part of food preparation, allowing you to assemble a nutritious lunch in under ten minutes. This approach to healthy meal planning turns a simple grocery store staple into a versatile base for various lunches, whether you prefer eating it straight from a bowl or tucked into a wrap.

Why This Recipe Works for Busy Schedules

Efficiency in the kitchen often comes down to smart shortcuts. Using a store-bought rotisserie chicken is one of the most effective ways to ensure you have a protein-packed meal ready when hunger strikes. Many people struggle with consistency in their diet because they run out of time to cook, but this method removes that barrier entirely. You are essentially performing an assembly job rather than a cooking job.

Beyond the time savings, this dish is incredibly adaptable. If you find yourself staring at a fridge full of random vegetables, this salad acts as a blank canvas. It fits perfectly into a gluten-free salad rotation, and because it relies on healthy pantry staples like mustard and quality oils, you likely have everything you need already. It is a classic example of how simple ingredients create a satisfying, savory result without needing professional culinary skills.

Pro tip: Shred your chicken while it is still slightly warm. The meat absorbs the dressing much better when the fibers are relaxed, leading to a more flavorful final product.

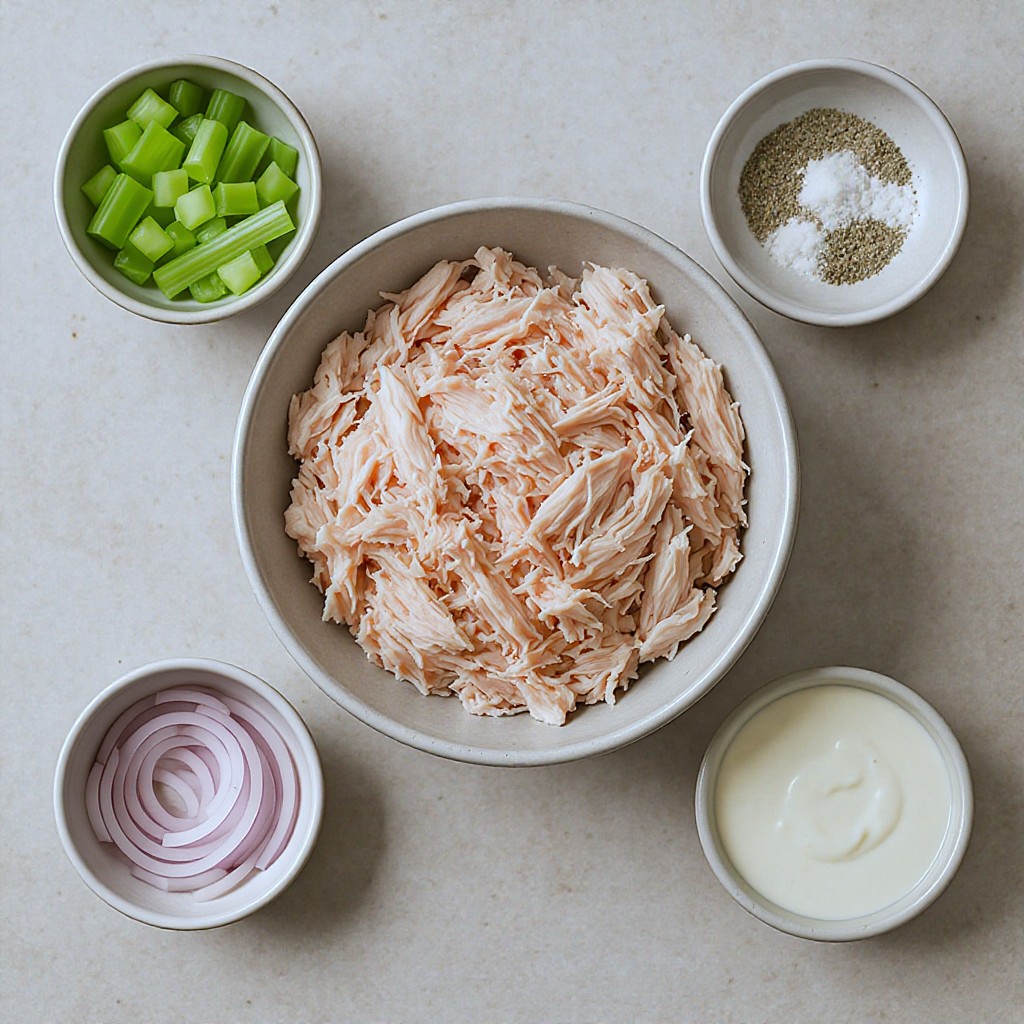
Essential Ingredients for the Perfect Texture

The quality of your ingredients dictates the outcome of your meal. While the chicken provides the foundation, the supporting cast of vegetables and condiments creates the flavor profile. Focus on these items to ensure your lunch remains fresh and appetizing throughout the week.

  • Shredded chicken: The star of the show. You can pull this from a store-bought bird or use leftover grilled chicken breast.
  • Avocado oil mayonnaise: This provides a clean, creamy base without the heavy aftertaste of soybean or canola oils.
  • Red onion: A small amount goes a long way in providing a sharp, savory bite that cuts through the richness of the mayo.
  • Celery: This is non-negotiable for that signature crunch. It keeps the salad from feeling like a uniform mush.
  • Dijon mustard: A tiny spoonful adds a complex, tangy depth that elevates the entire dish.
  • Sea salt and cracked black pepper: Never skip these. They wake up the flavors of the chicken and vegetables.

Step-by-Step Preparation

Preparation is straightforward and requires only a large mixing bowl and a sharp knife. Follow these steps to ensure your salad holds up well in the refrigerator.

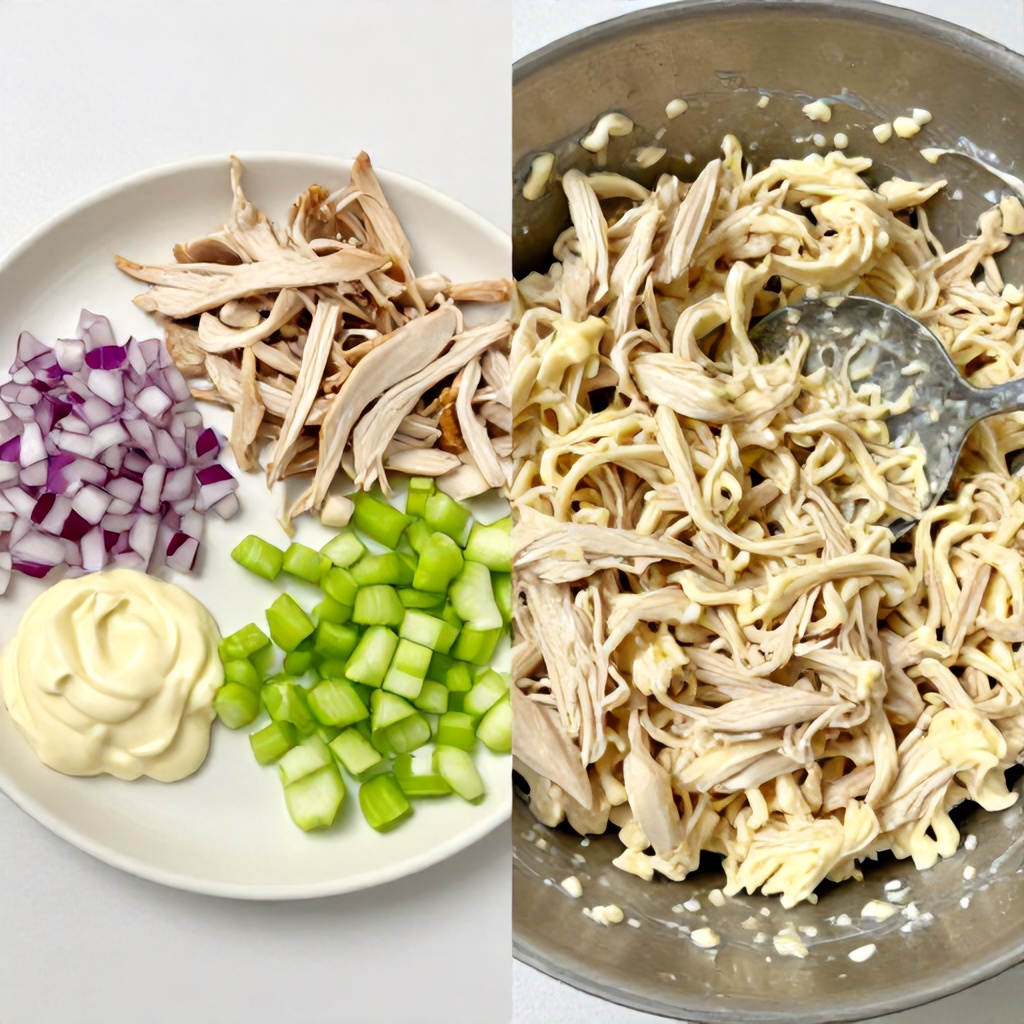
  1. Remove the skin and bones from your rotisserie chicken. Use your hands or two forks to shred the meat into bite-sized pieces.
  2. Finely dice your celery and red onion. Aim for small, uniform pieces so you get a bit of crunch in every single bite.
  3. In a large bowl, whisk together the avocado oil mayonnaise, dijon mustard, salt, and pepper until smooth.
  4. Add the shredded chicken, onion, and celery to the bowl. Fold everything together gently until the meat is evenly coated.
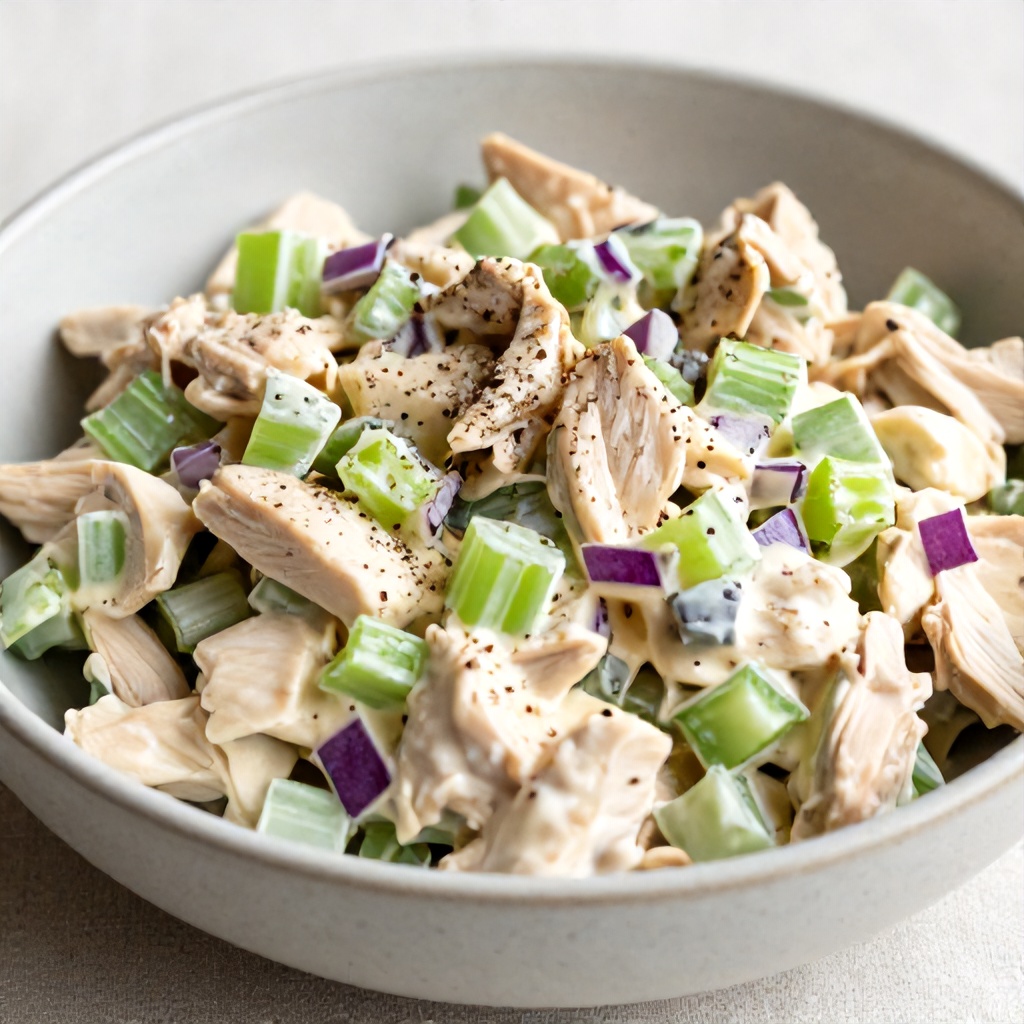
  5. Taste the mixture. Add more salt or pepper if needed, or a splash of lemon juice if you want extra brightness.

Maximizing Your Meal Prep Strategy

Successful meal prep is about more than just cooking; it is about storage and variety. If you plan to eat this throughout the work week, keep the salad in an airtight glass container. Glass prevents the plastic-like odors that can sometimes leach into creamy mixtures over several days. Because this is a high-protein meal, it keeps you full longer than a standard green salad, making it a staple for those who find themselves snacking by mid-afternoon.

If you want to keep things interesting, consider changing how you serve it. One day you might use it as a filling for a lettuce wrap, and the next you might serve it over a bed of baby spinach. These small changes prevent the boredom that often leads to ordering takeout. Keeping a few healthy pantry staples on hand, like crackers or gluten-free bread, ensures you are never caught without a vehicle for your salad.

Avoid adding watery ingredients like fresh tomatoes or cucumbers directly into the main batch. They will release moisture over time, making your salad soggy by day two. Add those fresh items right before you eat.

Creative Mix-ins and Flavor Variations

Once you master the base recipe, you can experiment with different chicken salad mix-ins to suit your mood. The beauty of this dish is that it welcomes both sweet and savory additions. If you enjoy a bit of sweetness, try adding diced gala apples or halved red grapes. These provide a refreshing contrast to the savory, creamy chicken.

For those who prefer a more savory or earthy profile, consider these additions:

  • Toasted pecans or walnuts: These add a rich, buttery crunch that pairs beautifully with the celery.
  • Fresh herbs: Chopped dill, parsley, or chives add a vibrant, garden-fresh flavor that makes the salad feel gourmet.
  • Dried cranberries: These offer a chewy texture and a tart sweetness that balances the dijon mustard perfectly.
  • Smoked paprika: A dash of this adds a subtle, campfire-like depth without needing to fire up the grill.

Culinary Substitutions for Every Diet

Not everyone has the same ingredients in their kitchen, and that is perfectly fine. Culinary substitutions are a normal part of cooking. If you find yourself out of avocado oil mayo, you can swap it for plain Greek yogurt. This creates a lighter, tangier version that is still packed with protein. If you are avoiding dairy, ensure your mayo is certified dairy-free, as some brands include buttermilk or whey.

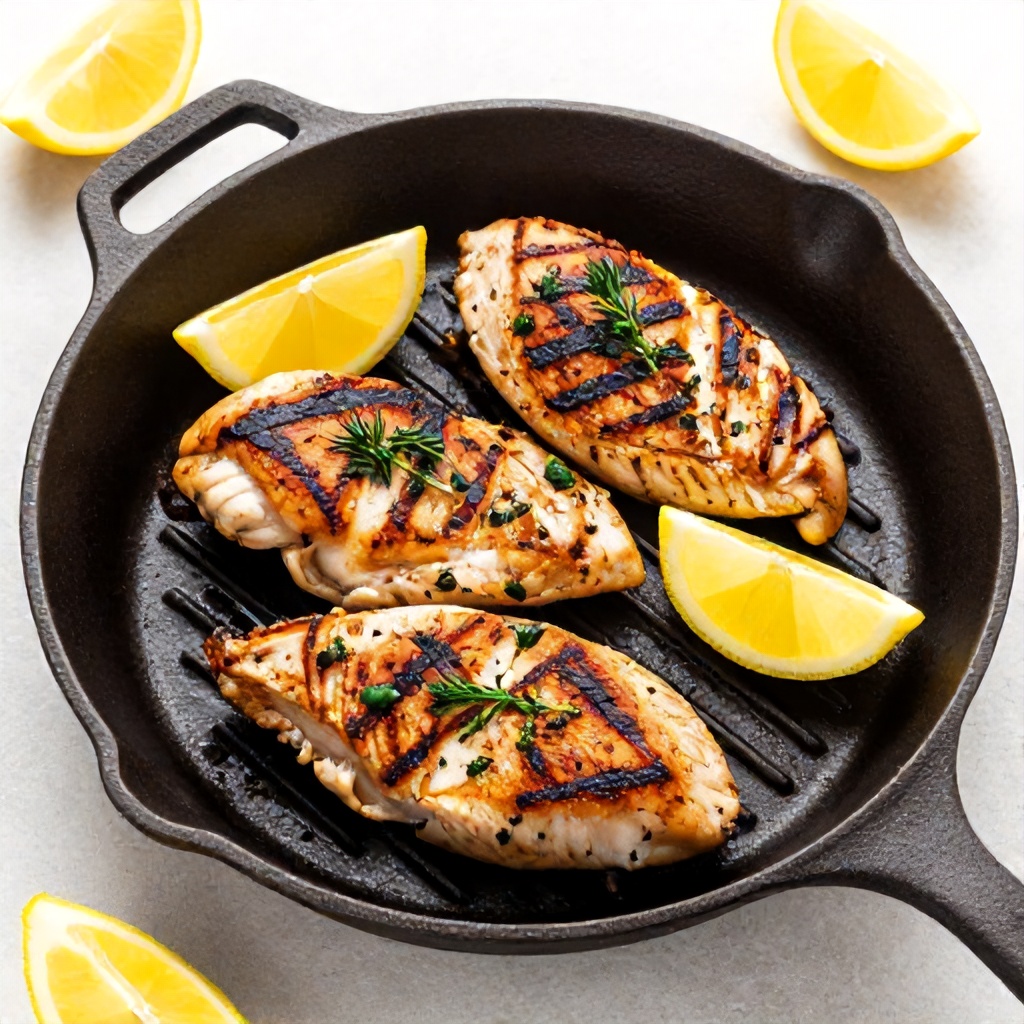
When you do not have a rotisserie chicken, you have options. Many home cooks rely on a slow cooker shredded chicken recipe to keep a stash of meat in the freezer. Alternatively, an Instant Pot chicken method takes less than twenty minutes and yields incredibly tender results. Both methods allow you to control the seasoning, ensuring your salad starts with the best possible flavor profile.

How to Serve Your Chicken Salad

The versatility of this dish is its greatest strength. While a sandwich is the most common choice, you have plenty of other options for nutritious lunch options. Try scooping the salad into hollowed-out bell peppers for a low-carb, crunchy vessel. You can also serve it alongside a side of roasted vegetables or a simple green salad to round out your meal.

If you are packing this for work, consider keeping the salad in a separate container from your greens. This prevents the leaves from wilting. When you are ready to eat, simply toss the salad with the greens. This simple habit makes your lunch feel like it was prepared fresh that morning, even if you made it on Sunday night.

How long does this salad stay fresh in the fridge?

When stored in an airtight container, this salad remains fresh and delicious for up to four days. Always ensure your refrigerator is set to the correct temperature to maintain food safety.

Can I freeze chicken salad?

It is generally not recommended to freeze chicken salad that contains mayonnaise. The emulsion will break during the thawing process, resulting in a watery, separated texture that is not very appetizing.

The Importance of Quality Ingredients

When you focus on healthy meal planning, the quality of your fats and proteins matters. Avocado oil mayonnaise is often preferred because it is processed at lower temperatures and contains heart-healthy monounsaturated fats. Similarly, choosing a high-quality dijon mustard ensures you are getting a depth of flavor that cheap, yellow mustards simply cannot provide. These small choices add up to a better-tasting, more satisfying meal.

Remember that food preparation is a skill that improves with practice. The more you make this salad, the more you will learn your own preferences. Perhaps you like more onion, or maybe you prefer a heavier hand with the black pepper. Adjusting the recipe to your own palate is the best way to ensure you actually enjoy your healthy lunches. When you enjoy what you eat, you are far more likely to stick to your health goals long-term.

Final Thoughts on Building Your Lunch Routine

Creating a sustainable lunch routine does not require hours of labor. By focusing on high-protein meals that utilize simple, accessible ingredients, you can maintain your energy levels throughout the day without the stress of constant cooking. This rotisserie chicken salad is designed to be a reliable, tasty, and flexible part of your weekly menu. Whether you are a busy professional, a parent, or simply someone who appreciates a good meal, this recipe offers a practical way to eat well every single day.

Keep your pantry stocked with the basics, keep your fridge stocked with fresh veggies, and you will always be prepared. The goal is to make healthy eating feel like the path of least resistance. With a bowl of this salad in the fridge, you have already won the battle against the mid-day hunger slump. Enjoy the process of making it your own, and do not be afraid to experiment with the flavors that make you happy.

Easy Grilled Chicken Breast Recipe for Simple Dinners and Meal Prep

Easy Grilled Chicken Breast for Simple Dinners and Meal Prep

The secret to achieving tender and juicy chicken every single time lies in a combination of proper marination and controlled heat. Whether you are looking for quick dinner solutions or reliable high-protein meal prep, mastering the art of the boneless skinless chicken breast is a fundamental skill for any home cook. This recipe relies on basic pantry staple ingredients to create a flavorful, versatile protein that fits perfectly into gluten-free dinner ideas and dairy-free protein sources alike.

Over the last few weeks, we have made chicken on the grill a few times and it got me thinking about how often people struggle with dry, rubbery meat. I have never shared my go-to recipe for simple grilled chicken breasts until now. While I love experimenting with complex sauces, everyone needs a basic, reliable grilled chicken recipe in their back pocket. With a simple marinade made from items you likely already have in your kitchen and a quick grilling time, this chicken is incredibly flavorful and versatile. Say goodbye to dry and bland poultry, and hello to a lean protein that actually tastes good.

Why You Will Love This Recipe

Consistency is the biggest challenge when working with lean meats. This method ensures you get perfectly tender and moist results without needing fancy equipment. It is a highly versatile recipe that can be served in countless ways. You might pair it with grilled sweet potatoes or roasted broccoli for a balanced plate. It works beautifully in salads, wraps, or tossed into pasta primavera. Because it is so neutral yet savory, it adapts to whatever side dishes you happen to have on hand.

If you are into meal planning, this is a lifesaver. Making a large batch of this grilled chicken allows you to have a ready-to-eat protein source throughout the week. It saves you from the mid-week scramble when you are tired and tempted to order takeout. The process is straightforward, requiring minimal cleanup and very little active time in the kitchen.

Ingredients Needed

  • Boneless skinless chicken breasts: Aim for about 1 to 1 1/4 pounds. Using boneless cuts significantly reduces cooking time and makes for easy slicing once the meat is rested.
  • Lemon juice: This acidic marinade component is essential. It helps with meat tenderization by breaking down tough fibers while adding a bright, tangy flavor profile.
  • Olive oil: A healthy fat that coats the meat, preventing it from sticking to the grates and helping to conduct heat for a beautiful, golden-brown sear.
  • Poultry seasoning blend: Garlic powder, dried thyme, and dried oregano provide a classic, earthy base.
  • Salt and black pepper: The most important pantry staples for enhancing the natural flavor of the meat.

How to Make Easy Grilled Chicken Breast

  1. Make the marinade: Whisk together the lemon juice, olive oil, garlic powder, thyme, oregano, salt, and pepper in a small bowl. Ensure the salt is fully dissolved so it distributes evenly across the chicken.
  2. Marinate the chicken: Place your chicken in a shallow glass dish or a sealable plastic bag. Pour the marinade over the chicken, ensuring that every surface is well coated. Place the chicken in the refrigerator and let it sit for at least one hour. If you have the time, let it marinate for up to 12 hours for even deeper flavor penetration.
  3. Grill: When you are ready to cook, remove the chicken from the marinade, shaking off any excess liquid. Heat up your outdoor grill or a stovetop grill pan. Once the surface is hot, add the chicken. Grill for approximately five minutes on each side, flipping with grill-safe tongs. You will know the chicken is done when the internal temperature reaches 165°F.

The Science of Healthy Grilling Techniques

Understanding why we use an acidic marinade is key to improving your culinary techniques. Acid, such as lemon juice or vinegar, begins to denature the proteins on the surface of the meat. This process makes the chicken more tender and allows the herbs and spices to adhere better. However, do not leave the chicken in the acid for more than 24 hours, or the texture can become mushy rather than firm and juicy.

Healthy cooking methods often get a bad reputation for being flavorless, but grilling is the exception. By using high heat, you create a Maillard reaction—the chemical process that gives browned food its distinctive flavor. This is why a good sear is so important. It locks in moisture and provides a savory crust that makes the chicken taste like it came from a restaurant kitchen.

Meal Planning and Storage Tips

Food preparation is the cornerstone of healthy eating habits. When you grill a large batch of chicken, store it in an airtight container in the refrigerator for up to four days. If you find yourself with extra, you can freeze the cooked chicken for up to three months. To reheat, simply slice it and warm it gently in a pan with a splash of water or broth to keep it from drying out.

For those who struggle with meal planning, try shredding the leftovers. Shredded grilled chicken is perfect for tacos, grain bowls, or a quick chicken salad. By having this lean protein ready, you ensure that your lunches and dinners are always packed with the nutrients your body needs to stay energized.

Grilled Chicken FAQ’s

Can I make this chicken without a grill?

Certainly! If you don’t have an outdoor grill or indoor grill pan, you can still prepare this chicken using your stovetop or oven. While these methods won’t have the smoky flavor of grilling, they’ll still yield a tasty and juicy chicken breast. Stovetop: On the stovetop, heat a skillet (I prefer to use a cast iron pan) and cook the chicken, adjusting the cooking time as necessary. Oven: Preheat your oven to 400°F. Add oil to a cast iron skillet and turn heat on medium/medium-high heat. Add chicken breasts to the skillet and sear for 4-5 minutes on each side. Move the skillet from the stovetop to the oven to finish cooking if the breasts are particularly thick.

How long should I marinate chicken?

The longer you marinate the chicken, the more flavorful it will be. If possible, try to let the chicken marinate for at least 1 hour, but if you have more time, let it marinate for 12 hours. If you’re pressed for time, even 30 minutes of marinating can make a difference in the flavor of your chicken breast.

Pro Tip: Always use a meat thermometer. It is the only way to ensure your chicken is safe to eat without overcooking it. Aim for 165°F at the thickest part of the breast.

Safety Warning: Never reuse the marinade that held raw chicken unless you boil it thoroughly first. It is safer to discard the leftover marinade or make a fresh batch for basting.

Expanding Your Flavor Profiles

Once you master this base recipe, you can start experimenting with different flavor profiles. If you want a Mediterranean vibe, add a teaspoon of dried basil and a pinch of red pepper flakes to the marinade. For a more southwestern flavor, swap the thyme and oregano for cumin and chili powder. The beauty of this recipe is its flexibility. Because the base is so simple, it acts as a blank canvas for whatever spices you have in your pantry.

Consider the quality of your olive oil as well. A high-quality extra virgin olive oil adds a subtle fruitiness that complements the lemon juice perfectly. If you are strictly dairy-free, this recipe is already safe for you, as it relies on oil rather than butter for fat. It is also naturally gluten-free, provided your seasonings are certified gluten-free, making it a safe bet for guests with dietary restrictions.

The Importance of Resting the Meat

Many home cooks make the mistake of slicing into their chicken the second it comes off the grill. This is a mistake. Resting your meat for five to ten minutes allows the juices to redistribute throughout the fibers. If you cut too soon, all that moisture runs out onto the cutting board, leaving you with dry meat. Patience is a virtue in the kitchen, and in this case, it pays off with a much better dining experience.

When you are ready to serve, slice the chicken against the grain. This shortens the muscle fibers, making each bite feel more tender. This technique is especially helpful if you are serving the chicken to children or anyone who might find tougher meat difficult to chew. It is a small detail that makes a massive difference in the final presentation and texture of your meal.

Integrating Chicken into Your Lifestyle

Incorporating this recipe into your weekly routine is about more than just food; it is about building sustainable habits. When you have a reliable, healthy protein source ready, you are less likely to rely on processed snacks or high-sodium convenience foods. This grilled chicken is a cornerstone of a balanced diet, providing the amino acids necessary for muscle repair and satiety.

Think about your upcoming week. If you know you have a busy Tuesday, grill a double batch on Sunday. Use half for dinner that night and save the other half for Tuesday’s lunch. This kind of intentional food preparation reduces mental fatigue and ensures that you are fueling your body with high-quality ingredients. It is a simple shift that creates a ripple effect of positive health outcomes over time.

Troubleshooting Common Issues

If your chicken is sticking to the grill, it usually means one of two things: the grill is not hot enough, or the meat is not ready to be flipped. Never force the chicken off the grates. If it is sticking, give it another minute or two. As the proteins sear, the meat will naturally release from the metal. If you are using a stovetop grill pan, make sure to lightly oil the pan before heating to create a non-stick surface.

If you find that your chicken is browning too quickly on the outside but remains raw in the middle, your heat is too high. Lower the flame to medium. This allows the heat to penetrate the center of the breast without burning the exterior. Remember that chicken breasts vary in thickness. If you have a particularly thick breast, consider pounding it to an even thickness with a meat mallet before marinating. This ensures that the entire piece cooks at the same rate, preventing the thinner edges from drying out while the center catches up.

Final Thoughts on Simple Cooking

Cooking does not have to be an elaborate production to be delicious. By focusing on high-quality ingredients and basic techniques, you can create meals that are both healthy and satisfying. This grilled chicken breast recipe is a testament to the idea that simple is often better. It provides a reliable foundation for your weekly meals, allowing you to spend less time in the kitchen and more time enjoying your food with family and friends.

As you continue to refine your skills, remember that every kitchen is different. Your grill might run hotter than mine, or your stove might have different heat settings. Use this recipe as a guide, but trust your senses. Look for the golden-brown sear, listen for the sizzle, and use your thermometer to confirm the internal temperature. With a little practice, you will be able to grill the perfect chicken breast without even thinking about it.

Exit mobile version