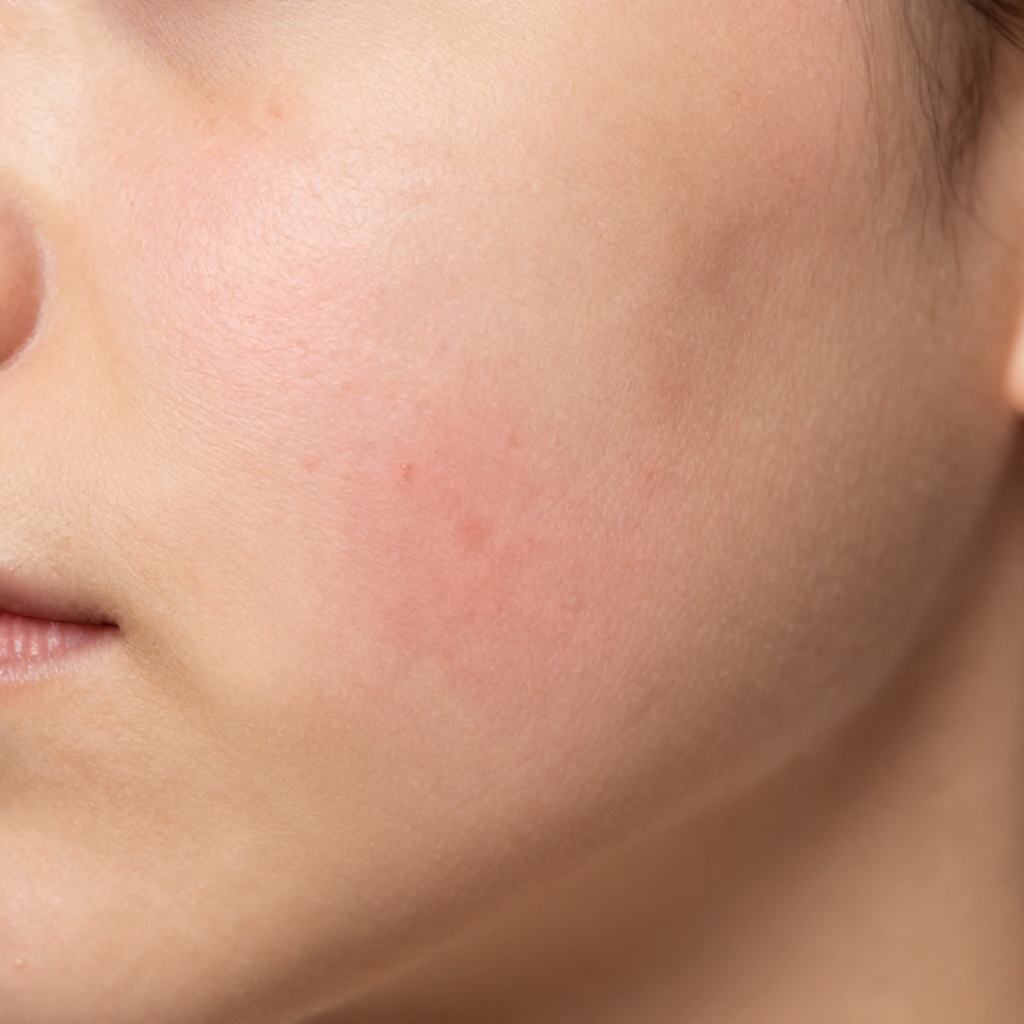
Blackheads are simply clogged pores that appear as small dark spots on your skin, forming when a mix of excess sebum and dead skin cells gets trapped and darkens at the skin’s surface.

What Exactly Are Blackheads?
Imagine your skin’s pores as tiny openings, each housing a hair follicle and a sebaceous gland. These glands are responsible for producing sebum, your skin’s natural oil, which is essential for keeping your skin hydrated and protected. However, sometimes these pores can become congested.
A blackhead forms when a pore gets blocked by a combination of this sebum and dead skin cells that haven’t shed properly. This mixture creates a plug. Unlike a whitehead, which is a closed pore, a blackhead is an open pore. The top of this plug is exposed to the air, and when the sebum within it comes into contact with oxygen, it undergoes a process called oxidation. This oxidation causes the trapped material to darken, creating the characteristic black or dark brown dot you see on your skin.
These small, dark blemishes are a common form of non-inflamed acne, distinct from red, painful pimples or cysts. They typically appear in areas of your face that have a higher concentration of sebaceous glands, such as your T-zone – your forehead, nose, and chin. However, blackheads can pop up anywhere on your body where pores are present, including your chest and back.


Why Blackheads Form and Who Experiences Them
Several factors contribute to the formation of blackheads, making them a common skin concern for many. It’s not just about dirty skin; it’s a complex interplay of internal and external elements.
Common Triggers for Clogged Pores
-
Product Choices: Using heavy, oil-rich skincare products or makeup that isn’t non-comedogenic can significantly contribute to clogged pores. These products can sit on the skin and trap dead skin cells and sebum, creating the perfect environment for blackheads to develop.
-
Inadequate Cleansing: Not cleansing your skin properly or consistently can allow a buildup of impurities, makeup, and dead skin cells. This skin congestion is a primary factor in blackhead formation. Regular, gentle facial care is important for maintaining skin clarity.

-
Hormonal Changes: Fluctuations in hormones, common during puberty, menstruation, pregnancy, or stress, can trigger your sebaceous glands to produce more sebum. This increase in oil production makes your pores more susceptible to blockages.
-
Genetics: Some individuals are simply more genetically predisposed to developing blackheads due to their skin type and pore structure.
The Role of Fatty Acids Imbalance
Beyond external factors, emerging research points to an internal imbalance within the skin’s natural oils. Specifically, an imbalanced ratio of fatty acids in your sebum, particularly the Oleic to Linoleic ratio, can play a significant role. Linoleic acid is an essential fatty acid that helps keep sebum fluid and prevents it from becoming sticky. When there’s a deficiency of linoleic acid or an excess of oleic acid, sebum can become thicker and more prone to sticking inside the pores, making it easier for blackheads to form.

Who is Most Prone?
While everyone will likely experience blackheads at some point, certain individuals are more prone. People with oily skin are particularly susceptible because their sebaceous glands naturally produce more sebum. This increased oil production, combined with often larger pore appearance, creates ideal conditions for blackheads to develop. The excess oil can easily mix with dead skin cells, leading to more frequent clogged pores and skin impurities.
Conversely, blackheads are less common in people with dry skin, who typically have smaller pores and naturally produce less oil. However, even dry skin types can develop blackheads if they use heavy products or neglect proper cleansing.
Free Shipping on Orders $50+

Why You Should NOT Squeeze Blackheads Yourself
The temptation to squeeze blackheads out manually can be incredibly strong, especially when you see those little dark dots on your skin. However, this common approach often does more harm than good and can actually worsen your skin health.
The Risks of Manual Extraction at Home
-
Skin Damage and Inflammation: When you try to squeeze a blackhead with your fingers or fingernails, you often apply uneven and excessive pressure. This can rupture the delicate wall of the sebaceous gland beneath the skin’s surface, forcing the trapped sebum, dead skin cells, and bacteria deeper into the surrounding tissue. The result is often an inflamed, red, and painful mark that can linger for days or even weeks. This can easily lead to more severe breakouts.
-
Introduction of Bacteria: Your hands, even if they appear clean, carry bacteria. When you forcefully extract a blackhead, you risk introducing these bacteria into the open pore and surrounding skin, leading to infection and further inflamed skin.
-
Scarring and Hyperpigmentation: Aggressive squeezing can cause trauma to the skin, leading to post-inflammatory hyperpigmentation (dark spots that remain after the blackhead is gone) or even permanent scarring, especially if the skin is repeatedly damaged.
When Professional Help is Best
If you feel the need for manual extraction, it’s best left to a trained professional. When you visit an esthetician, they are equipped with the knowledge, tools, and sterile environment necessary for safe and effective blackhead removal. They understand the correct amount of pressure, the precise angle, and the appropriate tools to extract blackheads without causing damage or irritation to your skin. This professional approach is the only instance where manual removal should be considered to protect your skin barrier and promote overall skin clarity.
Your cart is empty. Continue shopping. Have an account? Log in to check out faster.
Pore Strips & Other Harsh Solutions for Blackheads
Beyond manual squeezing, many people turn to products like pore strips, hoping for a quick fix for their blackheads and an instant improvement in pore appearance. While the visual satisfaction of pulling something out of your pores can be appealing, these methods often come with significant drawbacks and can be quite damaging to your skin.
The Downside of Pore Strips
Pore strips work by using strong adhesives to literally rip out the top layer of oxidized sebum and dead skin cells from your pores. While they might remove some surface-level impurities, they also strip away much more than just blackheads. The powerful adhesives can remove parts of your epidermal layer, the outermost protective layer of your skin. This can leave your skin feeling raw, dry, and vulnerable.
For individuals with pre-existing skin issues such as acne, eczema, or psoriasis, pore strips can be extremely damaging. They can exacerbate irritation, dryness, and inflammation, making your skin even more prone to breakouts and compromising your skin barrier. Instead of promoting skin health, these harsh solutions can create a cycle of irritation and sensitivity.
Why Harsh Scrubs Aren’t the Answer
Similarly, harsh physical scrubs with large, irregular particles are often marketed for blackhead removal. While exfoliation is important, overly aggressive scrubbing can create micro-tears in the skin, disrupt the skin barrier, and spread bacteria, potentially leading to more inflamed skin and further breakouts rather than improving skin clarity.
Try Holy Grail For 7 Days
Oil Cleansing: A Gentle Path to Clearer Pores
Instead of harsh methods, a gentler, more effective approach to dissolving and preventing blackheads involves the ancient wisdom of oil cleansing. It might seem counterintuitive to use oil to clean oily skin or remove oil-based blackheads, but there’s a strong scientific principle at play: “like dissolves like.”
The Science Behind Oil Cleansing
Since blackheads are essentially plugs of oxidized sebum and other oil-soluble impurities, applying a beneficial oil to your skin can effectively dissolve these stubborn blockages. The oil in your cleanser binds to the oil in your pores, including the hardened sebum that makes up blackheads, allowing it to be gently lifted away without stripping your skin’s natural moisture or disrupting its delicate skin barrier.
This method helps to balance your skin’s natural oil production over time, reducing the likelihood of future skin congestion and improving overall skin clarity. It’s a non-abrasive way to address skin impurities and promote a healthier complexion.
How to Incorporate Oil Cleansing into Your Facial Care Routine
-
Choose the Right Oil: Opt for a high-quality, non-comedogenic cleansing oil or a blend of oils (like jojoba, grapeseed, or sunflower oil) that are known for their ability to cleanse without clogging pores. Look for products specifically formulated for oil cleansing.
-
Apply to Dry Skin: Dispense a small amount of cleansing oil into your dry hands and gently massage it onto your dry face. Spend a minute or two gently massaging the oil into your T-zone and any areas prone to blackheads. You’ll feel the oil working to dissolve makeup, sunscreen, and the hardened sebum within your pores.
-
Emulsify with Water: Wet your hands with warm water and continue massaging your face. The oil will emulsify, turning into a milky, white liquid. This step helps to lift the dissolved impurities from your skin.
-
Rinse Thoroughly: Rinse your face completely with warm water until all traces of the oil cleanser are gone. Your skin should feel clean, soft, and hydrated, not stripped or greasy.
-
Follow with a Second Cleanse (Optional): For a deeper clean, especially if you wear heavy makeup, you can follow with a gentle, water-based cleanser. This is often referred to as the “double cleanse” method.
EWG Verified & Leaping Bunny Certified
Beyond Cleansing: Preventing Blackheads and Promoting Skin Health
While oil cleansing is a powerful tool, a holistic approach to skin care is key for long-term blackhead prevention and maintaining optimal skin health.
Consistent and Gentle Skincare Practices
-
Regular Exfoliation: Incorporate gentle chemical exfoliants (like AHAs or BHAs) a few times a week. Salicylic acid (a BHA) is particularly effective as it’s oil-soluble and can penetrate deeper into the pores to dissolve sebum and dead skin cells, helping to reduce skin congestion and the formation of new blackheads.
-
Non-Comedogenic Products: Always choose skincare and makeup products labeled “non-comedogenic,” meaning they are formulated not to clog pores. This is especially important for those with oily skin or a tendency towards breakouts.
-
Moisturize: Even oily skin needs moisture. Using a lightweight, non-comedogenic moisturizer helps maintain a healthy skin barrier, preventing your skin from overproducing oil in an attempt to compensate for dryness.
-
Protect Your Skin: Daily use of a broad-spectrum sunscreen is crucial. Some sunscreens can be heavy, so choose a lightweight, non-comedogenic formula to avoid contributing to clogged pores.
-
Clean Your Tools: Regularly clean makeup brushes, sponges, and anything else that comes into contact with your face to prevent the transfer of bacteria and skin impurities.
Lifestyle and Dietary Considerations
While direct links are still being researched, some individuals find that certain dietary choices or lifestyle factors can influence their skin health and propensity for breakouts. Maintaining a balanced diet, staying hydrated, managing stress, and getting adequate sleep all contribute to overall well-being, which can reflect positively on your skin clarity.
Free Shipping on Orders $50+
When to Seek Professional Advice
If you’ve consistently tried various home care methods and your blackheads persist, or if you’re experiencing frequent breakouts and inflamed skin, it’s wise to consult a dermatologist. They can assess your specific skin type and concerns, offering personalized advice, prescription treatments, or in-office procedures like professional extractions or chemical peels to effectively manage blackheads and improve your overall skin health.