Understanding the Causes and Treatment of Nose Pores and Blackheads

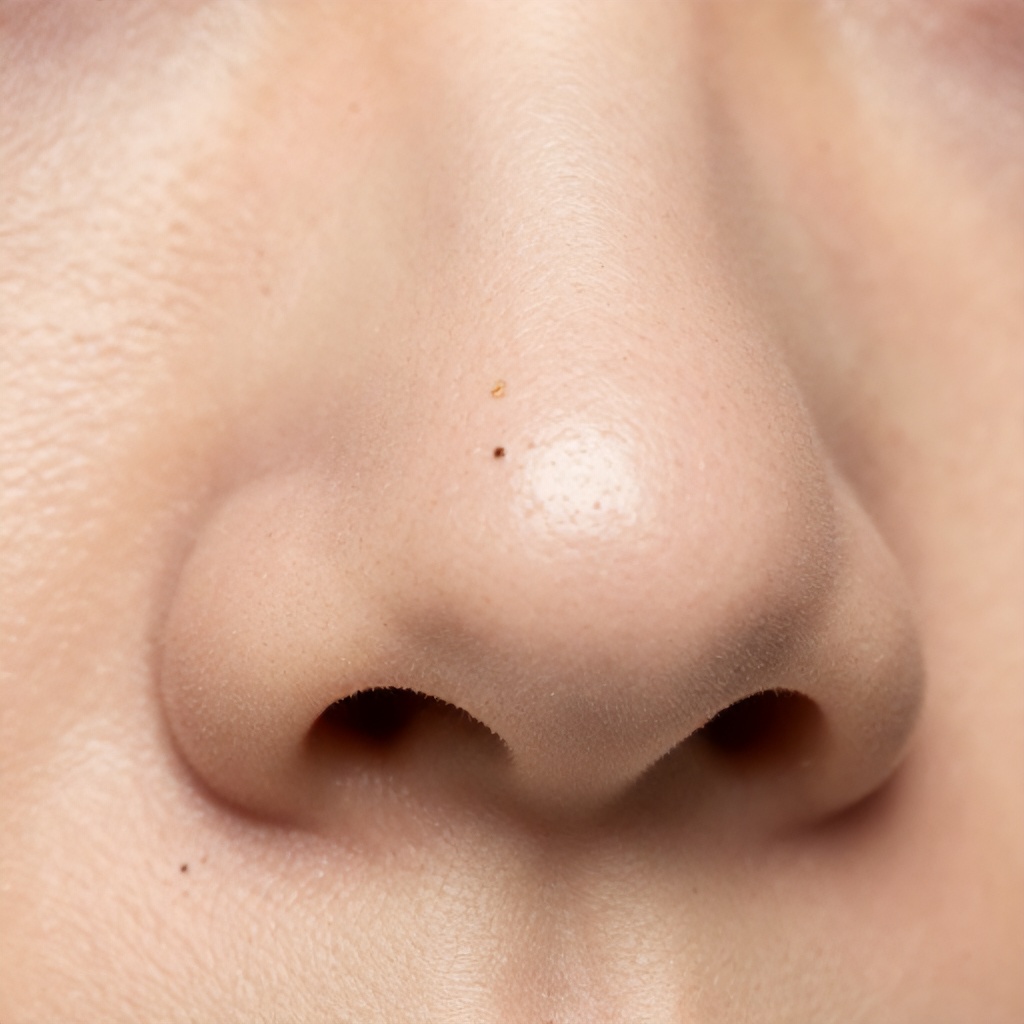
The Reality of Nose Pores and Blackhead Formation

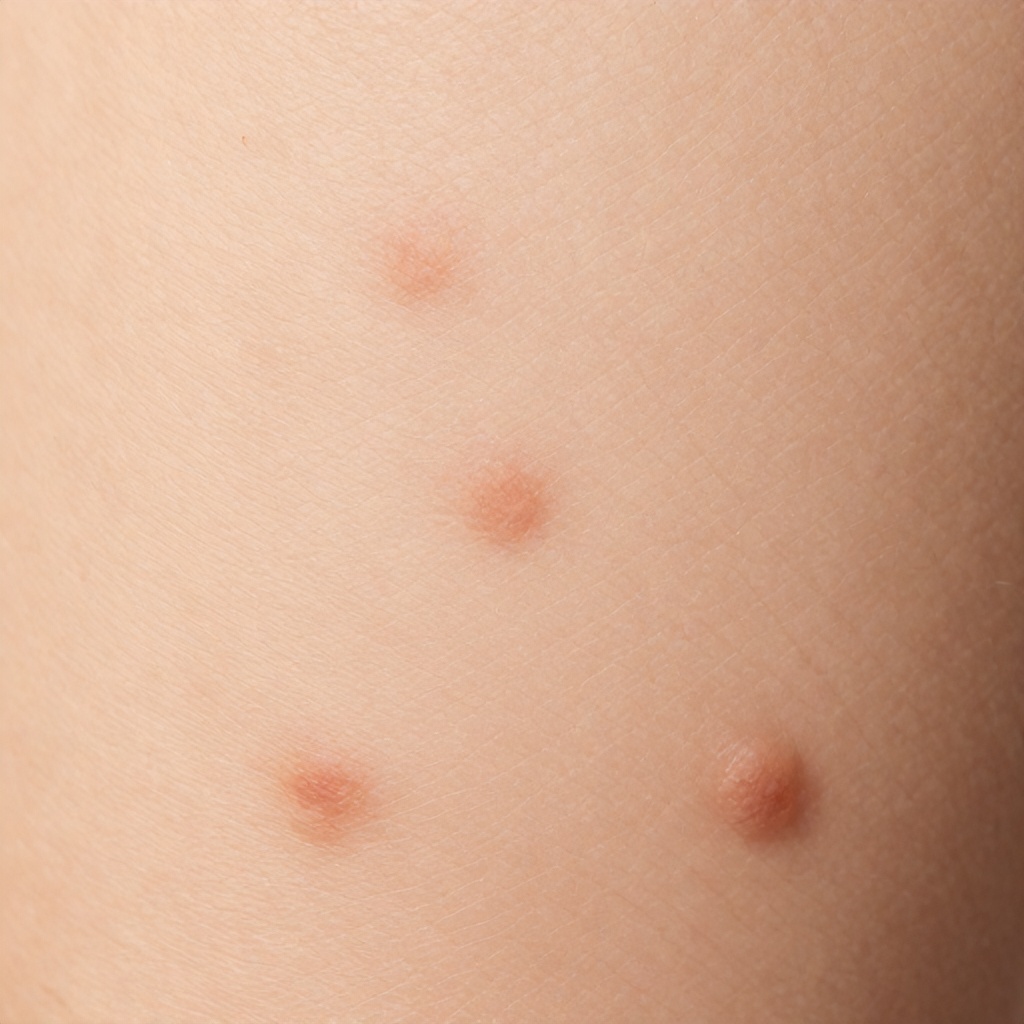
Nose pores and blackheads result from a combination of excess sebum, dead skin cell buildup, and the natural oxidation process that occurs when these materials meet the air. This specific area of the face contains a higher density of sebaceous glands compared to the cheeks or forehead. Because these glands are more active, the likelihood of congestion increases significantly. When a pore becomes blocked, the trapped oil and skin cells form a plug. If the pore remains open at the surface, the oxygen in the atmosphere reacts with the melanin and oil, turning the plug dark. This is why they are called open comedones. They are not signs of poor hygiene or trapped dirt. They are simply the result of biological processes happening within the skin follicle.

Managing these concerns requires a consistent approach rather than a one-time fix. Many people mistake sebaceous filaments for blackheads, leading to over-cleansing or aggressive scrubbing. Sebaceous filaments are normal, functional parts of the skin that help channel oil to the surface. They usually appear as small, flat, tan or greyish dots. Real blackheads are raised, darker, and represent a true blockage. Distinguishing between the two is the first step toward achieving a clearer complexion without causing unnecessary irritation or inflammation.

Common Causes of Congestion on the Nose

Genetics play a massive role in how your pores behave. Some individuals naturally produce more oil, which leads to more frequent clogs. If your parents dealt with large pores or oily skin, you likely will too. This is not something you can change, but you can manage it. Hormonal fluctuations also trigger the sebaceous glands to go into overdrive. This is common during puberty, pregnancy, or different phases of the menstrual cycle. When oil production spikes, the skin cannot always shed dead cells fast enough to keep up. The result is a traffic jam inside the pore.

Environmental factors contribute heavily to skin texture. Humidity and heat can make oil feel thinner and more prone to spreading, while pollution can deposit microscopic particles on the skin surface. These particles mix with your natural oils to create a sticky film that traps debris. Diet is often debated, but some evidence suggests that high-glycemic foods may influence oil production in certain individuals. However, topical factors are usually more immediate. Using heavy, occlusive skincare products or comedogenic makeup can physically block the pore opening. This prevents the natural flow of sebum and leads to the formation of blackheads over time.

The Impact of Aging and Sun Damage

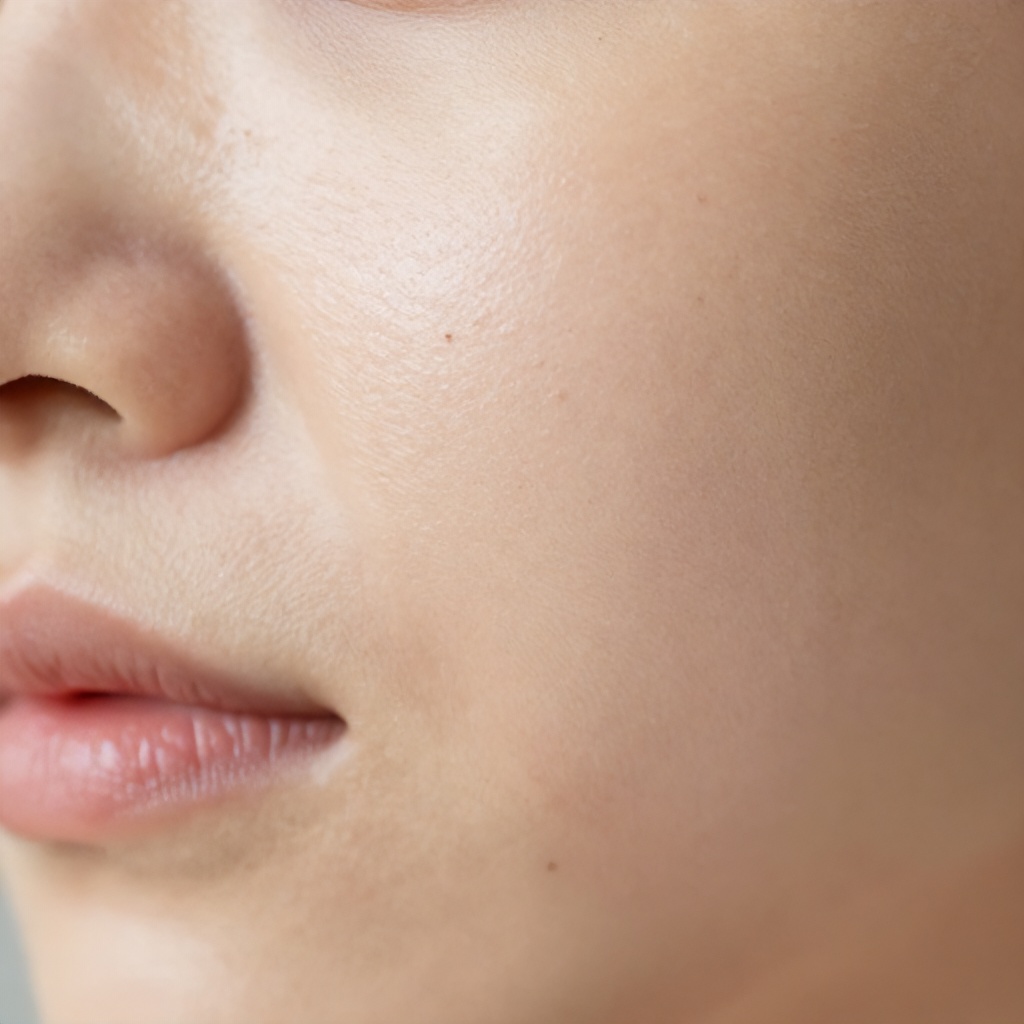
Pore size often appears to increase as we get older. This happens because the skin loses collagen and elastin, the proteins responsible for keeping the skin firm and bouncy. When the structure around a pore weakens, the pore sags and looks more visible. Sun damage accelerates this process. UV rays break down collagen fibers, leading to a loss of structural integrity. Protecting your skin from the sun is not just about preventing wrinkles; it is about maintaining the tightness of your pores. A damaged pore is more likely to collect debris and turn into a blackhead because it lacks the tension to keep itself clear.

Effective Ingredients for Clearer Skin

Salicylic acid is the gold standard for treating nose pores. It is a beta-hydroxy acid, or BHA, which means it is oil-soluble. Unlike alpha-hydroxy acids that work on the surface, salicylic acid can travel deep into the pore to dissolve the “glue” holding the clog together. It breaks down the mixture of oil and skin cells. Regular use of a BHA liquid or toner can significantly reduce the appearance of blackheads. Start slowly to avoid dryness. Using it two or three times a week is often enough for most skin types to see a difference without causing a compromised skin barrier.

Retinoids are another powerhouse for pore health. These vitamin A derivatives speed up cell turnover. By encouraging the skin to shed dead cells more efficiently, retinoids prevent the initial blockage from forming. They also help build collagen over time, which improves the overall texture and firmness of the skin. While often associated with anti-aging, retinoids are highly effective for acne-prone skin. They require patience, as results often take several weeks or months to become visible. Consistency is the most important factor when using these active ingredients.

Niacinamide and Clay

Niacinamide, also known as vitamin B3, is excellent for oil control. It helps regulate the amount of sebum the glands produce. It also has anti-inflammatory properties that soothe the redness often associated with congested skin. It works well with almost every other skincare ingredient, making it an easy addition to any routine. On the other hand, kaolin and bentonite clay masks offer a more immediate, temporary solution. These clays act like a vacuum, pulling excess oil from the surface of the skin. They are perfect for a weekly deep clean, especially if you have an oily T-zone. Just be sure not to let the mask dry until it cracks, as this can strip the skin of essential moisture and cause rebound oiliness.

A Practical Cleaning Routine

Facial cleansing is the foundation of any skincare routine. For those struggling with nose pores, double cleansing in the evening is a highly effective technique. Start with an oil-based cleanser or a cleansing balm. It might sound counterintuitive to put oil on oily skin, but oil dissolves oil. The balm breaks down makeup, water-resistant sunscreen, and the hardened sebum sitting in your pores. Massage it onto dry skin for at least sixty seconds, focusing on the sides of the nose. Rinse it off, then follow with a gentle, water-based gel or foam cleanser to remove any remaining residue. This ensures the skin is perfectly clean without being stripped of its natural moisture.

  1. Apply a cleansing oil to dry skin and massage gently for one minute.
  2. Emulsify the oil with a little warm water, then rinse thoroughly.
  3. Use a gentle pH-balanced cleanser to wash away any remaining impurities.
  4. Pat the skin dry with a clean towel; never rub harshly.
  5. Apply a BHA exfoliant to the nose area or the entire face.
  6. Follow with a lightweight, non-comedogenic moisturizer to seal in hydration.

Exfoliation should not be a daily ritual if you are using strong acids. Over-exfoliating can lead to a damaged skin barrier, which actually makes pores look worse. When the skin is irritated, it can become inflamed and swollen, making the pore openings appear larger. Balance is key. If your skin feels tight, red, or itchy, scale back on the actives. Focus on hydration with ingredients like hyaluronic acid or glycerin. Healthy, hydrated skin is more elastic and better at regulating its own oil production.

What to Avoid When Treating Pores

Pore strips are a popular but often damaging choice. These adhesive strips rip the top layer of sebaceous filaments and blackheads out of the skin. While the immediate result is satisfying, the effect is temporary. More importantly, the physical force can cause micro-tears in the skin and even lead to broken capillaries. The pores usually fill back up within a few days because the underlying cause of the oil production has not been addressed. Long-term use of pore strips can actually make pores appear larger by stretching them out or causing scarring around the follicle opening.

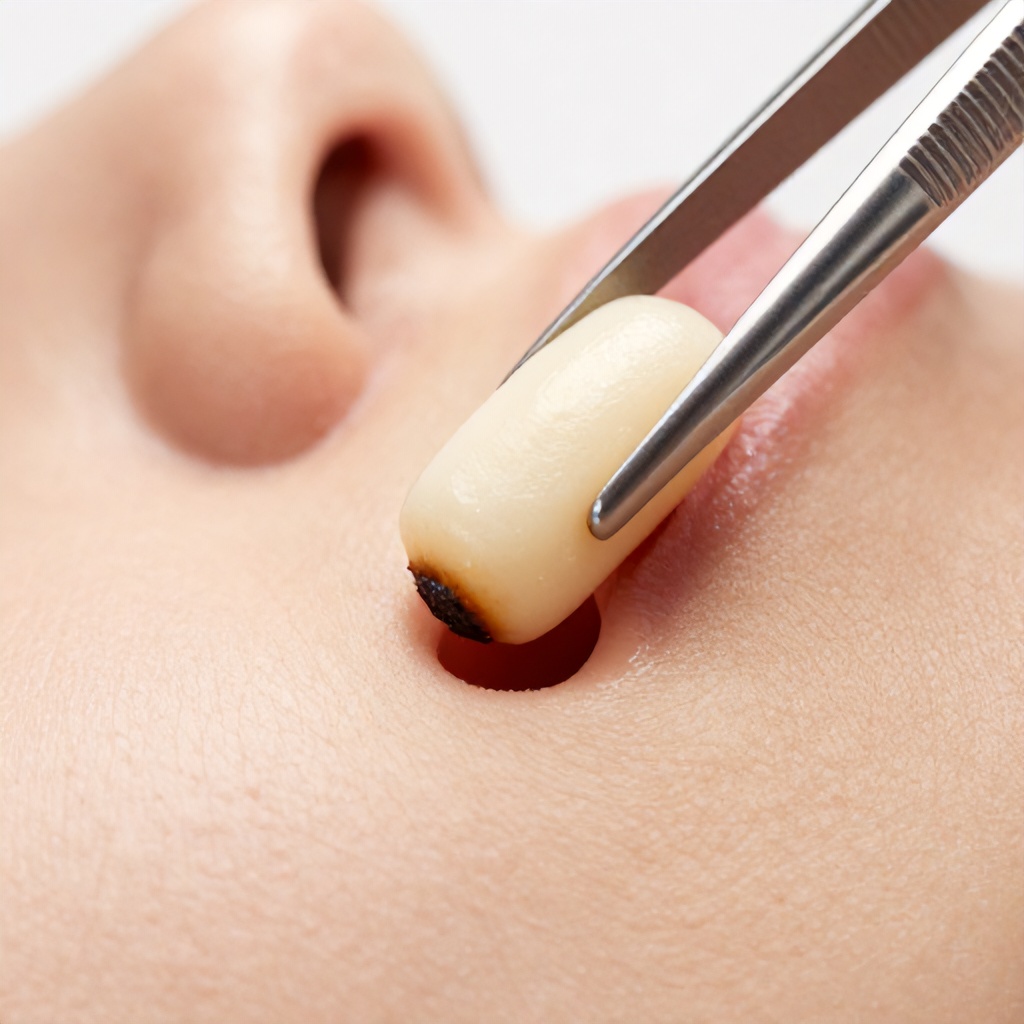
Picking and squeezing at home is another habit to break. Your fingers and nails carry bacteria that can easily turn a simple blackhead into a painful, inflamed pimple. The pressure applied during a DIY extraction can damage the pore wall, leading to permanent enlargement or scarring. If a blackhead is particularly stubborn, it is best to leave it to a professional esthetician or dermatologist. They use specialized tools and techniques to remove the clog without damaging the surrounding tissue. If you must do it at home, use a warm compress first to soften the skin and use very light pressure with clean cotton swabs, but even this carries risks.

The Myth of Shrinking Pores

It is a common misconception that you can permanently shrink your pores. Pore size is largely determined by genetics and skin structure. You cannot make them disappear, nor can you change their physical size with a single product. However, you can make them look smaller. When a pore is clear of debris and the surrounding skin is firm and hydrated, it reflects light more evenly. This creates the illusion of a smoother surface. Focus on “pore refinement” rather than “pore removal.” Using a primer with silicone or blurring ingredients can also help disguise the appearance of pores under makeup, but this is a cosmetic fix rather than a structural one.

Maintaining Results Long-Term

Consistency beats intensity every time. You do not need the strongest peel or the most expensive serum to see results. You need a routine that you can stick to every single day. Sunscreen is the most important part of this routine. By protecting your collagen, you are protecting the “scaffolding” that keeps your pores tight. Look for “non-comedogenic” labels on your sunscreens and moisturizers. This term means the product has been tested and is less likely to clog pores. While not a guarantee, it is a helpful guideline for those with congestion-prone skin.

Pay attention to how your skin changes with the seasons. You might need a more robust exfoliation routine in the humid summer months and a more hydrating, gentle approach in the winter. Skin is a living organ that reacts to its environment. If you notice an increase in blackheads, evaluate if you have introduced a new heavy cream or if you have been skipping your evening cleanse. Small adjustments often yield the best results. Clear skin is a marathon, not a sprint. By understanding the biology of your nose pores and treating them with gentle, effective ingredients, you can maintain a clear and healthy complexion.

  • Wash your face every night to remove the day’s buildup.
  • Use a BHA exfoliant 2-3 times per week.
  • Apply sunscreen daily to prevent collagen loss.
  • Avoid heavy, oil-based makeup if you are prone to clogs.
  • Keep your pillowcases clean to reduce bacteria transfer.
  • Hydrate from the inside out and use lightweight moisturizers.

Professional treatments like chemical peels or hydrafacials can provide a deeper level of cleaning than at-home routines. These treatments often use professional-grade acids and suction technology to clear out pores. They are excellent for a “reset” every few months. However, the work you do at home every morning and night is what truly sustains those results. Treat your skin with kindness. Aggression usually leads to more problems, while a steady, thoughtful routine leads to the smooth, clear skin you are looking for. Focus on the health of your skin barrier, and the appearance of your pores will naturally improve as a result.

Nose pores are a natural part of your anatomy. They serve a purpose by allowing oil to reach the surface and keep your skin lubricated. While they can be frustrating when they become visible or clogged, they are manageable. By using the right ingredients like salicylic acid and retinoids, and avoiding damaging habits like picking or using harsh strips, you can keep your skin looking its best. Clearer skin is achievable through patience, the right products, and a bit of scientific understanding.

Identifying Irregular Skin Growths and Lesions: A Visual Guide

Understanding Your Skin: A Visual Guide to Irregular Growths and Lesions

Keeping an eye on your skin is one of the simplest yet most effective ways to monitor your overall health, and spotting irregular skin growths and lesions early can make a significant difference.

Our skin is our largest organ, a dynamic barrier protecting us from the outside world. It’s constantly renewing itself, but sometimes, things can go a little awry. These changes can manifest as various skin abnormalities, from subtle shifts in color to noticeable skin elevations. Recognizing what’s normal for your skin and what might warrant a closer look is key to proactive skin health.

What Are Irregular Skin Growths and Lesions?

Broadly speaking, irregular skin growths and lesions encompass any change on the skin that deviates from its usual appearance. This can include anything from a new mole that looks different from your others to a persistent rash or a raised growth that appears suddenly.

Think of your skin as a canvas. Most of the time, it’s a consistent texture and color. Then, a new mark appears – a lesion. Some lesions are harmless and temporary, like a pimple or a bruise. Others, however, can be more persistent or exhibit characteristics that suggest they need a medical evaluation. These are the ones we need to pay attention to.

These skin abnormalities can vary widely in appearance. They might be a change in skin texture, a patch of skin discoloration, a new skin mass, or even a simple skin bump that doesn’t behave like a typical one. Understanding the nuances of these changes is the first step in effective lesion identification.

Why Vigilance Matters: Early Detection of Skin Pathology

The primary reason for being aware of your skin is the potential for early detection of serious dermatological conditions, most notably skin cancer. While not all irregular growths are cancerous, some, like melanoma, can be aggressive if not identified and treated promptly.

Regular skin screening, whether done by yourself or a dermatologist, is not about scaring yourself. It’s about empowerment. Knowing your skin allows you to recognize when something is out of the ordinary. This proactive approach can lead to earlier diagnosis and treatment, which often translates to better outcomes and less invasive interventions.

When we talk about skin pathology, we’re referring to the study of diseases affecting the skin. Many of these conditions are benign, but some require medical attention. A keen eye for skin irregularities is your first line of defense.

The ABCDEs of Atypical Moles: A Practical Self-Exam Tool

One of the most common concerns when it comes to irregular skin growths is the appearance of atypical moles. While not all moles are a cause for alarm, certain characteristics can signal that a mole might be suspicious and needs to be checked by a dermatologist. The ABCDEs are a widely used mnemonic to help you remember what to look for during a self-exam.

Asymmetry

Normal moles are usually symmetrical. If you draw a line through the middle of a mole, both halves should look roughly the same. An atypical mole, however, might be asymmetrical. One half might be different in shape or size from the other.

Imagine folding a piece of paper with a drawing on it. If the drawing is symmetrical, the two sides will match perfectly when folded. If it’s asymmetrical, they won’t align. Apply this concept to your moles. Look for those that are lopsided or uneven.

Border

The borders of a typical mole are usually smooth and well-defined. They have a clear edge that separates them from the surrounding skin.

An irregular skin growth, particularly a suspicious lesion, might have borders that are blurred, notched, scalloped, or ragged. These uneven edges can be a sign that the cells within the mole are not growing in a uniform pattern.

Color

Most moles are a single shade of brown. Some variations are normal, but significant color changes can be a warning sign.

Look for moles that have multiple colors or shades within them. This could include different shades of brown, tan, black, or even patches of red, white, or blue. Such variations in pigmentation changes can indicate that the mole is developing atypically.

Diameter

While moles can vary in size, most melanomas are larger than 6 millimeters (about the size of a pencil eraser) when diagnosed. However, they can be smaller, so this isn’t the only factor to consider.

Pay attention to any mole that is significantly larger than others or that has grown noticeably over time. Even if it doesn’t fit other ABCDE criteria, a large, new or changing mole warrants attention.

Evolving

This is perhaps the most critical factor. Any change in a mole’s size, shape, color, elevation, or any new symptom such as bleeding, itching, or crusting, is a significant warning sign. Your skin is telling you something is changing.

Evolving means changing. If a mole starts to look different from how it did a few weeks or months ago, it’s time to get it checked. This includes a change in its skin texture, becoming raised, or developing a new skin elevation. Even subtle shifts in its appearance can be important.

Beyond Moles: Other Types of Irregular Skin Growths

While moles are a common focus, irregular skin growths and lesions can take many other forms. It’s helpful to be aware of these as well, as they can also indicate underlying dermatological conditions.

Actinic Keratoses (AKs)

These are rough, scaly patches on the skin that develop from years of sun exposure. They are considered precancerous and can sometimes develop into squamous cell carcinoma.

AKs often feel like sandpaper and can be reddish-brown or flesh-colored. They are more common on sun-exposed areas like the face, ears, scalp, and hands. Their skin surface irregularities are a key characteristic.

Seborrheic Keratoses (SKs)

These are common, noncancerous skin growths that often appear in middle-aged and older adults. They can look like warts or waxy brown, black, or light tan growths.

SKs typically have a “stuck-on” appearance and can vary in size. While usually benign, they can sometimes be mistaken for other lesions, so a clinical assessment is always a good idea if you’re unsure.

Skin Cysts

Cysts are closed sacs that develop under the skin. They are usually benign and filled with fluid, pus, or other material. They can appear as smooth, movable lumps.

While most cysts are harmless, any new or rapidly growing lump should be evaluated to rule out other possibilities.

Skin Tags

These are small, soft, flesh-colored growths that hang off the skin. They are benign and often found in areas where skin rubs against skin or clothing, such as the neck, armpits, and groin.

Skin tags are generally not a cause for concern, but if one becomes irritated or bothersome, it can be easily removed by a healthcare professional.

Rashes and Inflammation

While not always a “growth,” persistent or unusual rashes can also be considered skin abnormalities. Erythema, or skin redness, can be a sign of inflammation or infection. Some rashes can be indicative of allergic reactions, autoimmune conditions, or even infections that require treatment.

If you develop a rash that is widespread, itchy, painful, or doesn’t go away with home care, it’s wise to seek medical advice. This is especially true if there are accompanying symptoms like fever or blistering.

When to Seek Professional Help: The Dermatological Examination

Self-examination is a powerful tool, but it’s not a substitute for professional medical advice. A dermatological examination by a qualified dermatologist is the best way to get an accurate diagnosis and peace of mind.

Your dermatologist can perform a thorough visual inspection and, if necessary, a biopsy. A biopsy involves taking a small sample of the skin growth or lesion to be examined under a microscope. This is the definitive way to determine if a lesion is cancerous or benign.

Don’t hesitate to make an appointment if you notice any of the following:

  • A new mole or skin lesion that appears suddenly.
  • A mole that is changing in size, shape, color, or texture (evolving).
  • A lesion that bleeds, itches, or is painful.
  • A sore that doesn’t heal.
  • Any skin abnormality that concerns you, even if it doesn’t fit the ABCDE criteria.

Regular skin screening is an essential part of maintaining good skin health. Think of it as a routine check-up for your body’s largest organ.

Tips for Effective Skin Self-Exams

Making skin self-exams a regular habit can significantly improve your ability to detect changes early. Aim to do a thorough exam once a month.

  1. Find a well-lit room: Natural light is best.
  2. Use a full-length mirror and a hand-held mirror: This allows you to see all areas of your body.
  3. Start from head to toe: Systematically examine your entire skin surface.
  4. Examine your scalp: Part your hair to check your scalp.
  5. Check your face: Pay close attention to your ears, nose, mouth, and eyelids.
  6. Inspect your neck, chest, and abdomen: Look for any new spots or changes.
  7. Examine your arms and hands: Include the palms, under your fingernails, and between your fingers.
  8. Check your back and buttocks: Use the hand-held mirror to see these areas.
  9. Inspect your legs and feet: Don’t forget the soles of your feet, between your toes, and under your toenails.
  10. Examine your genital area: Be thorough here as well.

It’s also helpful to have a partner or family member assist you with areas that are difficult to see, such as your back. They can help identify any skin masses or irregularities you might miss.

Maintaining Healthy Skin

While vigilance is important, preventing excessive sun damage is crucial for reducing your risk of developing irregular skin growths and lesions. This includes:

  • Sun Protection: Wear sunscreen with an SPF of 30 or higher daily, even on cloudy days. Seek shade during peak sun hours (10 a.m. to 4 p.m.). Wear protective clothing, including hats and sunglasses.
  • Avoid Tanning Beds: Tanning beds emit harmful UV radiation that significantly increases your risk of skin cancer.
  • Moisturize: Keeping your skin hydrated can help maintain its barrier function.
  • Healthy Lifestyle: A balanced diet and adequate hydration contribute to overall skin health.

Your skin health is an ongoing process. By understanding what to look for, performing regular self-exams, and seeking professional advice when needed, you are taking powerful steps to protect yourself.

Effective Home Remedies for Removing Facial Blackheads and Minimizing Pores

Tackling facial blackheads and minimizing the appearance of enlarged pores at home is entirely achievable with consistent, gentle skincare practices and a few well-chosen natural remedies that support overall skin health.

Understanding Blackheads and Pores

Before we dive into solutions, it helps to understand what we’re dealing with. Blackheads, medically known as open comedones, are a common type of acne lesion. They form when hair follicles on your skin become clogged with dead skin cells and excess sebum, which is your skin’s natural oil. Unlike whiteheads, blackheads have an open surface, exposing the trapped mixture to air. This exposure causes oxidation, turning the plug a dark, almost black color – hence the name. They are not dirt, so scrubbing harder won’t make them disappear; in fact, it can irritate your skin further.

Pores, on the other hand, are tiny openings on the surface of your skin that allow sweat and sebum to reach the surface. Everyone has pores. Their size is largely determined by genetics, but they can appear larger due to several factors. Clogged pores, accumulation of dead skin cells, sun damage, and a decrease in skin elasticity over time can all make pores seem more prominent. While you can’t permanently shrink pores, you can certainly minimize their appearance and improve overall skin texture through effective skincare.

Foundational Skincare for Clearer Skin

Any effective blackhead removal or pore minimization strategy starts with a solid, consistent skincare routine. These foundational steps are crucial for maintaining skin health and preventing future issues.

Gentle Cleansing

Washing your face twice a day – once in the morning and once before bed – is non-negotiable. Use a mild, pH-balanced cleanser that won’t strip your skin of its natural oils. Over-cleansing or using harsh products can actually trigger your skin to produce more oil, exacerbating blackhead formation. Focus on a gentle touch, using your fingertips to massage the cleanser onto your face in circular diagrams, then rinse thoroughly with lukewarm water. This helps keep the skin clean without causing irritation.

Exfoliation is Key

Exfoliation helps remove dead skin cells that can clog pores and contribute to blackheads. There are two main types: physical and chemical.

  • Physical Exfoliation: This involves using a scrub with fine particles or a soft brush to manually slough off dead skin. When choosing a scrub, opt for one with very fine, smooth particles to avoid micro-tears in your skin. Overly harsh scrubs can do more harm than good. Limit physical exfoliation to 1-2 times a week.
  • Chemical Exfoliation: This uses acids to dissolve the bonds between dead skin cells, allowing them to shed more easily. Alpha Hydroxy Acids (AHAs) like glycolic or lactic acid are great for surface exfoliation, improving skin texture. Beta Hydroxy Acids (BHAs) like salicylic acid are oil-soluble, meaning they can penetrate into the pore lining to dissolve sebum and dead skin cells, making them particularly effective for blackhead removal and minimizing pores. Look for cleansers, toners, or serums containing salicylic acid and use them as directed, usually a few times a week.

Moisturize Regularly

Even oily or acne-prone skin needs moisture. Dehydrated skin can produce more oil to compensate, leading to more clogged pores. Choose a lightweight, non-comedogenic moisturizer that won’t block your pores. Apply it after cleansing and any treatment steps to keep your skin hydrated and support its natural barrier function.

Sun Protection

Sun exposure can damage collagen, which supports the structure around your pores, making them appear larger. It can also contribute to hyperpigmentation and overall skin damage. Always apply a broad-spectrum sunscreen with at least SPF 30 every morning, even on cloudy days. This protects your skin and helps maintain a smoother appearance.

Effective Home Remedies for Blackhead Removal

With a solid foundation in place, you can incorporate targeted home remedies to address facial blackheads and improve your skin’s appearance. Remember to always patch test any new remedy on a small, inconspicuous area of your skin before applying it all over your face, especially if you have sensitive skin.

Clay Masks

Clay masks are fantastic for drawing out impurities and excess oil from the skin. Bentonite clay and kaolin clay are popular choices. They work by absorbing toxins and sebum, helping to deeply cleanse the pores. This treatment method can significantly improve skin clean and reduce the appearance of blackheads.

  1. Mix 1 tablespoon of clay powder with enough water or apple cider vinegar to form a smooth topical paste.
  2. Apply the paste evenly to your clean face, focusing on areas with blackheads.
  3. Let it sit for 10-15 minutes, or until it dries.
  4. Rinse thoroughly with lukewarm water.
  5. Use 1-2 times a week.

Oatmeal Scrub

Oatmeal is a gentle yet effective physical exfoliant. It’s soothing and anti-inflammatory, making it suitable for most skin types. This can help gently dislodge the trapped material in blackheads and refine skin texture.

  1. Grind 2 tablespoons of plain, uncooked oats into a fine powder.
  2. Mix with enough water, milk, or plain yogurt to create a thick paste.
  3. Gently massage the paste onto your damp face in circular motions for 1-2 minutes.
  4. Leave on for another 5-10 minutes as a mask.
  5. Rinse off with lukewarm water.
  6. Use 1-2 times a week.

Honey and Lemon Mask

Honey is a natural antibacterial and humectant, meaning it draws moisture to the skin. Lemon juice contains alpha hydroxy acids and acts as a natural astringent, helping to tighten pores and brighten the skin. This combination can be a great treatment for blackheads and overall skin health.

  1. Mix 1 tablespoon of raw honey with 1 teaspoon of fresh lemon juice.
  2. Apply the mixture to your face, avoiding the eye area.
  3. Leave it on for 15-20 minutes.
  4. Rinse with lukewarm water.
  5. Use 2-3 times a week. (Note: Lemon juice can increase sun sensitivity, so always apply sunscreen afterward.)

Egg White Mask

Egg whites can temporarily tighten the skin and absorb excess oil, which can help pull out blackheads and make pores appear smaller. This is a classic beauty tip for a quick refresh.

  1. Separate one egg white from the yolk.
  2. Whisk the egg white lightly until it’s frothy.
  3. Apply a thin layer to your clean face.
  4. Place a thin piece of tissue paper or toilet paper over the wet egg white, pressing it gently onto your skin.
  5. Apply another layer of egg white over the tissue.
  6. Let it dry completely (about 15-20 minutes). You’ll feel a tightening sensation.
  7. Gently peel off the mask, then rinse your face with lukewarm water.
  8. Use once a week.

Apple Cider Vinegar Toner

Apple cider vinegar (ACV) is a natural astringent that can help balance skin pH, reduce oiliness, and mildly exfoliate. Its acidic nature can help break down the bonds that hold dead skin cells together, contributing to the removal of facial blackheads and refining skin texture.

  1. Dilute raw, unfiltered apple cider vinegar with water in a 1:3 ratio (1 part ACV to 3 parts water).
  2. After cleansing, soak a cotton pad with the diluted solution.
  3. Gently wipe your skin with the cotton pad, focusing on areas with blackheads and enlarged pores.
  4. Let it air dry, then follow with your moisturizer.
  5. Use once a day or every other day, depending on your skin’s tolerance.

Green Tea Compress

Green tea is packed with antioxidants and anti-inflammatory compounds. Applying it topically can help reduce inflammation, fight bacteria, and potentially shrink the appearance of pores by tightening the skin. This is a soothing treatment method for overall skin health.

  1. Brew a cup of strong green tea and let it cool completely.
  2. Soak a clean cotton pad or a soft cloth in the cooled tea.
  3. Apply the compress to your face for 10-15 minutes.
  4. Rinse with cool water.
  5. Use daily for best results.

Home Remedies for Minimizing Pore Appearance

While blackhead removal often leads to pores appearing smaller, some remedies specifically target the temporary tightening effect that makes pores less noticeable.

Ice Cubes

This is a quick and easy trick to temporarily tighten skin and reduce the appearance of enlarged pores. The cold constricts blood vessels and can make pores look smaller almost instantly.

  1. Wrap an ice cube in a thin cloth or paper towel.
  2. Gently glide it over your clean face for 15-30 seconds, focusing on areas with larger pores.
  3. Do this after cleansing and before applying other skincare products.

Aloe Vera

Aloe vera is known for its soothing, hydrating, and healing properties. It can help tighten pores, improve skin elasticity, and reduce inflammation, contributing to a smoother skin texture and appearance.

  1. Apply a thin layer of pure aloe vera gel to your face after cleansing.
  2. Leave it on for 15-20 minutes, or even overnight.
  3. Rinse with cool water if desired, or leave it as a light moisturizer.
  4. Use daily.

Witch Hazel

Witch hazel is a natural astringent that can help remove excess oil, reduce inflammation, and temporarily tighten pores. It is often found in toners and can be a beneficial addition to your skincare for cosmetic concerns.

  1. After cleansing, apply a small amount of alcohol-free witch hazel to a cotton pad.
  2. Gently wipe your skin with the cotton pad.
  3. Follow with your regular moisturizer.
  4. Use once or twice daily.

Facial Steaming

Steaming your face helps to open up pores, making it easier for blackheads to be gently extracted or for masks to work more effectively. It softens the skin and loosens the hardened sebum within the pores, preparing the skin for deeper cleaning. This isn’t a direct pore minimizer, but it’s a useful step in the removal process.

  1. Fill a bowl with hot (but not boiling) water.
  2. Drape a towel over your head, creating a tent over the bowl.
  3. Position your face 8-12 inches above the water, keeping your eyes closed.
  4. Steam your face for 5-10 minutes.
  5. After steaming, gently cleanse your face or apply a clay mask for enhanced blackhead removal.

Important Considerations for Long-Term Skin Health

Achieving clear skin and minimized pores isn’t just about applying remedies; it’s about adopting healthy habits and understanding when to seek professional help.

Consistency is Key

Home remedies and skincare routines require patience and consistency. You won’t see dramatic results overnight. Stick with your chosen methods for several weeks to truly evaluate their effectiveness. Regular application, like using a topical paste or wiping skin with a cotton pad daily, makes a difference.

Diet and Hydration

What you put into your body can reflect on your skin. A balanced diet rich in fruits, vegetables, and whole grains, along with adequate water intake, supports healthy skin from the inside out. Staying hydrated helps maintain skin elasticity and overall skin health. Limiting processed foods, excessive sugar, and dairy might also benefit some individuals.

Avoid Picking and Squeezing

Resist the urge to pick, squeeze, or manually extract blackheads, especially without proper tools and technique. This can push bacteria deeper into the skin, lead to inflammation, scarring, and even more prominent pores. Leave extractions to a professional dermatologist or esthetician if you feel they are necessary. Magnified views of skin show how delicate the pore structure is, and improper handling can cause lasting damage.

Patch Testing

Always, always patch test any new product or home remedy on a small, inconspicuous area of your skin (like behind your ear or on your inner arm) before applying it to your entire face. Wait 24-48 hours to check for any adverse reactions like redness, itching, or irritation. This is a critical step, especially for those with sensitive skin or cosmetic concerns.

When to See a Professional

While home remedies are effective for many, some blackheads or pore issues might require professional intervention. If your blackheads are persistent, widespread, or accompanied by other forms of acne (like cysts or nodules), consulting a dermatologist is a wise step. They can offer stronger topical treatments, prescription medications, or in-office procedures like chemical peels or microdermabrasion, providing a more targeted treatment method for severe cases. A dermatologist can provide an informational graphic or close-up images to explain your specific skin condition and the best course of action for blackhead removal and minimizing pores.

Professional Extraction of a Large Solid Skin Plug Using Metal Tweezers

Professional Extraction of a Large Solid Skin Plug

Professional extraction of a large solid skin plug requires sterile metal tweezers and a steady hand to prevent scarring or infection. This dermatological extraction focuses on removing a hardened mass of sebum and dead skin cells that has become wedged within a follicle. When these materials compact over time, they form a dense, waxy obstruction known as a sebaceous plug or a large comedone. Unlike a soft whitehead, a solid plug has lost its moisture, making it a physical barrier that the skin cannot easily expel on its own. A licensed aesthetician or dermatologist uses specific manual extraction techniques to clear this congestion without damaging the surrounding epidermal treatment area.

Understanding the Nature of a Sebaceous Plug

A sebaceous plug starts as a simple mixture of oil and skin cells. Your skin naturally produces sebum to stay lubricated. Sometimes, this oil gets trapped. It mixes with keratin. It thickens. As the plug sits in the pore, it is exposed to air, which causes the top to oxidize and turn dark, resulting in a blackhead. However, the bulk of the plug remains a solid, off-white or yellowish mass beneath the surface. This is skin congestion at its most stubborn. The follicle wall stretches to accommodate the growing mass. If left alone, the pressure can cause the pore to appear permanently enlarged or lead to a painful cyst if the wall ruptures.

These plugs often feel like small, hard grains under the skin. They do not respond to traditional foaming cleansers or light exfoliation because the blockage is too deep and too dense. The material has become a solidified “core” that requires physical intervention. Professional skincare experts identify these by their raised texture and the slight discoloration of the pore opening. They are common on the nose, chin, and back, where sebaceous glands are most active and numerous.

The Essential Professional Toolkit

Precision is the primary requirement for a successful skin blemish removal. Professionals do not use their fingernails. Fingernails are blunt. They carry bacteria. Instead, a clinical environment utilizes medical-grade tweezers and precision forceps designed specifically for the task. These tools are usually made of high-quality stainless steel that can be autoclaved or chemically sterilized between uses. The tips are incredibly fine, often tapering to a point thinner than a human hair. This allows the practitioner to grip only the plug itself, avoiding unnecessary trauma to the healthy skin nearby.

There are different shapes of tweezers used in a professional skincare setting. Curved tweezers are popular for pulling plugs from rounded areas like the crease of the nostril. Straight, pointed forceps allow for a direct, vertical pull on very deep pore extraction sites. Some aestheticians also use a comedone extractor, which features a small metal loop, but for a truly solid, large plug, tweezers provide the grip necessary to lift the entire mass out in one piece. Using the wrong tool often results in the plug snapping, leaving a portion behind to cause further inflammation.

Sanitation and Safety Protocols

Safety starts with a clean field. The practitioner wears sanitary gloves to prevent the transfer of oils and pathogens. The skin is prepped with an antiseptic solution, such as isopropyl alcohol or a specialized pre-extraction fluid. This ensures that when the pore is opened, no surface bacteria can enter the empty follicle. Every tool is removed from a sterile pouch right before the procedure begins. Maintaining a clinical environment is what separates a professional service from a risky at-home attempt.

The Step-by-Step Extraction Process

The procedure begins with softening the skin. A professional will often use a facial steamer or a warm compress for several minutes. Heat expands the pore opening and softens the hardened sebum. This makes the plug more pliable. Without this step, the plug remains brittle. It might resist removal. Some practitioners also apply a desincrustation gel, which uses an alkaline pH to further liquefy the outer edges of the blockage. Once the skin is prepped, the extraction can proceed.

  1. The aesthetician positions a magnifying lamp over the area to see the exact boundaries of the plug.
  2. Using the tips of the precision forceps, they apply gentle, downward pressure around the perimeter of the pore.
  3. As the top of the plug begins to emerge, the tweezers grip the exposed edge firmly but carefully.
  4. The practitioner uses a slow, steady pulling motion. They do not jerk or twist.
  5. The entire solid mass is lifted out of the follicle, often leaving a temporary, clean “crater” in the skin.
  6. The area is immediately dabbed with a soothing, antibacterial toner to close the site and reduce redness.

The sensation for the client is usually one of intense pressure followed by immediate relief. Unlike popping a pimple, which involves explosive force, a professional extraction is a controlled lift. The goal is follicle clearing with zero blood and minimal redness. If the plug is particularly large, the aesthetician may work in stages, loosening the edges before the final pull. This patience prevents the skin from tearing.

Why Extraction Content Goes Viral

The rise of the viral skincare video has brought professional extractions into the mainstream. Millions of people watch macro skincare photography and high-definition recordings of these procedures. There is a psychological phenomenon behind this. It is often described as “satisfying.” Seeing a physical obstruction removed from a clean, clinical setting provides a sense of order and resolution. It triggers a release of dopamine for many viewers. This reaction content has turned simple dermatology tools into recognizable icons of the “skin-fluencer” world.

Social media formats favor the “before and after” impact. A large, dark pore suddenly becoming clean and empty is a powerful visual. However, these videos often skip the hours of preparation and the strict aftercare required. While they are fascinating to watch, they can sometimes give the false impression that extraction is easy or should be done by anyone with a pair of tweezers. The reality is that the “satisfying extraction” seen on screen is the result of years of training in manual extraction techniques.

The Role of Macro Photography

Macro lenses allow viewers to see the texture of the skin in ways the naked eye cannot. You can see the individual flakes of keratin. You can see the way the metal tweezers interact with the epidermal layers. This level of detail highlights the complexity of the skin. It shows that a pore is not just a hole, but a complex, living structure. High-definition footage also helps students of aesthetics learn the subtle cues of when a plug is ready to be pulled and when it needs more softening.

Risks of At-Home Interference

Attempting to remove a large solid skin plug at home is risky. Most household tweezers are not sharp enough. They are often contaminated with bathroom bacteria. When a person squeezes their skin with blunt tools or fingers, they apply lateral pressure. This pressure can push the plug deeper into the dermis. If the follicle wall breaks underground, the sebum and bacteria spill into the surrounding tissue. This leads to a localized infection, a painful nodule, or a permanent scar. What started as a simple clogged pore can turn into a month-long skin crisis.

Hyperpigmentation is another major concern. Forcing an extraction causes trauma. The skin responds by producing excess melanin as a protective measure. This leaves a dark spot that can take months to fade. Professionals know how to apply pressure in a way that avoids triggering this inflammatory response. They also know when to stop. If a plug does not budge with gentle professional pressure, a dermatologist may choose to use a tiny lancet or recommend a topical treatment instead of forcing it.

Post-Extraction Skin Recovery

After the plug is gone, the skin needs to heal. The empty follicle is vulnerable. A professional will typically apply a high-frequency wand or a targeted LED light treatment. High-frequency tools use a glass electrode to generate oxygen, which kills bacteria and calms the skin. Blue light therapy is also common for its antimicrobial properties. These steps ensure that the “satisfying extraction” doesn’t result in a new breakout the next day.

At home, the client must follow a strict regimen for the next forty-eight hours. This includes avoiding heavy makeup and intense sweating. The skin should be treated with gentle, non-comedogenic moisturizers. Ingredients like centella asiatica or niacinamide are excellent for soothing the area. It is also vital to use sun protection. The freshly cleared pore is sensitive to UV damage, which can lead to those aforementioned dark spots. Healing usually takes three to five days, after which the pore will naturally shrink back to its original size.

Long-Term Pore Maintenance

Preventing the return of solid skin plugs involves consistent follicle clearing. You cannot change your pore size, but you can change what is inside them. Chemical exfoliants are the best defense. Salicylic acid is oil-soluble, meaning it can get inside the pore to dissolve the “glue” that holds sebum and dead skin together. Using a 2% BHA liquid twice a week can keep the sebum fluid, preventing it from hardening into a plug. This reduces the need for frequent manual extractions.

Retinoids also play a massive role in skin health. They speed up cell turnover. This prevents dead skin cells from lingering long enough to clog the follicle. When combined with a double-cleansing routine—using an oil-based cleanser followed by a water-based one—the skin stays clear and balanced. Oil cleansers are particularly effective at breaking down surface sebum so it doesn’t accumulate. Consistency is the key to avoiding the deep-seated congestion that requires professional intervention.

Choosing Professional Aesthetician Services

When looking for a professional to handle extractions, check their credentials. Look for a licensed aesthetician who specializes in “clinical facials” or “acne treatments.” Ask about their sterilization process. A good practitioner will be happy to explain how they clean their tools. They should also perform a thorough skin analysis before touching your face. If they try to force every single pore clear in one session, they may be too aggressive. A true professional prioritizes the long-term integrity of your skin over a single “satisfying” result.

Regular professional cleanings, perhaps once a month or once a quarter, can keep skin congestion under control. These sessions allow for the removal of small plugs before they become large, solid masses that are harder to extract. It is a proactive approach to beauty. By maintaining the health of the follicles, you ensure a smoother skin texture and a more radiant complexion. Professional extraction is a tool, but a solid daily routine is the foundation of clear skin.

Final Thoughts on Skin Health

The process of removing a solid skin plug is a blend of science and art. It requires an understanding of anatomy, a mastery of specialized tools, and a commitment to hygiene. While the visual of the extraction is what captures our attention on social media, the real value lies in the relief it provides to the skin. Clearing a blockage allows the skin to breathe and function normally again. It prevents future inflammation and helps maintain a youthful, healthy appearance. Respect your skin by choosing professional care for deep extractions and supporting it with a thoughtful, evidence-based routine at home.

Exit mobile version