Managing Visible Pores and Blackheads on Nose Skin Texture

Addressing Visible Pores and Blackheads on Your Nose

Visible pores and blackheads on your nose are common skin concerns that can impact your skin texture and overall complexion, but there are effective ways to manage them.

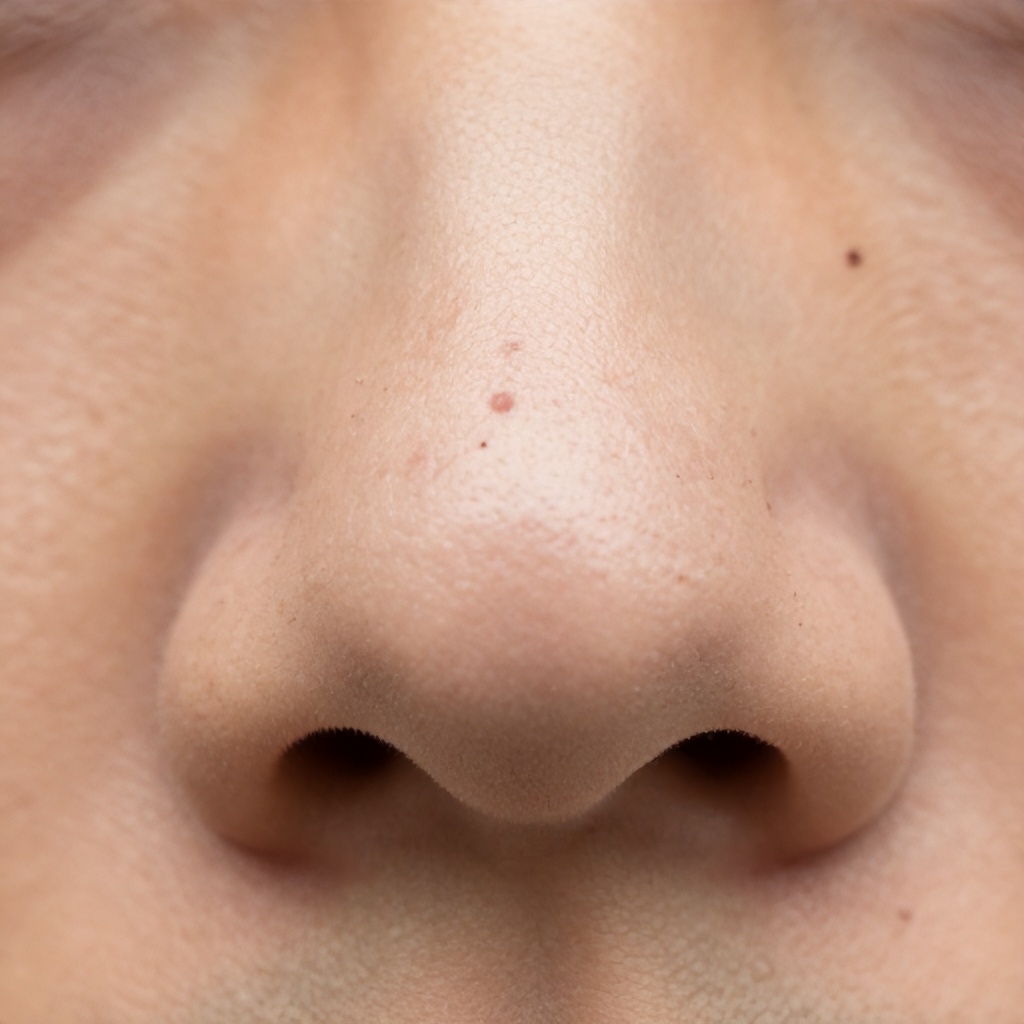
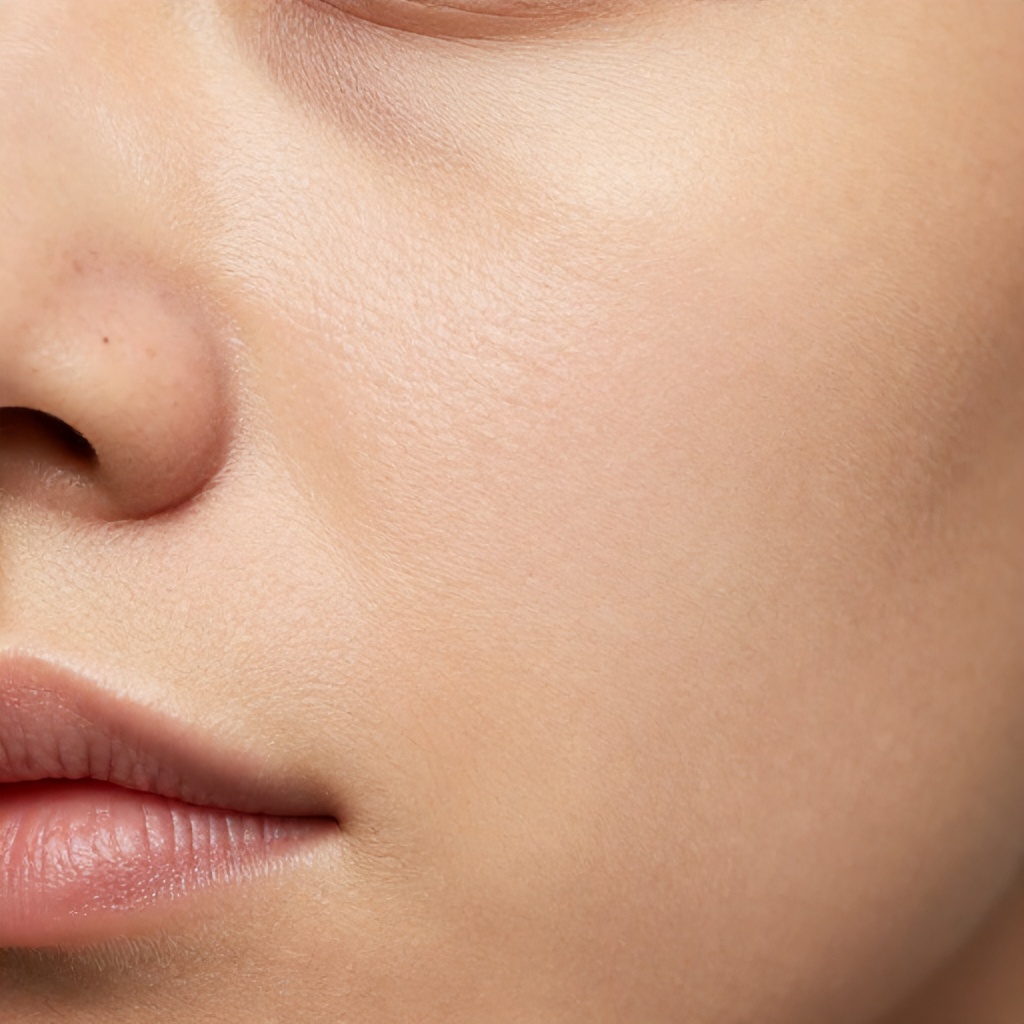
That bumpy, uneven skin surface on your nose, often peppered with tiny dark spots? It’s a familiar sight for many, and it’s usually a combination of enlarged pores and blackheads. These aren’t just cosmetic annoyances; they can make your facial skin feel less smooth and even. Understanding what causes them is the first step to smoother, clearer skin.

Understanding Visible Pores

Pores are simply the openings of hair follicles on your skin. They contain sebaceous glands that produce oil, also known as sebum. This oil is essential for keeping our skin moisturized and healthy. However, several factors can make these pores appear larger and more noticeable, especially on the nose, which tends to be oilier.

Why Do Pores Look Bigger?

Genetics play a significant role in pore size. If your parents have larger pores, you’re more likely to have them too. But it’s not just about what you inherit. The amount of sebum your sebaceous glands produce is another major factor. Oily skin types often have more prominent pores because the glands are more active.

As we age, our skin loses elasticity. Think of a stretched-out rubber band; it doesn’t spring back as tightly. The same happens to the skin around our pores. Collagen and elastin, the proteins that keep our skin firm and supple, break down over time. This loss of support can cause pores to sag and appear larger. Sun damage accelerates this process, further weakening the skin’s structure.

Anything that stretches or fills the pore can also make it look bigger. This includes excess oil, dead skin cells, and debris that can accumulate inside. When these clog the pore, they can cause it to distend.

The Scoop on Blackheads

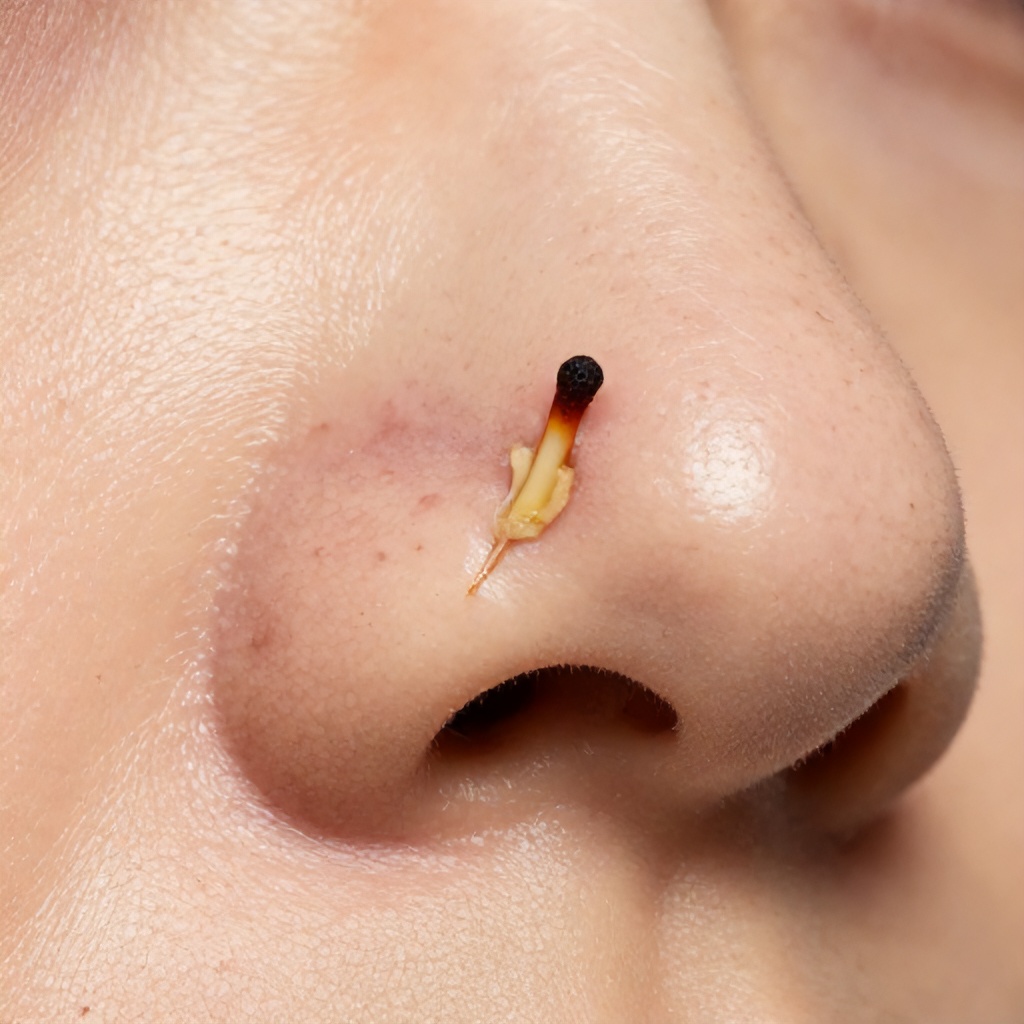
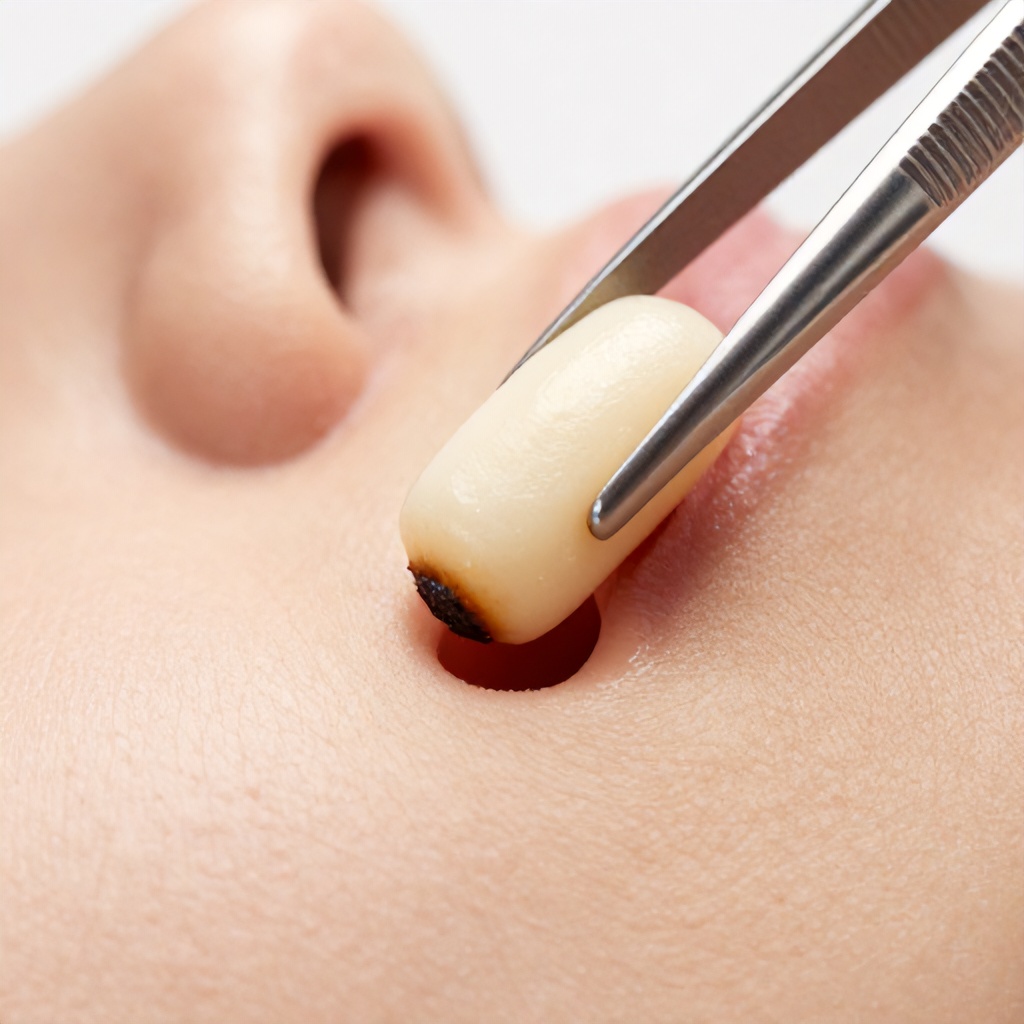
Blackheads, scientifically known as open comedones, are a type of non-inflammatory acne. They occur when a pore becomes clogged with a mixture of sebum (oil) and dead skin cells. The “black” color isn’t dirt, as many people believe. It’s the result of the trapped mixture oxidizing when it’s exposed to the air.

Sebaceous filaments are often mistaken for blackheads. These are naturally occurring structures within pores that help transport sebum to the skin’s surface. They often appear as tiny, grayish or yellowish dots. Unlike blackheads, they don’t have a hardened plug and are usually less noticeable. The key difference is that blackheads are solidified plugs that oxidize, while sebaceous filaments are the normal lining of the pore.

The nose area is particularly prone to both visible pores and blackheads due to a higher concentration of sebaceous glands. This means more oil production, creating a perfect environment for clogs and more prominent pore appearance.

Factors Contributing to Clogged Pores and Blackheads

Several everyday factors can contribute to the appearance of visible pores and the development of blackheads on your nose and other areas of your facial skin.

Oil Production and Skin Type

If you have oily skin, you’re naturally going to produce more sebum. This excess oil can mix with dead skin cells and debris, creating blockages in your pores. This is why many people with oily skin also struggle with enlarged pores and blackheads.

Dead Skin Cell Buildup

Your skin is constantly shedding dead cells. Normally, these cells are sloughed off without issue. However, if this process is disrupted, dead skin cells can accumulate within the pores, mixing with oil and forming comedones. Factors like dehydration, certain skincare products, or even hormonal changes can affect this natural shedding process.

Cosmetic Products and Habits

Heavy, pore-clogging makeup or skincare products (often labeled as “comedogenic”) can contribute significantly to clogged pores. If you don’t remove your makeup thoroughly each night, you’re essentially trapping these ingredients and your skin’s natural oils, creating a breeding ground for blemishes. Even touching your face frequently with unwashed hands can transfer dirt and bacteria, exacerbating the problem.

Environmental Factors

Pollution and environmental debris can settle on your skin and find their way into your pores. This can contribute to blockages and inflammation, making your pores appear more noticeable and increasing the likelihood of developing blackheads and other skin imperfections.

Effective Skincare Strategies for Managing Visible Pores and Blackheads

Tackling visible pores and blackheads requires a consistent and targeted skincare routine. It’s about managing oil, clearing out debris, and supporting your skin’s natural functions. Patience is key; you won’t see dramatic pore reduction overnight, but consistent effort yields results.

Cleansing: The Foundation

A good daily cleanse is non-negotiable. For those prone to oily skin and blackheads, a gentle yet effective cleanser is essential. Look for ingredients like salicylic acid (a beta-hydroxy acid, or BHA) or glycolic acid (an alpha-hydroxy acid, or AHA).

  • Salicylic acid is oil-soluble, meaning it can penetrate into the pore lining. It helps to dissolve the mixture of oil and dead skin cells that cause clogs. This makes it particularly effective for blackheads and can also help reduce the appearance of enlarged pores over time.
  • Glycolic acid is a powerful exfoliant that works on the skin’s surface, helping to slough off dead skin cells. This can improve overall skin texture and brightness, and by removing surface debris, it can also indirectly help keep pores clearer.

Be sure to cleanse twice daily – once in the morning to remove any oil and sweat accumulated overnight, and again in the evening to remove makeup, dirt, and pollution. Avoid harsh scrubbing, which can irritate your skin and paradoxically lead to more oil production.

Exfoliation: Clearing the Way

Regular exfoliation is crucial for preventing clogged pores and improving skin texture. Beyond your daily cleanser, incorporating a dedicated exfoliant a few times a week can make a significant difference.

  1. Chemical Exfoliants (AHAs and BHAs): As mentioned, these are incredibly effective. Start with a lower concentration and use them 2-3 times a week. As your skin builds tolerance, you can gradually increase frequency if needed. Look for serums, toners, or masks containing these ingredients.
  2. Physical Exfoliants: These involve using a scrub or a cleansing brush. If you choose this route, opt for very fine particles and use gentle pressure. Harsh physical exfoliants can create micro-tears in the skin, leading to inflammation and potentially worsening the appearance of pores.

Over-exfoliation can strip your skin’s natural barrier, leading to dryness, irritation, and increased sensitivity. Always listen to your skin and adjust your routine accordingly.

Targeted Treatments for Blackheads

Once you have a good cleansing and exfoliating routine, you can add targeted treatments specifically for blackheads and pore refinement.

  • Clay Masks: These masks are excellent for drawing out impurities and excess oil from the pores. Ingredients like bentonite or kaolin clay can absorb sebum and help reduce the appearance of clogged pores. Use them once or twice a week.
  • Retinoids: Prescription-strength retinoids (like tretinoin) or over-the-counter retinol products are powerful allies. They speed up cell turnover, which helps prevent pores from becoming clogged in the first place. They also boost collagen production, which can improve skin elasticity and, over time, make pores appear smaller. Retinoids can cause initial dryness or peeling, so start slowly and use a good moisturizer.
  • Niacinamide: This multitasking ingredient, a form of Vitamin B3, is fantastic for improving the appearance of pores. It helps regulate oil production, reduces inflammation, and strengthens the skin barrier. It can also help fade dark spots left behind by blemishes.

When using active ingredients like retinoids or strong exfoliants, always apply sunscreen during the day. These ingredients can make your skin more sensitive to the sun, and sun exposure can worsen hyperpigmentation and skin damage, making pores look more prominent.

Hydration: Don’t Skip This Step!

It might seem counterintuitive, but even oily skin needs hydration. When your skin is dehydrated, it can actually produce more oil to compensate, leading to more clogged pores. Look for lightweight, oil-free, non-comedogenic moisturizers. Ingredients like hyaluronic acid are excellent for providing hydration without feeling heavy.

Sun Protection: A Must for Skin Texture

Sun damage is a major contributor to the breakdown of collagen and elastin, which leads to enlarged pores and a rougher skin texture over time. Daily use of a broad-spectrum SPF 30 or higher sunscreen is one of the most important steps you can take to protect your skin’s long-term health and appearance. This will help prevent further sagging and keep your skin looking smoother.

Professional Help and Advanced Options

If you’re struggling with persistent blackheads, enlarged pores, or other skin imperfections, a dermatological professional can offer more advanced solutions.

  • Professional Extractions: A dermatologist or licensed esthetician can safely extract blackheads and other comedones, reducing the risk of inflammation and scarring.
  • Chemical Peels: Stronger chemical peels performed by professionals can deeply exfoliate the skin, unclog pores, and improve overall skin texture and tone.
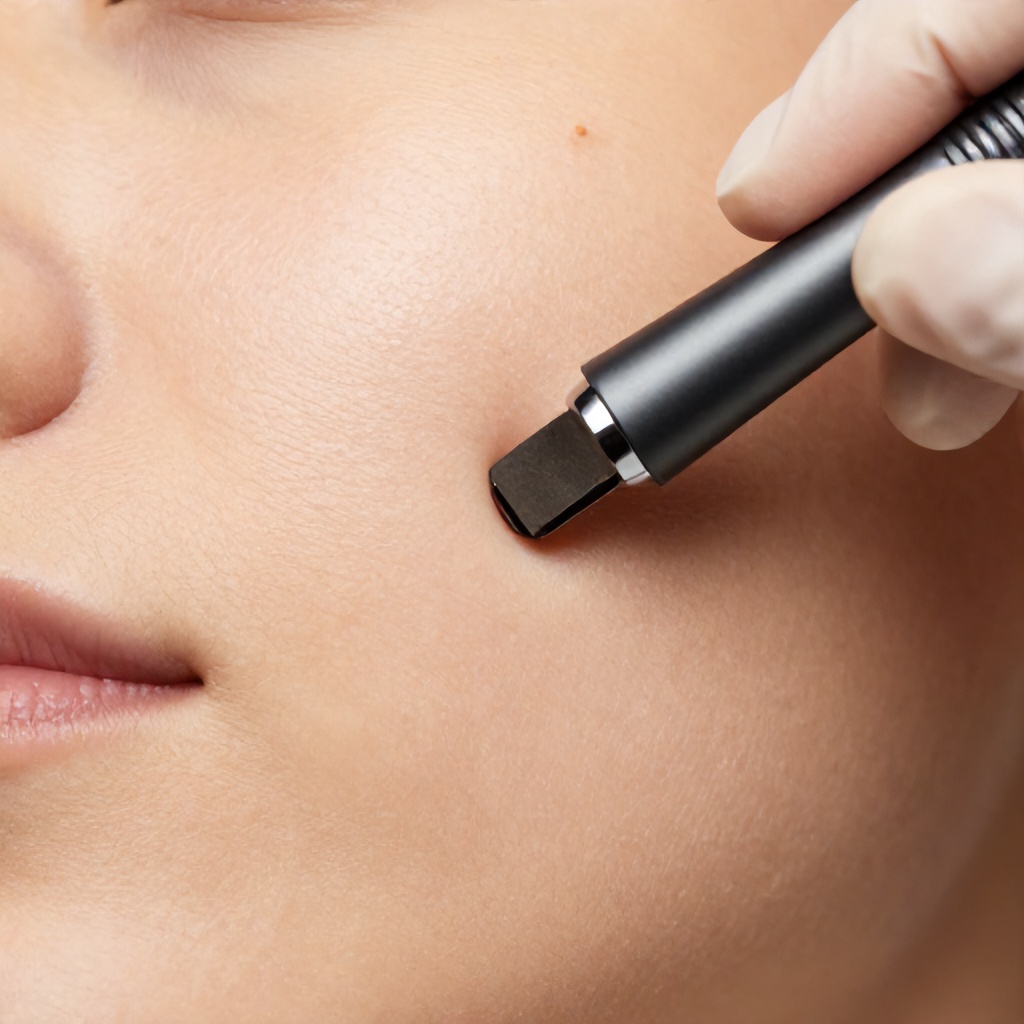
  • Microdermabrasion: This procedure uses a special device to gently sand away the outer layer of skin, removing dead skin cells and debris that can clog pores.
  • Laser Treatments: Certain laser therapies can target oil glands, improve skin texture, and stimulate collagen production, which can help reduce pore visibility.

These treatments can be very effective, but they often require multiple sessions and can be more costly than at-home care. Discuss your concerns with a dermatologist to determine the best course of action for your specific needs.

Lifestyle Adjustments for Clearer Skin

Beyond your skincare routine, certain lifestyle habits can influence your nose complexion and overall skin health.

Diet and Hydration

While the link between diet and acne is complex and varies from person to person, staying well-hydrated is universally beneficial for skin health. Drinking plenty of water helps keep your skin cells plump and functioning optimally. Some people find that reducing their intake of high-glycemic foods or dairy can help manage breakouts, but this is highly individual.

Stress Management

Stress can trigger hormonal changes that may increase oil production and inflammation, potentially worsening acne and the appearance of pores. Finding healthy ways to manage stress, such as exercise, meditation, or spending time in nature, can have a positive impact on your skin.

Sleep

Adequate sleep is vital for skin repair and regeneration. When you’re sleep-deprived, your body produces more cortisol, the stress hormone, which can exacerbate skin issues. Aim for 7-9 hours of quality sleep per night.

Consistency is Key

Managing visible pores and blackheads on your nose is an ongoing process. It’s not about finding a quick fix, but about adopting a consistent, evidence-based skincare routine and making healthy lifestyle choices. Be patient with your skin, celebrate small improvements, and don’t be afraid to seek professional advice when needed. With the right approach, you can achieve a smoother, clearer, and more refined nose complexion.

Blackhead Removal and Pore Minimizing Treatment: Realistic Results Explained

Blackhead Removal and Pore Minimizing: A Real-World Look

Achieving smoother, clearer skin often hinges on tackling those stubborn blackheads and refining the appearance of enlarged pores. This isn’t just about aesthetics; it’s about improving overall skin condition and confidence. We’re going to explore what effective blackhead removal and pore minimizing treatments can realistically do, showing you the kind of results you can expect.

Understanding Blackheads and Pores

Before we get to the before and after, let’s quickly touch on what we’re dealing with. Blackheads, scientifically known as open comedones, are essentially clogged pores. The pore gets filled with excess sebum (skin oil), dead skin cells, and sometimes bacteria. When this mixture is exposed to air, it oxidizes and turns dark, hence the “blackhead” appearance. They’re not dirt, despite what many people think. Prominent pores, on the other hand, can be caused by genetics, aging, sun damage, and the natural accumulation of sebum and debris within them, making them appear larger and more noticeable.

These issues often go hand-in-hand. Clogged pores can stretch over time, leading to the appearance of larger pores. Addressing both blackhead removal and pore minimizing is key for a truly improved complexion.

The Goal: What to Expect from Treatment

The aim of any good skin treatment for these concerns is multi-faceted. Primarily, we want to effectively extract or dissolve those sebum plugs and dead skin cells that form blackheads. This leads to immediate visual improvement, making the skin appear cleaner and less congested. Simultaneously, treatments that focus on pore minimizing work to tighten the skin around the pore opening, reduce inflammation, and clear out debris that contributes to pore stretching. The ultimate goal is a smoother texture, a clearer appearance, and a reduction in the visibility of prominent pores.

It’s important to set realistic expectations. While significant improvements are achievable, completely eliminating pores is impossible – nor is it desirable, as pores are essential for skin function. The focus is on refinement and making them less noticeable.

Methods for Blackhead Removal and Pore Minimizing

There’s a spectrum of approaches, from at-home care to professional dermatology interventions. Each has its place depending on the severity of the skin condition and individual needs. Understanding these methods helps in appreciating the ‘after’ results.

At-Home Treatments

Many people start their journey with over-the-counter products and DIY methods. These can be effective for mild to moderate cases.

  • Exfoliation: Chemical exfoliants like salicylic acid (a beta-hydroxy acid, or BHA) are fantastic for blackhead removal because they are oil-soluble and can penetrate into the pore to break down sebum and dead skin cells. Alpha-hydroxy acids (AHAs) like glycolic and lactic acid work on the skin’s surface, helping to shed dead skin cells and improve texture, which indirectly aids in pore appearance. Physical exfoliants, like gentle scrubs, can also help remove surface debris, but caution is advised to avoid irritation.
  • Clay Masks: These are excellent for drawing out impurities and excess oil from the pores. They can temporarily tighten the appearance of pores and leave the skin feeling cleaner.
  • Retinoids: Over-the-counter retinols can help increase cell turnover, preventing pores from becoming clogged in the first place. They also have long-term benefits for skin texture and can contribute to pore refinement.
  • Pore Strips: While satisfying to see what they pull out, pore strips offer a temporary fix. They remove the top layer of the blackhead but don’t address the underlying cause and can sometimes irritate the skin or even damage capillaries if used too aggressively.

Professional Treatments

For more stubborn issues or when seeking more dramatic results, professional treatments offer a higher level of efficacy.

  • Facial Extractions: Performed by estheticians or dermatologists, these involve manually and carefully removing blackheads and other comedones. This is a direct method of blackhead removal that yields immediate visible results.
  • Chemical Peels: Stronger concentrations of AHAs and BHAs are used in professional peels. These can deeply exfoliate the skin, unclog pores, and stimulate collagen production, leading to improved skin texture and pore appearance over time.
  • Microdermabrasion: This procedure uses a device to gently exfoliate the outer layer of skin, removing dead skin cells and debris. It can help to smooth skin texture and make pores appear smaller.
  • Facial Treatments with Advanced Technologies: Some aesthetic treatments incorporate devices like micro-needling or certain types of lasers. These can stimulate collagen, tighten skin, and improve overall pore structure and skin rejuvenation.
  • Prescription Medications: In cases of severe acne contributing to clogged pores and inflammation, a dermatologist might prescribe stronger retinoids or other medications.

The “Before” Picture: Common Concerns

Let’s visualize the “before.” Imagine a close-up view of the nose skin, perhaps the T-zone area. You’d likely see small, dark dots – the blackheads, which are sebum plugs. These are often accompanied by visibly enlarged pores, sometimes appearing like tiny craters or tunnels. The skin texture might feel a bit rough or uneven. There could be a general dullness, and perhaps even some lingering dark spots from past blemishes. The overall complexion might lack that smooth, refined look. Prominent pores are a key feature here, making the skin appear less uniform.

This is the starting point for many seeking effective skin treatment. It’s a common skin condition that affects a wide range of people, regardless of age or skin type. The frustration often stems from the persistent nature of these issues and the difficulty in achieving a truly clearer appearance with casual skincare alone.

The “After” Picture: Visible Transformations

Now, let’s look at the potential “after.” The difference can be quite striking. The most immediate change is the absence of visible blackheads. Those dark spots are gone, replaced by smooth skin. The pores themselves appear significantly refined. Instead of gaping openings, they look tighter, smaller, and less noticeable. The skin texture is noticeably smoother, with a more even and refined appearance. The overall complexion looks brighter and more uniform, with a reduction in the appearance of blemishes and dark spots.

A side-by-side presentation of clinical photographs truly highlights the impact. You’d see the reduction in the depth and width of pores. The skin might appear less oily and congested. The smoother texture is palpable, even in an image. It’s not just about removing blackheads; it’s about achieving a healthier, more balanced skin condition. This improved appearance contributes greatly to enhanced confidence and a more positive self-image. It’s a transformation that goes beyond surface-level changes, reflecting a healthier underlying skin structure.

Comparing Approaches: What Works Best?

The effectiveness of a “before and after” comparison depends heavily on the chosen treatment. A simple pore strip might show a temporary “after” with less visible blackhead tops, but the underlying pore structure remains unchanged. Professional treatments, especially those focusing on exfoliation, collagen stimulation, and deep pore cleansing, offer more profound and lasting results.

For instance, a series of chemical peels or microdermabrasion sessions, combined with a consistent at-home retinoid and salicylic acid regimen, can yield dramatic improvements in both blackhead removal and pore minimizing. The “after” in such cases shows not just a clean surface but a fundamentally improved skin texture and pore health. The key is often a combination of treatments tailored to the individual’s specific skin needs and concerns.

Dermatology offers the most advanced and targeted solutions. Treatments like fractional laser resurfacing, while more intensive, can profoundly alter skin texture, stimulate collagen, and significantly reduce pore size and the appearance of comedones. These are the treatments that deliver the most dramatic “before and after” transformations, often addressing multiple skin concerns simultaneously, including blemish removal and skin rejuvenation.

Maintaining Your Results

The journey doesn’t end after achieving your “after” results. Consistent pore care is essential to maintain the improvements. This includes:

  1. Daily Cleansing: Use a gentle cleanser to remove daily impurities and excess oil.
  2. Regular Exfoliation: Continue using chemical exfoliants like salicylic acid a few times a week to keep pores clear.
  3. Sun Protection: Sun damage can worsen pore appearance and skin texture, so daily SPF is non-negotiable.
  4. Healthy Lifestyle: Hydration, a balanced diet, and adequate sleep all contribute to overall skin health.
  5. Targeted Treatments: Periodically revisit professional treatments or use targeted masks to keep concerns at bay.

Maintaining a consistent facial skincare routine is the bedrock of long-term success. It prevents the recurrence of clogged pores and helps keep the skin looking its best. This proactive approach ensures that the “after” state becomes your new normal, rather than a fleeting moment.

Conclusion: The Power of Targeted Care

The comparison between “before” and “after” treatments for blackhead removal and pore minimizing showcases the significant impact that targeted skincare and professional interventions can have. From addressing stubborn sebum plugs to refining the appearance of prominent pores, the goal is always a smoother, clearer, and more confident complexion. Understanding the mechanisms behind these issues and the various treatment options available empowers you to make informed decisions about your skin health. The journey to better skin is often one of patience and consistency, but the visible results can be truly rewarding.

Effective Ways to Treat and Remove Blackheads on Your Chin

Pesky Chin Blackheads? Here’s How to Tackle Them!

Blackheads are one of those annoying skin issues that can pop up on anyone, no matter your age or skin type. They’re especially common on the chin, which is part of that oilier T-zone area (forehead, nose, and chin). If you’re battling chin blackheads and wondering how to get rid of them, you’ve found the right spot! This guide will break down what blackheads are, why they love your chin, and most importantly, how to treat and prevent them. With a few smart tweaks to your skincare routine, you can wave goodbye to those little dark dots!

What Exactly Are Blackheads?

Think of blackheads as tiny pimples caused by blocked hair follicles. They’re technically called open comedones. Their dark color isn’t dirt; it’s the result of oxidation. When the mixture of oil (sebum) and dead skin cells that fills the follicle gets exposed to air, it turns dark. While they can show up anywhere, faces, especially the T-zone including your chin, are prime real estate for them.

Why Does Your Chin Attract Blackheads?

Your chin seems to be a magnet for these little bumps for a few key reasons. Understanding these can help you fight back more effectively.

Excess Oil Production

The skin on your chin can sometimes produce more oil than other areas. This is often linked to hormonal shifts. Think about times like puberty, pregnancy, or even just everyday hormonal fluctuations. All these can ramp up sebum production, creating a perfect environment for clogged pores.

Facial Stroking Habits

It’s a common habit, but constantly touching or stroking your face, especially your chin, can transfer oils, dirt, and germs from your hands directly onto your skin. This can easily lead to pore congestion and the formation of blackheads.

Irritation from Hair Removal

Methods like shaving or waxing can sometimes irritate the skin and the hair follicles. If these irritated areas become blocked, it can contribute to the development of blackheads. This irritation around hair follicles is a common culprit.

Your Action Plan for Clearing Chin Blackheads

Now that we know the “why,” let’s get to the “how.” Here’s a practical, step-by-step strategy to help you achieve smoother, clearer skin on your chin.

Step 1: Master Your Skin Cleansing

Keeping your skin clean is the absolute foundation for tackling blackheads. Proper cleansing removes the buildup of debris, makeup, and excess oil that leads to clogged pores.

Tips for Effective Cleansing:

  • Choose a Gentle Cleanser: Pick a cleanser designed for your specific skin type – whether you have oily skin, dry skin, combination skin, or sensitive skin. Avoid harsh formulas that strip your skin’s natural oils; this can actually trigger more oil production.
  • Embrace Double Cleansing at Night: If you wear makeup or sunscreen, consider double cleansing before bed. Start with an oil-based cleanser to break down makeup and SPF, then follow up with a water-based cleanser to wash away any remaining impurities.
  • Don’t Over-Cleanse: Washing your face too often can strip away essential natural oils, leading your skin to overcompensate by producing even more. Stick to cleansing twice a day: once in the morning and once at night. Over-cleansing is a common mistake that can worsen skin congestion.

Step 2: Exfoliate Regularly

Exfoliation is key to removing the dead skin cells that contribute to pore blockages. It helps to slough away the top layer of skin, revealing fresher skin underneath and preventing future congestion.

Types of Exfoliation:

  • Chemical Exfoliants: These use acids like salicylic acid (a beta-hydroxy acid, or BHA) or glycolic acid (an alpha-hydroxy acid, or AHA). Salicylic acid is particularly effective because it’s oil-soluble, meaning it can penetrate into the pore to dissolve the mixture of oil and dead skin cells. AHAs work more on the surface to remove dead skin cells.
  • Physical Exfoliants: These involve using scrubs with fine particles to manually buff away dead skin cells. Be gentle; harsh scrubbing can cause micro-tears and irritation, especially on sensitive skin.

Step 3: Incorporate Targeted Treatments

Once your skin is clean and exfoliated, you can introduce treatments specifically designed to address blackheads and pore congestion.

Effective Topical Treatments:

  • Salicylic Acid: As mentioned, this is a star ingredient. Look for cleansers, toners, or spot treatments containing salicylic acid. It’s excellent for penetrating clogged pores.
  • Retinoids: Prescription or over-the-counter retinoids (like adapalene) can speed up cell turnover, preventing dead skin cells from clogging pores in the first place. They also help to regulate sebum production over time. Start slowly with retinoids, as they can cause initial dryness or irritation.
  • Clay Masks: Masks containing ingredients like bentonite or kaolin clay can help draw out excess oil and impurities from the pores, making them less likely to become blocked. Use these once or twice a week.

Step 4: Moisturize Smartly

Even oily or acne-prone skin needs hydration! Skipping moisturizer can actually cause your skin to produce more oil to compensate for dryness. The trick is to choose the right kind.

Choosing the Right Moisturizer:

  • Look for “Non-Comedogenic”: This label means the product is formulated not to clog pores.
  • Opt for Lightweight Formulas: Gel-based or water-based moisturizers are often ideal for oily and combination skin types, providing hydration without feeling heavy.

Step 5: Lifestyle Adjustments for Clearer Skin

Sometimes, what you do outside of your skincare routine can make a big difference.

Helpful Habits:

  • Hands Off: Make a conscious effort to avoid touching your face throughout the day.
  • Clean Your Phone and Pillowcases: These surfaces can harbor bacteria and oil that transfer to your skin.
  • Manage Stress: Stress can trigger hormonal imbalances that increase oil production.
  • Watch Your Diet: While research is ongoing, some people find that certain foods might influence their skin.

When to Seek Professional Help

If you’ve tried these steps consistently and aren’t seeing improvement, or if your blackheads are accompanied by inflammation and pain, it might be time to consult a dermatologist. They can offer stronger topical treatments, prescription medications, or in-office procedures like professional extractions or chemical peels to address stubborn pore congestion.

Pro Tip for Extraction

While the urge to squeeze is strong, avoid picking or popping blackheads yourself. This can push bacteria deeper into the pore, leading to inflammation, infection, and potential scarring. If you must remove them, consider using a sterile comedone extractor under the guidance of a skincare professional or after a warm shower when pores are softened.

Caution: Overdoing It

Be patient with your skin. Introducing too many new active ingredients at once can overwhelm your skin and cause irritation, redness, and peeling, which can actually worsen breakouts. Introduce new products one at a time and give your skin a few weeks to adjust before adding another.

Dealing with chin blackheads can be frustrating, but with a consistent and informed approach, you can significantly improve their appearance and prevent new ones from forming. Focus on gentle cleansing, effective exfoliation, targeted treatments, and mindful lifestyle choices. Your skin will thank you!

8 DIY Remedies to Remove Blackheads at Home Naturally

Tackling blackheads at home is absolutely possible with consistent effort and the right natural approaches, helping you achieve clearer, smoother facial skin without harsh chemicals.

Why Do Blackheads Appear?

Blackheads, technically known as open comedones, are a common type of mild acne that forms when hair follicles become clogged. This happens when excess sebum, which is your skin’s natural oil, combines with dead skin cells. This mixture gets trapped in the visible pores, creating a plug. The top of this plug remains open to the air, and when exposed to oxygen, it oxidizes, turning a dark, almost black color. This isn’t dirt, as many people mistakenly believe, but rather the oxidation process giving it that characteristic dark spot appearance.

These small skin imperfections often appear on the nose, forehead, and chin, but can show up anywhere on the human skin. While they are not usually painful, they can make your skin texture feel rough and uneven, and many people find them aesthetically bothersome. Understanding their formation is the first step in effectively treating and preventing them through your daily skin care routine.

Important Tips Before Trying Any Remedy

Before you jump into any DIY remedies for blackheads, remember that your skin health is paramount. What works wonders for one person might irritate another. Always approach new topical solutions with caution and gentleness.

  • Patch Test Everything: Before applying any new mixture to your entire facial area, test a small amount on an inconspicuous spot, like behind your ear or on your inner arm. Wait 24 hours to check for any redness, itching, or irritation.
  • Be Gentle: Aggressive scrubbing or picking can worsen skin blemishes, spread bacteria, and even cause scarring. Treat your skin kindly.
  • Consistency is Key: Natural remedies often take time to show results. Stick to a routine for a few weeks before deciding if a remedy is effective for your skin concerns.
  • Moisturize: Even oily skin needs hydration. Some remedies can be drying, so follow up with a light, non-comedogenic moisturizer to maintain your skin’s barrier function.
  • Sun Protection: Some ingredients, like lemon juice, can increase your skin’s sensitivity to the sun. Always use sunscreen, especially when using exfoliating treatments.

8 DIY Home Remedies for Removing Blackheads

1. Baking Soda and Water Paste

Baking soda is a mild abrasive that can help exfoliate the skin and remove dead skin cells and excess oil that contribute to clogged pores. Its alkaline nature can also help balance the skin’s pH, which sometimes gets out of whack when dealing with skin imperfections. This simple home remedy offers a gentle way to improve skin texture.

  1. Mix two tablespoons of baking soda with two tablespoons of water to form a thick paste.
  2. Gently apply the paste to the areas with blackheads, such as your nose or chin.
  3. Massage in small, circular motions for about 30 seconds.
  4. Rinse thoroughly with lukewarm water and pat your facial skin dry.

Use this remedy once or twice a week. Overuse can be drying or irritating for some skin types, particularly sensitive skin. Always follow up with a moisturizer.

2. Honey and Cinnamon Pore Strips

Honey is a natural antibacterial and antiseptic agent, making it excellent for skin health. Cinnamon, on the other hand, helps improve blood circulation and acts as a mild exfoliant. Together, they create a sticky, effective natural remedy that can help pull out impurities from your pores, similar to a DIY pore strip, aiding in pore cleansing.

  1. Combine one tablespoon of raw honey with half a teaspoon of cinnamon powder to create a paste.
  2. Apply a thin layer of this mixture over your blackheads, especially on the nose or other affected areas.
  3. Press a clean cotton strip or a piece of thin cloth over the mixture.
  4. Let it sit for 5-10 minutes.
  5. Gently peel off the strip, and then rinse your face with warm water.

This method can be used once a week. Cinnamon can cause a slight tingling sensation; if it feels too intense, rinse immediately. This is a great option for those looking to banish blackheads with natural ingredients.

3. Oatmeal Exfoliating Scrub

Oatmeal is renowned for its soothing and anti-inflammatory properties, making it an excellent choice for sensitive skin types. As a gentle physical exfoliant, it can absorb excess oil and remove dead skin cells without causing irritation, leading to smoother skin texture and helping to clear out those visible pores.

  1. Cook a small amount of plain oatmeal according to package directions, but use less water to make it thicker. Let it cool completely.
  2. Alternatively, grind dry rolled oats into a fine powder and mix with a bit of water, milk, or plain yogurt to form a paste.
  3. Apply the oatmeal paste to your facial skin, focusing on areas with blackheads.
  4. Gently massage in circular motions for 1-2 minutes.
  5. Leave the mask on for an additional 10-15 minutes before rinsing with lukewarm water.

You can use this gentle scrub 2-3 times a week. It’s particularly good for calming the skin while performing effective pore cleansing, contributing to overall skin health.

4. Green Tea Toner

Green tea is a powerhouse of antioxidants, particularly catechins, which have anti-inflammatory and anti-androgenic properties. This means it can help reduce sebum production, which is a key factor in the formation of blackheads and other forms of acne. Using it as a toner can help tighten visible pores and reduce the appearance of dark spots over time.

  1. Brew a cup of green tea and let it cool completely. You can also use two green tea bags steeped in hot water.
  2. Once cool, dip a cotton ball into the tea.
  3. Gently dab the green tea onto your clean facial area, especially where blackheads are present.
  4. Let it air dry; do not rinse it off.

Apply this green tea toner once or twice daily after cleansing. It’s a refreshing and effective addition to your skincare routine, promoting better skin health and helping to banish blackheads with consistent use.

5. Lemon Juice and Sugar Scrub

Lemon juice contains alpha-hydroxy acids (AHAs), which are natural chemical exfoliants that can help break down the bonds between dead skin cells, promoting cell turnover and unclogging pores. Sugar acts as a physical exfoliant, gently scrubbing away surface impurities. This combination is a potent DIY remedy for improving skin texture and addressing skin imperfections.

  1. Squeeze the juice from half a fresh lemon into a small bowl.
  2. Add one tablespoon of granulated sugar and mix well to form a coarse scrub.
  3. Apply the scrub to your clean facial skin, focusing on areas with blackheads.
  4. Gently massage in circular motions for about 1 minute.
  5. Rinse thoroughly with lukewarm water.

Use this scrub no more than once a week due to its potency. Lemon juice can make your skin very sensitive to the sun, so it’s essential to apply sunscreen diligently after using this remedy. Avoid if you have very sensitive skin or open cuts.

6. Apple Cider Vinegar (ACV) Toner

Apple cider vinegar is a natural astringent and antibacterial agent. It can help balance the skin’s pH, tighten visible pores, and dissolve the excess oil and dead skin cells that lead to blackheads. Its antiseptic properties also help prevent further skin blemishes and maintain overall skin health. Dilution is crucial for this powerful natural remedy.

  1. Mix one part raw, unfiltered apple cider vinegar with two to three parts distilled water. For example, one tablespoon of ACV with two or three tablespoons of water.
  2. After cleansing your face, apply the diluted ACV to your facial area with a cotton ball.
  3. Let it air dry; there’s no need to rinse.

Start by using this toner once a day, and if your skin tolerates it well, you can increase to twice daily. The smell can be strong initially but dissipates quickly. Always dilute ACV properly to avoid irritation, especially if you have sensitive facial skin.

7. Clay Mask (Bentonite or Kaolin)

Clay masks, particularly those made from bentonite or kaolin clay, are excellent for drawing out impurities and absorbing excess oil from deep within the pores. These natural remedies work by having a negative electrical charge, which attracts positively charged toxins and oils, effectively performing deep pore cleansing and helping to banish blackheads. They are fantastic topical solutions for improving skin texture and reducing dark spots.

  1. Mix one tablespoon of bentonite or kaolin clay powder with enough water or apple cider vinegar to form a smooth paste.
  2. Apply an even layer of the mask to your clean facial skin, focusing on areas with blackheads.
  3. Allow the mask to dry completely, which usually takes 10-15 minutes. You’ll feel a tightening sensation.
  4. Rinse thoroughly with lukewarm water, gently massaging as you rinse to aid in exfoliation.

Use a clay mask once a week. If you have dry skin, you might want to use it less frequently or only on oily zones. These masks are a staple in many skincare routines for addressing various skin concerns, including stubborn comedones.

8. Egg White Mask

Egg whites are known for their ability to temporarily tighten the skin and visible pores. They can also help absorb excess oil and gently pull out impurities from clogged pores as they dry, making them a simple yet effective DIY remedy for blackheads. The proteins in egg whites can also contribute to a smoother skin texture.

  1. Separate the white from one egg.
  2. Whisk the egg white lightly until it’s slightly frothy.
  3. Apply a thin layer of the whisked egg white to your clean facial area, particularly where you have blackheads.
  4. Place a thin piece of tissue paper or toilet paper over the wet egg white, pressing it gently onto your skin.
  5. Apply another thin layer of egg white over the tissue paper.
  6. Let it dry completely, which can take 15-20 minutes. You’ll feel your skin tighten.
  7. Once dry, carefully peel off the tissue paper.
  8. Rinse your face with lukewarm water to remove any residue.

This mask can be used once a week. Avoid if you have an egg allergy. While it won’t permanently shrink pores, it can give a temporary tightening effect and aid in the removal of surface blackheads, improving the overall look of your facial skin.

Maintaining Clear Skin Long-Term

Removing existing blackheads is just one part of the battle; preventing new ones from forming is equally important for lasting skin health. A consistent and gentle skincare routine is your best defense against clogged pores and skin blemishes. Remember that healthy human skin thrives on balance, not harsh treatments.

  • Cleanse Regularly: Wash your face twice daily with a mild, non-comedogenic cleanser to remove excess oil, makeup, and environmental pollutants.
  • Exfoliate Gently: Incorporate a gentle exfoliant (either chemical like salicylic acid or physical like a soft scrub) 2-3 times a week to prevent the buildup of dead skin cells.
  • Moisturize: Use a lightweight, non-comedogenic moisturizer daily, even if you have oily skin. Dehydrated skin can sometimes produce more oil to compensate, leading to more blackheads.
  • Avoid Picking: Resist the urge to squeeze or pick at blackheads. This can push bacteria deeper, cause inflammation, and lead to scarring or more severe acne.
  • Check Your Products: Ensure all your makeup, sunscreen, and other skincare products are labeled “non-comedogenic” or “non-acnegenic,” meaning they won’t clog pores.
  • Hydrate from Within: Drink plenty of water to keep your skin hydrated and help flush out toxins.

When to Seek Professional Help

While DIY remedies can be very effective for many people, sometimes blackheads and other skin concerns require professional intervention. If your blackheads are persistent, widespread, or accompanied by painful cysts or nodules (indicating more severe acne), it’s a good idea to consult a dermatologist. They can offer stronger topical solutions, prescription medications, or in-office treatments like extractions or chemical peels to address your specific skin health needs and help you achieve clearer skin.

Practical Guide to Blackhead Extraction: Removing Clogged Pores Safely

Hands in Gloves: A Practical Guide to Blackhead Extraction

Getting rid of blackheads involves carefully removing the hardened sebum and dead skin cells that clog your pores, a process best done with clean hands and the right tools.

Those tiny black dots on your skin aren’t dirt, despite what many people think. They’re actually a common type of acne called an open comedone. When a pore gets blocked with excess oil (sebum) and dead skin cells, it forms a plug. If this plug remains open to the air, the trapped sebum and skin cells oxidize, turning that familiar dark color. It’s a natural process, but one that many of us prefer to address for clearer, smoother-looking skin. Understanding what causes them is the first step toward effective blackhead extraction.

Sebaceous filaments, which are often mistaken for blackheads, are a normal part of your skin’s structure. They are tiny, yellowish structures that line your pores and help sebum travel to the skin’s surface. They’re usually only noticeable when they become enlarged or filled with excess sebum. Blackheads, on the other hand, are a distinct pore blockage. The key difference lies in the oxidation of the trapped material. Sebaceous filaments are not oxidized and don’t have that dark appearance.

The goal of blackhead extraction is to gently remove the contents of these clogged pores without causing further inflammation or damage to the skin. This can improve the appearance of pore size and overall skin texture. While the temptation to squeeze is strong, improper technique can lead to scarring, infection, and even make the problem worse.

Why Do Blackheads Form?

Several factors contribute to the formation of blackheads and clogged pores. It’s a common skin concern that affects people of all ages, though it’s particularly prevalent during adolescence due to hormonal fluctuations.

  • Hormonal changes: Fluctuations in hormones, especially androgens, can increase sebum production. This excess oil is a primary ingredient in pore blockages.
  • Excess oil production: Some individuals naturally have more active sebaceous glands, leading to a higher likelihood of clogged pores.
  • Dead skin cell buildup: Our skin constantly sheds dead cells. If these cells aren’t removed effectively, they can mix with sebum and clog pores.
  • Genetics: Your genetic makeup can play a role in your skin’s tendency to produce more oil or experience clogged pores.
  • Certain medications: Some drugs, like corticosteroids or those containing lithium, can affect sebum production.
  • Comedogenic products: Using heavy, oily, or pore-clogging makeup and skincare products can contribute to blockages.

It’s important to remember that blackheads are not a sign of poor hygiene. Even with diligent cleansing, they can still form due to these underlying factors. The focus should be on managing sebum production and ensuring proper exfoliation for effective pore cleansing.

The Art of Safe Blackhead Extraction

When performed correctly, blackhead extraction can be a satisfying and effective cosmetic procedure to improve skin blemishes. However, the emphasis must always be on safety and gentleness. This isn’t about brute force; it’s about precision and care.

The most crucial step before any attempt at extraction is preparation. Cleanliness is paramount to prevent introducing bacteria into the pores, which can lead to infection and inflammation. Think of it like preparing a surgical site – you want everything as sterile as possible.

Step-by-Step Extraction Process

Here’s how to approach blackhead extraction safely at home, keeping in mind that for persistent or deep blackheads, professional extraction by an esthetician or dermatologist is often the best route.

  1. Cleanse your face thoroughly. Use a gentle cleanser to remove makeup, dirt, and excess oil. This ensures a clean canvas and minimizes the risk of infection.
  2. Steam your face. This is a vital step to soften the plug within the pore, making extraction easier and less traumatic for the skin. You can do this by leaning over a bowl of hot water (not boiling!) with a towel draped over your head to trap the steam, or by using a facial steamer. Aim for about 5-10 minutes. Be careful not to get too close to the hot water to avoid burns.
  3. Wash your hands thoroughly. Again, cleanliness is key. Use soap and warm water.
  4. Wrap your fingertips in clean tissues or cotton pads. This provides a barrier between your skin and your fingers, reducing direct pressure and the risk of transferring bacteria. Alternatively, you can use a clean comedone extractor tool.
  5. Gently press around the blackhead. Apply even, gentle pressure on either side of the blackhead. The goal is to coax the plug out, not to force it. If it doesn’t come out with minimal pressure, don’t push harder. You might need to try again later or seek professional help.
  6. Observe the pore. If the blackhead is ready, it should slide out relatively easily. If you see blood or it feels painful, stop immediately. You might be damaging the surrounding skin.
  7. Cleanse again. After extraction, gently cleanse the area again to remove any remaining debris and oil.
  8. Apply a soothing toner or serum. Look for ingredients like salicylic acid (which can help prevent future clogs) or calming agents like chamomile or aloe vera.
  9. Follow with a light, non-comedogenic moisturizer.

It’s essential to be patient. Not all blackheads will come out in one session. Forcing an extraction can lead to post-inflammatory hyperpigmentation or even scarring, making the pore appearance worse in the long run.

When to Call the Professionals

While at-home extraction can be effective for some superficial blackheads, there are times when professional intervention is necessary. An experienced esthetician or dermatologist has the training, tools, and sterile environment to perform extractions safely and effectively.

Consider seeking professional extraction if:

  • Your blackheads are deep, large, or inflamed.
  • You have a lot of blackheads or are prone to breakouts.
  • You’ve tried at-home methods without success.
  • You’re concerned about scarring or infection.
  • You want a more comprehensive skin treatment plan.

A professional facial extraction can be part of a broader skin care regimen. They can also advise on the best products and practices for your specific skin type and concerns, helping with overall skin health and pore maintenance.

Alternatives and Prevention Strategies

Blackhead extraction is a reactive measure, but prevention is key for long-term skin health. Incorporating the right skincare habits can significantly reduce the formation of clogged pores.

Exfoliation is Your Friend

Regular exfoliation is one of the most effective ways to prevent blackheads. It helps to remove dead skin cells before they have a chance to mix with sebum and clog pores. There are two main types of exfoliation:

  • Chemical Exfoliation: This uses acids like salicylic acid (BHA) or glycolic acid (AHA). Salicylic acid is particularly effective because it’s oil-soluble, meaning it can penetrate into the pores and break down the sebum buildup. AHAs work on the skin’s surface.
  • Physical Exfoliation: This involves using scrubs with fine particles to manually slough off dead skin cells. Be gentle; harsh scrubbing can irritate the skin and worsen acne.

Aim to exfoliate 1-3 times a week, depending on your skin’s sensitivity. Over-exfoliation can strip the skin’s natural barrier, leading to increased oil production as a defense mechanism.

Incorporate the Right Ingredients

Certain skincare ingredients are specifically designed to combat clogged pores and blackheads. Look for products containing:

  • Salicylic Acid (BHA): As mentioned, this is a powerhouse for unclogging pores from within.
  • Retinoids (Retinol, Tretinoin): These vitamin A derivatives speed up cell turnover, preventing dead skin cells from accumulating and helping to keep pores clear. They can also help reduce sebum production over time.
  • Niacinamide: This versatile ingredient can help regulate oil production, reduce inflammation, and improve the appearance of pores.
  • Clay Masks: These masks help to absorb excess oil and draw impurities from the pores, offering a deep pore cleansing effect.

Cleansing Habits Matter

While you can’t always prevent blackheads entirely, a consistent and effective facial cleansing routine is foundational. Double cleansing, especially in the evening, can be very beneficial. Start with an oil-based cleanser to break down makeup and sebum, followed by a water-based cleanser to remove any remaining impurities.

Avoid harsh scrubbing or over-washing, as this can strip the skin and lead to rebound oiliness. Gentle, consistent cleansing is the aim.

Lifestyle Factors

Your diet and lifestyle can also play a role in your skin’s health. While the link between diet and acne is complex and varies from person to person, some find that reducing high-glycemic foods or dairy can help. Staying hydrated and managing stress are also beneficial for overall skin health.

Choosing non-comedogenic makeup and skincare products is also a simple but effective step. These products are formulated not to clog pores, reducing the likelihood of pore blockages from your beauty routine.

Managing sebaceous filaments and blackheads is an ongoing process. By understanding the causes, practicing safe extraction techniques when necessary, and focusing on preventative skincare, you can achieve clearer, healthier-looking skin and improve your skin texture over time.

How Macro Bubbling Textures Demonstrate Skincare Formulation Stability in Commentary Videos

The Visual Power of Macro Skincare Textures

High-quality macro photography of a bubbling tan liquid provides a microscopic view into the stability and activity of a cosmetic formulation, allowing viewers to see exactly how a product might behave on the skin before they ever open a bottle. These close-up shots have become the backbone of modern skin care commentary. They strip away the flashy packaging and focus entirely on the liquid consistency. When a beauty influencer uses an organic surface as a detailed backdrop for a reaction video, they are doing more than just showing off a product. They are performing a visual product analysis that speaks to the viewer’s senses and their desire for transparency in beauty marketing.

The human eye is naturally drawn to the movement of air bubbles within a viscous medium. In a macro view, these bubbles aren’t just pockets of air; they are spheres of light and shadow that reveal the thickness and flow of a serum or essence. Tan and light brown hues often suggest the presence of botanical extracts, fermented ingredients, or specific antioxidants like Vitamin C and ferulic acid. Seeing these colors in a bubbling texture creates a sense of “active” skincare. It looks alive. It looks like it is doing something. This visual storytelling is what keeps an audience engaged during a long-form skincare review, turning a simple product demo into an immersive educational experience.

Understanding the Bubbling Texture

Bubbles in a skincare product can indicate several different things depending on the cosmetic formulation. Sometimes, they are simply the result of the bottle being shaken, showing the presence of surfactants that help the product spread across the skin. In other cases, an effervescent liquid is a deliberate design choice. Some masks and cleansers use carbonation or specific chemical reactions to create a self-foaming effect upon contact with air or skin. When you see circular indentations forming and popping in a tan liquid, you are watching the surface tension of the product at work.

A thick, honey-like liquid consistency will hold bubbles longer than a watery one. This tells the viewer about the “slip” of the product. If the bubbles move slowly and maintain their shape, the product likely contains high concentrations of humectants like glycerin or hyaluronic acid. These ingredients create a dense matrix that traps air. For someone watching a commentary video, these visual cues help them decide if a product will feel heavy or light on their own face. It is a form of dermatological texture analysis that happens purely through the screen.

The Role of Color in Visual Analysis

Tan and light brown hues are common in the world of high-performance skincare. While we often associate beauty products with pristine whites or clear gels, the most potent active ingredients often carry a natural tint. Many tea-based toners, copper peptide serums, and stabilized Vitamin C formulas fall into this earthy color palette. In a macro view, these colors can shift from a pale champagne to a deep amber depending on the lighting and the concentration of the ingredients.

When filming a close-up shot, the way light interacts with these tan tones is essential. Backlighting can make a light brown liquid look glowing and ethereal, while top-down lighting emphasizes the surface detail and the organic surface of the liquid. For a beauty influencer, choosing the right lighting for these hues is the difference between a product looking “natural and potent” or “muddy and unappealing.” The goal is to highlight the clarity and richness of the liquid, even when it has a deep color.

Filming the Perfect Macro Shot for Commentary

Creating a compelling detailed backdrop for a skincare video requires more than just a good camera. You need to understand how to manipulate the product to get the best visual response. If you want to show off a bubbling texture, you might use a glass stir rod to introduce air into the liquid just before the camera starts rolling. This creates a fresh, active look that mimics the product being applied or dispensed.

  • Use a dedicated macro lens with a 1:1 magnification ratio to capture the smallest air bubbles.
  • Set your frame rate higher (like 60fps or 120fps) if you plan to use slow-motion to show bubbles popping.
  • Keep the camera on a tripod to avoid any micro-shakes that become distracting at high zoom levels.
  • Use a neutral, non-distracting background to keep the focus entirely on the product texture.

The microscopic view allows the audience to see things they would normally miss. They can see the tiny particles of an undissolved active ingredient or the way a bi-phase oil and water formula begins to separate. This level of detail builds trust. When a commentator points out these specific surface details, they demonstrate a level of product knowledge that goes beyond reading the ingredient list on the back of the box.

Capturing Circular Indentations and Surface Tension

One of the most satisfying things to watch in a macro skincare video is the way the liquid settles. After the initial bubbling subsides, the surface often develops small circular indentations. These are areas where bubbles have recently popped, leaving a temporary “crater” in the viscous liquid. This specific visual is a hallmark of high-quality macro photography in the beauty space. It shows the “memory” of the liquid, which is a direct indicator of its viscosity and film-forming properties.

For a skin treatment meant to stay on the surface and provide a barrier, this slow-settling behavior is a good sign. If the liquid levels out instantly like water, it suggests a very thin, fast-absorbing formula. Neither is objectively better, but the visual allows the commentator to explain the intended use of the product more effectively. A thick tan liquid that holds its shape is likely a nourishing night oil or a concentrated serum, whereas a thin, fizzy tan liquid might be a refreshing morning essence.

The Psychology of Skincare Visuals

Why are we so obsessed with watching these textures? There is a certain level of ASMR (Autonomous Sensory Meridian Response) involved in visual storytelling for beauty. Watching a bubbling texture can be deeply relaxing. It taps into a sense of “cleanliness” and “transformation.” When we see a product reacting and moving, we subconsciously associate that movement with the product “working” on our skin texture or cleaning out our pores.

This is why reaction videos that feature macro shots perform so well on platforms like Pinterest and TikTok. They provide a hit of visual satisfaction while delivering educational content. The viewer learns about cosmetic formulation without feeling like they are sitting through a chemistry lecture. They see the active ingredients in motion. They see the pore texture of the surface the liquid is resting on. It makes the science of skincare feel accessible and tangible.

Practical Tips for Evaluating Product Texture

If you are a consumer trying to use these videos to make better buying decisions, there are specific things you should look for. Don’t just get lost in the “pretty” visuals; look for signs of product health and performance. A tan liquid that looks cloudy or has uneven streaks might be showing signs of oxidation or poor emulsification. On the other hand, a clear, vibrant tan liquid with uniform air bubbles usually indicates a well-stabilized formula.

  1. Observe the speed of the bubbles: Fast bubbles mean a watery base; slow bubbles mean a thicker, more hydrating base.
  2. Look for color consistency: The tan hue should be uniform throughout the liquid, not patchy.
  3. Check the surface detail: A smooth, glassy surface after bubbles pop suggests a high-quality oil or silicone blend that will give the skin a “glow.”
  4. Watch the “drip”: How the liquid moves down a glass surface reveals how it will hang onto your skin during application.

These observations help you skip the trial-and-error phase of skincare. By watching a detailed product analysis from a trusted source, you can narrow down which textures will work for your specific skin type. If you have oily skin, you might avoid the thick, slow-moving tan liquids in favor of something more effervescent and light. If you have dry skin, those viscous, bubble-trapping serums are exactly what you should be looking for.

Avoiding Misleading Visuals

It is important to remember that some visuals are enhanced for the camera. A beauty influencer might add extra heat or agitation to a product to make it bubble more than it would in your bathroom. Always look for “real-time” application shots alongside the stylized macro views. If a tan liquid looks like a boiling cauldron in the macro shot but like plain water in the hand-pour shot, the macro view might be slightly exaggerated for aesthetic purposes.

Authentic skin care commentary will always point out when a texture is unique or unexpected. If a product has a strange dermatological texture—perhaps it feels gritty or looks “broken”—a good reviewer will explain why. Sometimes, “pilling” or “beading” is a sign of a bad formula, but in some professional-grade treatments, it is a sign of encapsulated ingredients being released. The macro view is the only way to see these tiny capsules before they vanish into the skin.

The Future of Skincare Commentary

As camera technology becomes more accessible, the standard for a skincare review continues to rise. We are moving away from just “talking heads” and toward a more “lab-style” presentation. Viewers want to see the microscopic view. They want to see the organic surface of the skin as it interacts with the product. This shift toward visual storytelling makes the industry more accountable. It is much harder to hide a mediocre formula when it is being held under a macro lens for thousands of people to see.

The use of tan and light brown hues in these videos also reflects a broader trend toward “clean” and “clinical” aesthetics. These colors feel grounded and honest. They don’t need artificial dyes to look appealing. When you combine these natural tones with the dynamic movement of a bubbling texture, you get a visual that is both beautiful and informative. It bridges the gap between the vanity of the beauty world and the cold facts of dermatology.

Final Thoughts on Texture and Technique

Next time you see a close-up shot of a bubbling tan liquid, take a moment to really look at the details. Notice the way the air bubbles vary in size. Look at the circular indentations left behind on the surface. Think about the liquid consistency and what it says about the active ingredients inside. This isn’t just “eye candy” for social media; it is a powerful tool for understanding the products we put on our bodies every day.

Whether you are a creator making educational content or a consumer looking for your next holy grail skin treatment, the macro view is your best friend. It reveals the truth of the cosmetic formulation in a way that words never can. By focusing on the visual aesthetics of the product itself, we can move past the hype and get down to the actual science of healthy, glowing skin. The beauty is in the details, quite literally, and those tiny bubbles are telling a story that is well worth watching.

Professional Extraction of a Large Solid Skin Plug Using Metal Tweezers

Professional Extraction of a Large Solid Skin Plug

Professional extraction of a large solid skin plug requires sterile metal tweezers and a steady hand to prevent scarring or infection. This dermatological extraction focuses on removing a hardened mass of sebum and dead skin cells that has become wedged within a follicle. When these materials compact over time, they form a dense, waxy obstruction known as a sebaceous plug or a large comedone. Unlike a soft whitehead, a solid plug has lost its moisture, making it a physical barrier that the skin cannot easily expel on its own. A licensed aesthetician or dermatologist uses specific manual extraction techniques to clear this congestion without damaging the surrounding epidermal treatment area.

Understanding the Nature of a Sebaceous Plug

A sebaceous plug starts as a simple mixture of oil and skin cells. Your skin naturally produces sebum to stay lubricated. Sometimes, this oil gets trapped. It mixes with keratin. It thickens. As the plug sits in the pore, it is exposed to air, which causes the top to oxidize and turn dark, resulting in a blackhead. However, the bulk of the plug remains a solid, off-white or yellowish mass beneath the surface. This is skin congestion at its most stubborn. The follicle wall stretches to accommodate the growing mass. If left alone, the pressure can cause the pore to appear permanently enlarged or lead to a painful cyst if the wall ruptures.

These plugs often feel like small, hard grains under the skin. They do not respond to traditional foaming cleansers or light exfoliation because the blockage is too deep and too dense. The material has become a solidified “core” that requires physical intervention. Professional skincare experts identify these by their raised texture and the slight discoloration of the pore opening. They are common on the nose, chin, and back, where sebaceous glands are most active and numerous.

The Essential Professional Toolkit

Precision is the primary requirement for a successful skin blemish removal. Professionals do not use their fingernails. Fingernails are blunt. They carry bacteria. Instead, a clinical environment utilizes medical-grade tweezers and precision forceps designed specifically for the task. These tools are usually made of high-quality stainless steel that can be autoclaved or chemically sterilized between uses. The tips are incredibly fine, often tapering to a point thinner than a human hair. This allows the practitioner to grip only the plug itself, avoiding unnecessary trauma to the healthy skin nearby.

There are different shapes of tweezers used in a professional skincare setting. Curved tweezers are popular for pulling plugs from rounded areas like the crease of the nostril. Straight, pointed forceps allow for a direct, vertical pull on very deep pore extraction sites. Some aestheticians also use a comedone extractor, which features a small metal loop, but for a truly solid, large plug, tweezers provide the grip necessary to lift the entire mass out in one piece. Using the wrong tool often results in the plug snapping, leaving a portion behind to cause further inflammation.

Sanitation and Safety Protocols

Safety starts with a clean field. The practitioner wears sanitary gloves to prevent the transfer of oils and pathogens. The skin is prepped with an antiseptic solution, such as isopropyl alcohol or a specialized pre-extraction fluid. This ensures that when the pore is opened, no surface bacteria can enter the empty follicle. Every tool is removed from a sterile pouch right before the procedure begins. Maintaining a clinical environment is what separates a professional service from a risky at-home attempt.

The Step-by-Step Extraction Process

The procedure begins with softening the skin. A professional will often use a facial steamer or a warm compress for several minutes. Heat expands the pore opening and softens the hardened sebum. This makes the plug more pliable. Without this step, the plug remains brittle. It might resist removal. Some practitioners also apply a desincrustation gel, which uses an alkaline pH to further liquefy the outer edges of the blockage. Once the skin is prepped, the extraction can proceed.

  1. The aesthetician positions a magnifying lamp over the area to see the exact boundaries of the plug.
  2. Using the tips of the precision forceps, they apply gentle, downward pressure around the perimeter of the pore.
  3. As the top of the plug begins to emerge, the tweezers grip the exposed edge firmly but carefully.
  4. The practitioner uses a slow, steady pulling motion. They do not jerk or twist.
  5. The entire solid mass is lifted out of the follicle, often leaving a temporary, clean “crater” in the skin.
  6. The area is immediately dabbed with a soothing, antibacterial toner to close the site and reduce redness.

The sensation for the client is usually one of intense pressure followed by immediate relief. Unlike popping a pimple, which involves explosive force, a professional extraction is a controlled lift. The goal is follicle clearing with zero blood and minimal redness. If the plug is particularly large, the aesthetician may work in stages, loosening the edges before the final pull. This patience prevents the skin from tearing.

Why Extraction Content Goes Viral

The rise of the viral skincare video has brought professional extractions into the mainstream. Millions of people watch macro skincare photography and high-definition recordings of these procedures. There is a psychological phenomenon behind this. It is often described as “satisfying.” Seeing a physical obstruction removed from a clean, clinical setting provides a sense of order and resolution. It triggers a release of dopamine for many viewers. This reaction content has turned simple dermatology tools into recognizable icons of the “skin-fluencer” world.

Social media formats favor the “before and after” impact. A large, dark pore suddenly becoming clean and empty is a powerful visual. However, these videos often skip the hours of preparation and the strict aftercare required. While they are fascinating to watch, they can sometimes give the false impression that extraction is easy or should be done by anyone with a pair of tweezers. The reality is that the “satisfying extraction” seen on screen is the result of years of training in manual extraction techniques.

The Role of Macro Photography

Macro lenses allow viewers to see the texture of the skin in ways the naked eye cannot. You can see the individual flakes of keratin. You can see the way the metal tweezers interact with the epidermal layers. This level of detail highlights the complexity of the skin. It shows that a pore is not just a hole, but a complex, living structure. High-definition footage also helps students of aesthetics learn the subtle cues of when a plug is ready to be pulled and when it needs more softening.

Risks of At-Home Interference

Attempting to remove a large solid skin plug at home is risky. Most household tweezers are not sharp enough. They are often contaminated with bathroom bacteria. When a person squeezes their skin with blunt tools or fingers, they apply lateral pressure. This pressure can push the plug deeper into the dermis. If the follicle wall breaks underground, the sebum and bacteria spill into the surrounding tissue. This leads to a localized infection, a painful nodule, or a permanent scar. What started as a simple clogged pore can turn into a month-long skin crisis.

Hyperpigmentation is another major concern. Forcing an extraction causes trauma. The skin responds by producing excess melanin as a protective measure. This leaves a dark spot that can take months to fade. Professionals know how to apply pressure in a way that avoids triggering this inflammatory response. They also know when to stop. If a plug does not budge with gentle professional pressure, a dermatologist may choose to use a tiny lancet or recommend a topical treatment instead of forcing it.

Post-Extraction Skin Recovery

After the plug is gone, the skin needs to heal. The empty follicle is vulnerable. A professional will typically apply a high-frequency wand or a targeted LED light treatment. High-frequency tools use a glass electrode to generate oxygen, which kills bacteria and calms the skin. Blue light therapy is also common for its antimicrobial properties. These steps ensure that the “satisfying extraction” doesn’t result in a new breakout the next day.

At home, the client must follow a strict regimen for the next forty-eight hours. This includes avoiding heavy makeup and intense sweating. The skin should be treated with gentle, non-comedogenic moisturizers. Ingredients like centella asiatica or niacinamide are excellent for soothing the area. It is also vital to use sun protection. The freshly cleared pore is sensitive to UV damage, which can lead to those aforementioned dark spots. Healing usually takes three to five days, after which the pore will naturally shrink back to its original size.

Long-Term Pore Maintenance

Preventing the return of solid skin plugs involves consistent follicle clearing. You cannot change your pore size, but you can change what is inside them. Chemical exfoliants are the best defense. Salicylic acid is oil-soluble, meaning it can get inside the pore to dissolve the “glue” that holds sebum and dead skin together. Using a 2% BHA liquid twice a week can keep the sebum fluid, preventing it from hardening into a plug. This reduces the need for frequent manual extractions.

Retinoids also play a massive role in skin health. They speed up cell turnover. This prevents dead skin cells from lingering long enough to clog the follicle. When combined with a double-cleansing routine—using an oil-based cleanser followed by a water-based one—the skin stays clear and balanced. Oil cleansers are particularly effective at breaking down surface sebum so it doesn’t accumulate. Consistency is the key to avoiding the deep-seated congestion that requires professional intervention.

Choosing Professional Aesthetician Services

When looking for a professional to handle extractions, check their credentials. Look for a licensed aesthetician who specializes in “clinical facials” or “acne treatments.” Ask about their sterilization process. A good practitioner will be happy to explain how they clean their tools. They should also perform a thorough skin analysis before touching your face. If they try to force every single pore clear in one session, they may be too aggressive. A true professional prioritizes the long-term integrity of your skin over a single “satisfying” result.

Regular professional cleanings, perhaps once a month or once a quarter, can keep skin congestion under control. These sessions allow for the removal of small plugs before they become large, solid masses that are harder to extract. It is a proactive approach to beauty. By maintaining the health of the follicles, you ensure a smoother skin texture and a more radiant complexion. Professional extraction is a tool, but a solid daily routine is the foundation of clear skin.

Final Thoughts on Skin Health

The process of removing a solid skin plug is a blend of science and art. It requires an understanding of anatomy, a mastery of specialized tools, and a commitment to hygiene. While the visual of the extraction is what captures our attention on social media, the real value lies in the relief it provides to the skin. Clearing a blockage allows the skin to breathe and function normally again. It prevents future inflammation and helps maintain a youthful, healthy appearance. Respect your skin by choosing professional care for deep extractions and supporting it with a thoughtful, evidence-based routine at home.

How to Treat Hyperpigmentation and Blackheads on Your Neck

Addressing Hyperpigmentation and Blackheads on the Neck

Darkening of the neck, often referred to as acanthosis nigricans, and the presence of blackheads are distinct dermatological concerns that require targeted approaches for management and treatment. While both can affect the appearance of the neck, their underlying causes and recommended interventions differ significantly.

Understanding Neck Hyperpigmentation

Neck hyperpigmentation, characterized by a darkening of the skin, is frequently associated with acanthosis nigricans. This condition is not a disease in itself but rather a sign of an underlying metabolic issue. The skin in the affected areas, typically the neck, armpits, and groin, develops a thickened, velvety texture and a darker hue.

Causes of Neck Hyperpigmentation

The primary driver of acanthosis nigricans is insulin resistance. Elevated insulin levels can stimulate the growth of skin cells, leading to the characteristic thickening and darkening. Several factors contribute to insulin resistance:

  • Obesity: Excess body weight is a leading cause of insulin resistance.
  • Type 2 Diabetes: This metabolic disorder is closely linked to impaired insulin function.
  • Polycystic Ovary Syndrome (PCOS): Hormonal imbalances in PCOS can lead to insulin resistance.
  • Certain Medications: Some drugs, including corticosteroids and oral contraceptives, can influence insulin sensitivity.
  • Genetic Predisposition: A family history of diabetes or insulin resistance can increase susceptibility.
  • Rare Conditions: In less common instances, acanthosis nigricans can be a symptom of certain cancers, particularly adenocarcinoma of the gastrointestinal tract.

Medical Evaluation for Hyperpigmentation

Individuals experiencing significant neck darkening should consult a healthcare professional. A medical evaluation is crucial to identify the underlying cause. This typically involves:

  1. Medical History Review: Discussing symptoms, lifestyle, and family medical history.
  2. Physical Examination: Assessing the affected skin areas and overall health.
  3. Blood Tests: Measuring blood glucose levels, HbA1c (a measure of long-term blood sugar control), and insulin levels to diagnose or rule out diabetes and insulin resistance.
  4. Hormone Level Tests: In cases of suspected PCOS, hormone levels may be checked.
  5. Further Investigations: If malignancy is suspected, imaging studies or other diagnostic procedures may be recommended.

Treatment and Management of Hyperpigmentation

Treatment focuses on addressing the root cause:

  • Lifestyle Modifications: For obesity-related insulin resistance, weight loss through diet and exercise is paramount.
  • Diabetes Management: Strict adherence to prescribed diabetes treatment plans is essential.
  • PCOS Treatment: Medical management of PCOS may involve hormonal therapies and lifestyle changes.
  • Medication Review: If medications are contributing, a physician may adjust dosages or suggest alternatives.
  • Topical Treatments: While not curative for acanthosis nigricans, topical agents like retinoids or alpha-hydroxy acids (AHAs) may help to lighten the skin and improve texture over time. These should be used under medical supervision due to potential irritation.

Addressing Blackheads on the Neck

Blackheads, also known as open comedones, are a common form of acne. They occur when hair follicles become clogged with sebum (skin oil) and dead skin cells. When this plug is exposed to air, it oxidizes and turns black, giving it its characteristic appearance. Blackheads can appear on the neck, similar to other areas prone to acne, such as the face and chest.

Causes of Blackheads

Several factors contribute to the formation of blackheads:

  • Excess Sebum Production: Hormonal fluctuations, particularly during puberty, menstruation, or periods of stress, can increase sebum production.
  • Dead Skin Cell Buildup: Inadequate exfoliation allows dead skin cells to accumulate and mix with sebum.
  • Bacterial Activity: While not the primary cause of blackheads themselves, bacteria like Cutibacterium acnes can contribute to inflammation in acne lesions.
  • Genetics: A predisposition to acne can be inherited.
  • Certain Products: Comedogenic (pore-clogging) skincare or hair products can exacerbate blackhead formation.
  • Friction: Tight clothing or accessories that rub against the neck can irritate follicles and contribute to blockages.

Skincare Habits for Blackhead Prevention and Treatment

A consistent and appropriate skincare routine is fundamental for managing blackheads on the neck. This involves:

Cleansing

Regular cleansing removes excess oil, dirt, and dead skin cells that can contribute to pore blockages. It is advisable to use a gentle, non-comedogenic cleanser twice daily.

  • Morning Cleansing: To remove accumulated oil and impurities overnight.
  • Evening Cleansing: To remove makeup, sunscreen, environmental pollutants, and excess sebum from the day.

Exfoliation

Exfoliation is critical for removing dead skin cells and preventing them from clogging pores. Two main types of exfoliation are beneficial:

  • Chemical Exfoliation: This involves using ingredients that dissolve the bonds between dead skin cells. Common chemical exfoliants include:
    • Salicylic Acid (BHA): This oil-soluble acid can penetrate pores and help to break down sebum and dead skin cells. It is particularly effective for blackheads.
    • Alpha-Hydroxy Acids (AHAs): Glycolic acid and lactic acid are examples of AHAs that work on the skin’s surface to remove dead cells.
  • Physical Exfoliation: This involves using scrubs or brushes to manually remove dead skin cells. Care must be taken to avoid over-exfoliation, which can lead to irritation and micro-tears in the skin. Gentle, finely-grained scrubs are preferable.

It is important to introduce exfoliating products gradually, starting with a few times per week, to assess skin tolerance. Over-exfoliation can compromise the skin barrier, leading to increased sensitivity and potential breakouts.

Topical Treatments

Several over-the-counter and prescription topical treatments can effectively target blackheads:

  • Retinoids: Topical retinoids, such as adapalene (available over-the-counter) and prescription-strength tretinoin, are highly effective. They work by increasing cell turnover, preventing the buildup of dead skin cells, and helping to unclog pores. Retinoids can cause initial dryness and peeling, so starting with a low concentration and applying them a few times a week is recommended.
  • Benzoyl Peroxide: This ingredient has antibacterial properties and can also help to unclog pores. It is available in various strengths and can be used as a spot treatment or a wash.
  • Niacinamide: This form of vitamin B3 can help to regulate sebum production and reduce inflammation, making it beneficial for acne-prone skin.

Moisturization

Even oily or acne-prone skin requires hydration. Using a lightweight, non-comedogenic moisturizer helps to maintain the skin barrier and prevent the skin from overcompensating by producing more oil. Look for oil-free or gel-based formulations.

Sun Protection

Sun exposure can worsen post-inflammatory hyperpigmentation (dark spots left after acne lesions heal) and can also irritate the skin, potentially exacerbating acne. Daily application of a broad-spectrum SPF 30 or higher sunscreen is essential, especially when using exfoliating treatments or retinoids, which can increase photosensitivity.

Professional Treatments for Blackheads

For persistent or severe blackheads, professional dermatological interventions may be necessary:

  • Professional Extractions: Dermatologists or trained aestheticians can safely extract blackheads using sterile instruments. This should not be attempted at home to avoid infection and scarring.
  • Chemical Peels: Stronger chemical peels can be performed in a clinical setting to deeply exfoliate the skin and improve pore clarity.
  • Microdermabrasion: This procedure uses a device to gently abrade the outer layer of skin, removing dead cells and improving texture.
  • Prescription Medications: In some cases, oral medications like isotretinoin may be prescribed for severe or recalcitrant acne, including blackheads.

Differentiating and Managing Both Conditions

It is crucial to distinguish between neck hyperpigmentation (often acanthosis nigricans) and blackheads, as their management strategies are different. While a person may experience both conditions concurrently, treating one will not resolve the other.

Integrated Approach

An integrated approach is necessary when both hyperpigmentation and blackheads are present:

  • Medical Consultation: A dermatologist can accurately diagnose the cause of hyperpigmentation and assess the severity of blackheads.
  • Addressing Underlying Causes: For hyperpigmentation, prioritizing medical management of insulin resistance or other underlying conditions is paramount.
  • Targeted Skincare: Implementing a consistent skincare routine that addresses blackheads, including gentle cleansing, appropriate exfoliation, and the use of targeted topical treatments, is essential.
  • Patience and Consistency: Both conditions require time and consistent effort to manage. Visible improvements may take weeks or months.

It is important to note that aggressive treatments for hyperpigmentation, such as harsh scrubbing or strong bleaching agents, can irritate the skin and potentially worsen acne or cause further dermatological issues. Similarly, treatments for blackheads should be approached with care to avoid exacerbating any underlying hyperpigmentation.

Lifestyle Considerations

Beyond specific treatments, certain lifestyle choices can support skin health and contribute to the management of both conditions:

  • Diet: A balanced diet rich in fruits, vegetables, and whole grains can support overall metabolic health, which is relevant for insulin resistance. Limiting processed foods and excessive sugar intake is advisable.
  • Hydration: Adequate water intake is crucial for maintaining skin health and overall bodily function.
  • Stress Management: Chronic stress can impact hormonal balance and skin health. Employing stress-reduction techniques can be beneficial.
  • Clothing Choices: Opting for breathable fabrics and avoiding tight-fitting garments that cause friction on the neck can help prevent irritation and potential breakouts.

By understanding the distinct nature of neck hyperpigmentation and blackheads, and by adopting a comprehensive, evidence-based approach that addresses both underlying causes and symptomatic treatment, individuals can effectively manage these common dermatological concerns and improve the clarity and appearance of their neck skin.

Exit mobile version