10 Simple Home Remedies To Get Rid Of Open Pores On Skin

Tackling Those Visible Skin Pores: Simple Home Solutions

Visible skin pores are a common concern for many, and while you can’t actually change your pore size, you can certainly make them appear smaller and less noticeable. This often comes down to keeping them clean, managing excess oil, and improving overall skin clarity. Thankfully, you don’t need a cabinet full of fancy products to achieve smoother-looking skin. Many effective beauty tips and skincare habits involve ingredients you likely already have in your kitchen.

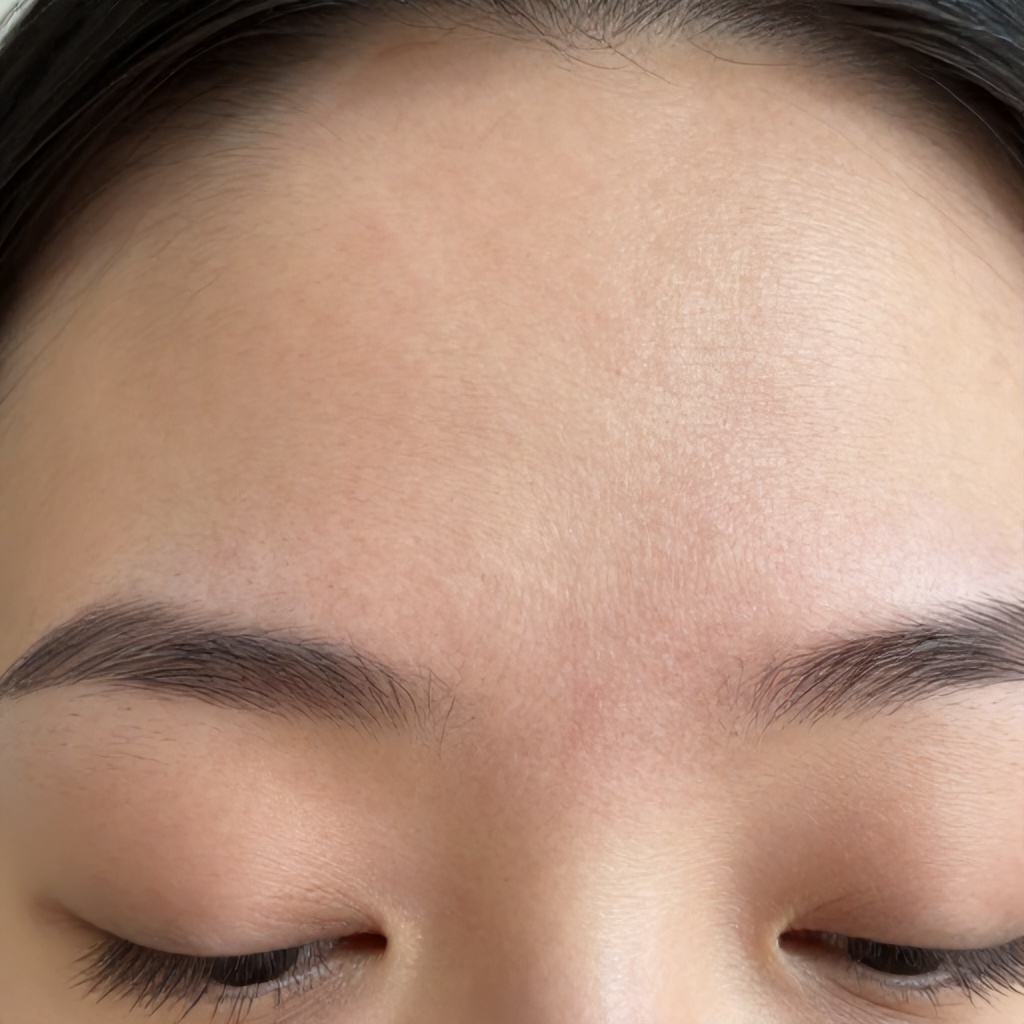
Why Do Pores Seem Bigger?

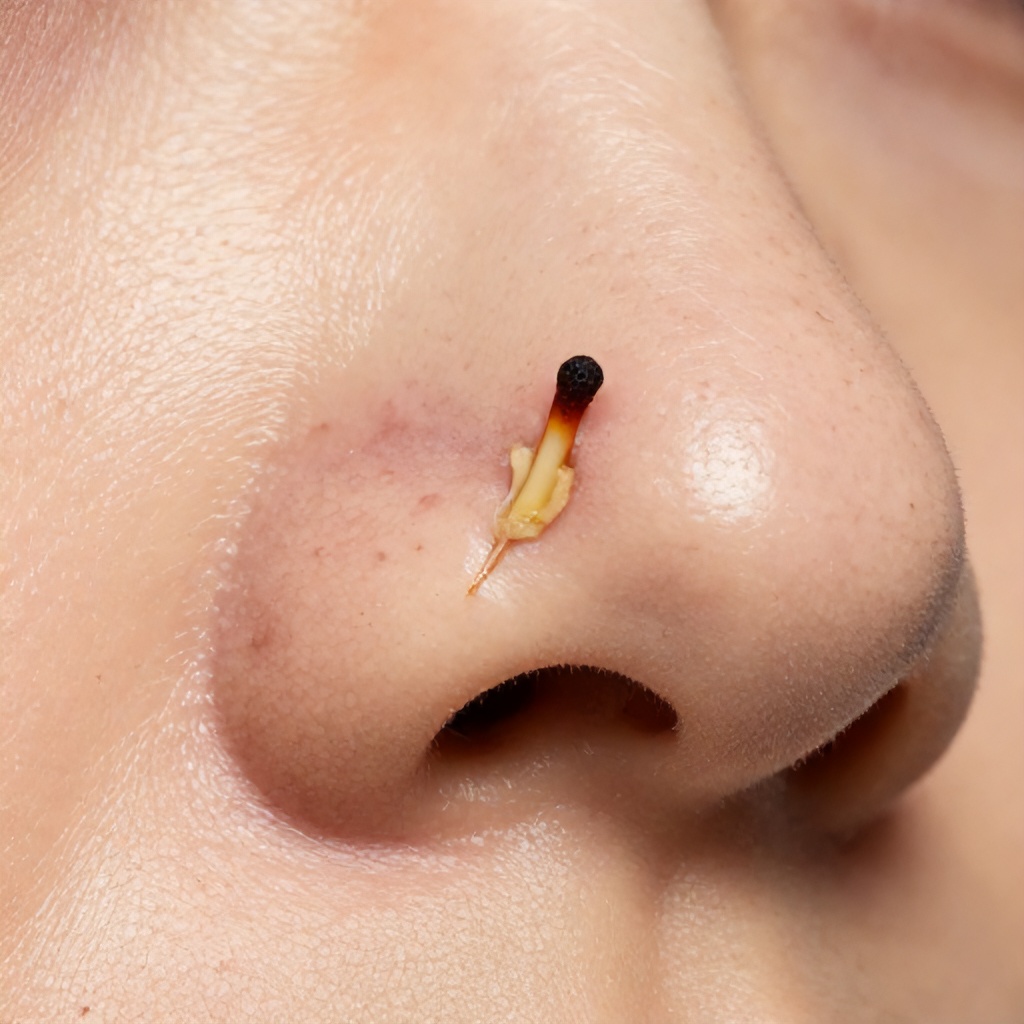
So, what makes pores more prominent? It’s usually a combination of factors. Genetics plays a role, dictating your natural pore size. But lifestyle and skincare habits also contribute significantly. When pores get clogged with oil, dead skin cells, and debris, they can stretch and appear larger. This is where issues like blackheads and acne breakouts can arise, further emphasizing their appearance. Excess oil production, a common culprit, can also make pores look more obvious. Maintaining good skin hydration and keeping your skin’s pH balance in check are also key to a refined skin texture.

Home Remedies for Minimizing the Appearance of Open Pores

Papaya Power for Blemish Reduction

Papaya is a fantastic natural ingredient for your skin. It’s packed with antioxidants and contains an enzyme called papain. This enzyme is a superhero for blemish reduction, working to gently exfoliate and unclog pores. By clearing out the gunk, it helps to refine the appearance of your skin pores.

Mashed Papaya Mask: Mash a ripe papaya until it’s smooth. Apply this pulp to your face and leave it on for about 15-20 minutes. Rinse off with lukewarm water. This can be done a couple of times a week.

Sugar Scrub for Deep Cleaning

Sugar is a wonderfully effective exfoliator. It can easily lift away excess oil and debris that get trapped in your skin pores. When you remove all that accumulated dirt, your pore size can appear to reduce, leading to a smoother complexion. Regular exfoliation is a cornerstone of good skincare habits for achieving skin clarity.

Sugar Scrub: Mix a tablespoon of fine sugar with a little bit of honey or olive oil to create a paste. Gently massage this mixture onto your damp face in circular motions, focusing on areas with visible pores. Rinse thoroughly. Use this scrub once or twice a week, being careful not to over-exfoliate.

Aloe Vera: Nature’s Gentle Cleanser

Aloe vera is a true gift from nature for your skin. It acts as a gentle cleanser, helping to remove impurities without stripping your skin. More than that, it’s incredibly nourishing and hydrating. By unclogging pores, it allows your skin to breathe and absorb moisture better, contributing to a healthier skin texture.

Aloe Vera Gel Application: Apply fresh aloe vera gel directly from the plant (or a pure store-bought gel) to your clean face. Leave it on for 20 minutes, then rinse with cool water. This can be done daily.

Egg Whites for Tightening and Toning

Egg whites are a fantastic natural agent for toning and tightening the skin. They can work wonders in making large pores appear smaller. Plus, they’re excellent at helping to control excess oil, which is a major contributor to visible pores and can lead to issues like blackheads.

Egg White Mask: Whisk one or two egg whites until they are frothy. Apply a thin layer to your face, avoiding the eye area. Let it dry completely (you’ll feel your skin tighten), then rinse with lukewarm water. You can follow up with a light moisturizer. Use this mask once or twice a week.

Baking Soda: Balancing and Soothing

Baking soda is known for its ability to help balance your skin’s pH levels. This is important for overall skin health. It also possesses anti-inflammatory and anti-bacterial characteristics. This makes it a helpful ingredient for reducing the occurrence of pimples and acne breakouts, contributing to clearer skin.

Baking Soda Paste: Mix one tablespoon of baking soda with enough water to form a paste. Gently massage it onto your face for about a minute, then rinse thoroughly with cool water. Follow with a moisturizer. Limit use to once or twice a week to avoid drying out your skin.

Banana Peel for Rejuvenation

Banana peels are surprisingly beneficial for the skin. They contain lutein, an antioxidant that aids in skin rejuvenation and can help in tightening the pores. The potassium found in banana peels also contributes to skin health and can help improve skin texture.

Banana Peel Rub: Take a ripe banana peel and gently rub the inside of the peel over your face, especially on areas with visible pores. Leave the residue on for about 10-15 minutes, then rinse with cool water. This can be done several times a week.

Apple Cider Vinegar: The Natural Toner

Apple cider vinegar (ACV) is a remarkable natural toning agent. It’s a great remedy for treating acne breakouts due to its anti-inflammatory and anti-microbial characteristics. ACV helps restore the pH balance of your skin, which is vital for healthy skin. It can also help tighten large pores, leading to a smoother appearance.

Diluted ACV Toner: Mix one part raw, unfiltered apple cider vinegar with three parts water. Apply this diluted solution to your clean face using a cotton ball. Let it dry naturally, then follow with your usual moisturizer. Start by using this toner once a day, and adjust based on your skin’s reaction. Always dilute ACV before applying it to your skin.

Warning: Apple cider vinegar is acidic and can cause irritation or burns if used undiluted or too frequently. Always perform a patch test on a small area of skin before applying it to your entire face. If you experience redness or stinging, discontinue use or further dilute the mixture.

Argan Oil for Hydration and Glow

Argan oil is a powerhouse ingredient, rich in vitamin E and essential fatty acids. These components are crucial for keeping your skin well-hydrated. Proper hydration can make pores appear less noticeable and contribute to a natural glow. It also helps to reduce the appearance of pores and can improve overall skin texture.

Argan Oil Application: After cleansing and toning, apply a few drops of pure argan oil to your face and gently massage it in. It can be used as a moisturizer or as a treatment before applying makeup to help create a smooth canvas. It’s suitable for most skin types, even oily ones, as it’s non-comedogenic.

Ice Cubes for a Quick Tightening Effect

Applying ice cubes to your skin is a quick and easy way to temporarily tighten pores and reduce puffiness. The cold temperature causes the blood vessels in your skin to constrict, making pores appear smaller. It can also help to reduce inflammation associated with pimples and acne breakouts.

Ice Cube Application: Wrap an ice cube in a thin cloth or paper towel. Gently glide it over your face for a minute or two, focusing on areas with enlarged pores. You can also do this before applying makeup to create a smoother base and enhance blood circulation, giving your skin a healthy appearance.

Tomato Scrub for Oil Control

Tomatoes have natural astringent characteristics that are highly beneficial for the skin. They help in the removal of excess oil and can tighten the skin, leading to pores reduction. The acidity in tomatoes can also help to exfoliate and clarify the skin, contributing to a clearer complexion.

Tomato Scrub: Cut a ripe tomato in half. You can either rub the cut side directly onto your face, or for a bit more exfoliation, mix the pulp with a little bit of sugar or oatmeal. Gently massage the mixture onto your face, then rinse with cool water. Use this scrub a couple of times a week.

Consistency is Key

Remember, achieving better skin clarity and minimizing the appearance of open pores is a marathon, not a sprint. These home remedies, when used consistently as part of your skincare habits, can make a noticeable difference. They work by keeping your pores clean, managing excess oil, and promoting overall skin health. Focus on gentle exfoliation, proper cleansing, and adequate hydration to maintain a refined skin texture and a natural glow.

Effective Skincare Strategies for Treating Prominent Red Marks on Forehead

Tackling That Forehead Redness: Strategies for Smoother Skin

Prominent red marks on your forehead can be a real confidence-buster, but there are effective skincare strategies to help fade them and achieve a more even complexion.

Dealing with persistent redness on your forehead is a common concern. Whether it’s from past breakouts, skin irritation, or general inflammation, these red marks can make your skin look less smooth and even. The good news is that with the right approach to facial care, you can significantly improve the appearance of these blemishes and boost your overall skin health.

Understanding the Causes of Forehead Redness

Before we jump into treatments, it’s helpful to understand what might be causing those red marks on your forehead. This can range from simple skin irritation to more complex dermatological issues. Identifying the root cause is the first step towards finding the most effective solution.

Acne and Post-Inflammatory Erythema

One of the most frequent culprits behind forehead redness is acne. When pimples, blackheads, or whiteheads form, they trigger an inflammatory response. Even after the blemish itself has healed, the area can remain red. This lingering redness, known as post-inflammatory erythema (PIE), occurs because the blood vessels in the affected area are still dilated or have undergone changes during the healing process. These red marks can sometimes persist for weeks or even months if not properly managed. It’s a common form of skin discoloration that many people experience.

Sensitive Skin and Irritation

Forehead skin can be particularly prone to sensitivity. Certain ingredients in skincare products, harsh weather conditions, or even friction from hats or headbands can trigger an inflammatory response. This leads to visible redness and can sometimes manifest as small, red bumps or patches. If your skin feels tight, itchy, or stings easily, you might have sensitive skin that’s reacting to something in your environment or routine. This skin irritation needs gentle handling.

Rosacea and Other Dermatological Conditions

In some cases, persistent forehead redness can be a symptom of underlying dermatological conditions like rosacea. Rosacea is a chronic inflammatory skin condition that often causes facial redness, visible blood vessels, and sometimes papules and pustules. While it can affect the entire face, the forehead is a common area for it to appear. Other conditions, though less common, could also contribute to persistent skin lesions and redness.

Sun Damage

Over time, cumulative sun exposure can lead to changes in the skin, including increased redness and a blotchy complexion. The sun’s UV rays can damage blood vessels and contribute to inflammation, making existing redness more prominent and potentially causing new areas of discoloration. Protecting your forehead from the sun is a vital part of any skincare strategy.

Effective Skincare Strategies for Redness Reduction

Now that we have a better grasp of the potential causes, let’s explore practical and effective skincare strategies to help reduce those prominent red marks on your forehead. Consistency is key here; you won’t see dramatic changes overnight, but with a dedicated routine, you can achieve noticeable improvements in your skin texture and overall complexion.

Gentle Cleansing is Paramount

The foundation of any good skincare routine, especially for managing redness, is gentle cleansing. Avoid harsh soaps or cleansers that strip your skin of its natural oils. Opt for mild, fragrance-free cleansers that are specifically formulated for sensitive skin or to calm inflammation. Look for ingredients like glycerin or ceramides, which help maintain the skin barrier. Cleansing twice a day, once in the morning and once at night, is usually sufficient. Over-washing can actually exacerbate skin irritation.

Incorporate Soothing Agents

When your skin is red and inflamed, you need ingredients that can calm it down. Many effective topical treatments utilize soothing agents to combat erythema.

  • Centella Asiatica (Cica): This plant extract is a powerhouse for calming irritated skin. It has anti-inflammatory properties and can help accelerate the skin’s healing process.
  • Niacinamide: Also known as Vitamin B3, niacinamide is a multi-tasking ingredient that can reduce redness, strengthen the skin barrier, and improve skin texture. It’s excellent for managing inflammation and can even help with hyperpigmentation.
  • Green Tea Extract: Rich in antioxidants, green tea extract has potent anti-inflammatory and antioxidant benefits that can help soothe redness and protect the skin from environmental damage.
  • Chamomile: Known for its calming properties, chamomile can help reduce redness and irritation, making it a great addition to cleansers or serums.

Targeted Treatments for Blemishes and Red Marks

For active breakouts or lingering red marks, targeted treatments can make a significant difference. These spot treatments are designed to address specific concerns without irritating the surrounding skin.

  1. Salicylic Acid (BHA): If your redness is linked to acne, salicylic acid is your best friend. It’s oil-soluble, meaning it can penetrate pores to unclog them and reduce inflammation. Use it in a low concentration as a spot treatment or in a gentle cleanser.
  2. Benzoyl Peroxide: This ingredient is effective at killing acne-causing bacteria. However, it can be drying and irritating, so use it sparingly and start with a lower concentration. It’s best used as a spot treatment directly on active blemishes.
  3. Azelaic Acid: This is a fantastic ingredient for both acne and the redness associated with it. It has anti-inflammatory and antibacterial properties and can also help with hyperpigmentation, making it a great choice for post-inflammatory erythema.

Hydration is Non-Negotiable

A well-hydrated skin barrier is crucial for healthy skin and for managing redness. When your skin is dehydrated, it can become more prone to irritation and inflammation. Choose a moisturizer that is non-comedogenic (won’t clog pores) and free from common irritants like fragrances and alcohol. Look for ingredients like hyaluronic acid, ceramides, and glycerin, which help to lock in moisture and support the skin barrier. Even oily skin needs hydration; a lightweight, gel-based moisturizer can be ideal.

Sun Protection: Your Daily Shield

This cannot be stressed enough: daily sun protection is vital for preventing and treating red marks. UV rays can worsen existing redness and contribute to further skin discoloration and inflammation. Every single day, apply a broad-spectrum sunscreen with an SPF of 30 or higher to your face, including your forehead. Mineral sunscreens containing zinc oxide or titanium dioxide are often well-tolerated by sensitive skin and can offer excellent protection. Reapply throughout the day, especially if you’re outdoors.

Exfoliation: Proceed with Caution

While exfoliation can help improve skin texture and remove dead skin cells that might be contributing to a dull complexion, it needs to be done carefully when dealing with redness. Over-exfoliation can strip the skin and worsen inflammation.

  • Chemical Exfoliants: AHAs (like glycolic or lactic acid) and BHAs can be effective, but start with low concentrations and use them only 1-2 times per week.
  • Physical Exfoliants: Avoid harsh scrubs with large, jagged particles. If you must use a physical exfoliant, choose one with very fine, smooth particles and use it gently.

Listen to your skin. If it feels irritated after exfoliating, reduce the frequency or switch to a gentler option.

Lifestyle Factors That Impact Your Complexion

Skincare isn’t just about what you put on your face; it’s also about how you live. Certain lifestyle choices can significantly impact your skin’s health and its tendency towards redness.

Diet and Hydration

What you eat and drink plays a role in your skin’s health. Staying well-hydrated by drinking plenty of water throughout the day can improve your skin’s overall appearance and resilience. Some people find that certain foods trigger inflammation or breakouts, leading to more red marks. Common triggers include dairy, high-glycemic foods, and spicy foods. While individual triggers vary, paying attention to your diet might reveal patterns that affect your forehead redness.

Stress Management

Stress is a known contributor to inflammation in the body, and this can manifest on your skin. When you’re stressed, your body releases cortisol, a hormone that can exacerbate acne and increase skin sensitivity. Finding healthy ways to manage stress, such as exercise, meditation, or yoga, can have a positive impact on your complexion. Prioritizing your mental well-being is an integral part of achieving clear, healthy skin.

Sleep Quality

Your skin repairs itself while you sleep. Poor sleep quality can disrupt this crucial healing process, making your skin more susceptible to inflammation and less able to recover from existing blemishes. Aim for 7-9 hours of quality sleep per night to give your skin the best chance to regenerate and heal. Ensure your pillowcases are clean, as bacteria can contribute to breakouts and irritation.

When to Seek Professional Help

While at-home skincare can address many common causes of forehead redness, there are times when consulting a professional is the best course of action. If your redness is severe, persistent, or accompanied by other concerning symptoms, a dermatological evaluation is recommended.

Consulting a Dermatologist

A dermatologist can accurately diagnose the cause of your forehead redness, whether it’s a form of acne, rosacea, or another skin condition. They can offer prescription-strength topical treatments, oral medications, or recommend in-office procedures like laser therapy or chemical peels that are tailored to your specific needs. They can also advise on the best skincare products for your skin type and concerns, ensuring you’re not using anything that could worsen your condition. Don’t hesitate to seek expert advice if you’re struggling to see improvement or if the redness is impacting your quality of life.

Managing prominent red marks on your forehead involves a consistent and gentle approach to skincare, understanding the underlying causes, and adopting healthy lifestyle habits. By incorporating soothing ingredients, targeted treatments, and diligent sun protection, you can work towards a smoother, clearer, and more even complexion. Remember that patience and consistency are your greatest allies in this journey toward healthier skin.

8 DIY Remedies to Remove Blackheads at Home Naturally

Tackling blackheads at home is absolutely possible with consistent effort and the right natural approaches, helping you achieve clearer, smoother facial skin without harsh chemicals.

Why Do Blackheads Appear?

Blackheads, technically known as open comedones, are a common type of mild acne that forms when hair follicles become clogged. This happens when excess sebum, which is your skin’s natural oil, combines with dead skin cells. This mixture gets trapped in the visible pores, creating a plug. The top of this plug remains open to the air, and when exposed to oxygen, it oxidizes, turning a dark, almost black color. This isn’t dirt, as many people mistakenly believe, but rather the oxidation process giving it that characteristic dark spot appearance.

These small skin imperfections often appear on the nose, forehead, and chin, but can show up anywhere on the human skin. While they are not usually painful, they can make your skin texture feel rough and uneven, and many people find them aesthetically bothersome. Understanding their formation is the first step in effectively treating and preventing them through your daily skin care routine.

Important Tips Before Trying Any Remedy

Before you jump into any DIY remedies for blackheads, remember that your skin health is paramount. What works wonders for one person might irritate another. Always approach new topical solutions with caution and gentleness.

  • Patch Test Everything: Before applying any new mixture to your entire facial area, test a small amount on an inconspicuous spot, like behind your ear or on your inner arm. Wait 24 hours to check for any redness, itching, or irritation.
  • Be Gentle: Aggressive scrubbing or picking can worsen skin blemishes, spread bacteria, and even cause scarring. Treat your skin kindly.
  • Consistency is Key: Natural remedies often take time to show results. Stick to a routine for a few weeks before deciding if a remedy is effective for your skin concerns.
  • Moisturize: Even oily skin needs hydration. Some remedies can be drying, so follow up with a light, non-comedogenic moisturizer to maintain your skin’s barrier function.
  • Sun Protection: Some ingredients, like lemon juice, can increase your skin’s sensitivity to the sun. Always use sunscreen, especially when using exfoliating treatments.

8 DIY Home Remedies for Removing Blackheads

1. Baking Soda and Water Paste

Baking soda is a mild abrasive that can help exfoliate the skin and remove dead skin cells and excess oil that contribute to clogged pores. Its alkaline nature can also help balance the skin’s pH, which sometimes gets out of whack when dealing with skin imperfections. This simple home remedy offers a gentle way to improve skin texture.

  1. Mix two tablespoons of baking soda with two tablespoons of water to form a thick paste.
  2. Gently apply the paste to the areas with blackheads, such as your nose or chin.
  3. Massage in small, circular motions for about 30 seconds.
  4. Rinse thoroughly with lukewarm water and pat your facial skin dry.

Use this remedy once or twice a week. Overuse can be drying or irritating for some skin types, particularly sensitive skin. Always follow up with a moisturizer.

2. Honey and Cinnamon Pore Strips

Honey is a natural antibacterial and antiseptic agent, making it excellent for skin health. Cinnamon, on the other hand, helps improve blood circulation and acts as a mild exfoliant. Together, they create a sticky, effective natural remedy that can help pull out impurities from your pores, similar to a DIY pore strip, aiding in pore cleansing.

  1. Combine one tablespoon of raw honey with half a teaspoon of cinnamon powder to create a paste.
  2. Apply a thin layer of this mixture over your blackheads, especially on the nose or other affected areas.
  3. Press a clean cotton strip or a piece of thin cloth over the mixture.
  4. Let it sit for 5-10 minutes.
  5. Gently peel off the strip, and then rinse your face with warm water.

This method can be used once a week. Cinnamon can cause a slight tingling sensation; if it feels too intense, rinse immediately. This is a great option for those looking to banish blackheads with natural ingredients.

3. Oatmeal Exfoliating Scrub

Oatmeal is renowned for its soothing and anti-inflammatory properties, making it an excellent choice for sensitive skin types. As a gentle physical exfoliant, it can absorb excess oil and remove dead skin cells without causing irritation, leading to smoother skin texture and helping to clear out those visible pores.

  1. Cook a small amount of plain oatmeal according to package directions, but use less water to make it thicker. Let it cool completely.
  2. Alternatively, grind dry rolled oats into a fine powder and mix with a bit of water, milk, or plain yogurt to form a paste.
  3. Apply the oatmeal paste to your facial skin, focusing on areas with blackheads.
  4. Gently massage in circular motions for 1-2 minutes.
  5. Leave the mask on for an additional 10-15 minutes before rinsing with lukewarm water.

You can use this gentle scrub 2-3 times a week. It’s particularly good for calming the skin while performing effective pore cleansing, contributing to overall skin health.

4. Green Tea Toner

Green tea is a powerhouse of antioxidants, particularly catechins, which have anti-inflammatory and anti-androgenic properties. This means it can help reduce sebum production, which is a key factor in the formation of blackheads and other forms of acne. Using it as a toner can help tighten visible pores and reduce the appearance of dark spots over time.

  1. Brew a cup of green tea and let it cool completely. You can also use two green tea bags steeped in hot water.
  2. Once cool, dip a cotton ball into the tea.
  3. Gently dab the green tea onto your clean facial area, especially where blackheads are present.
  4. Let it air dry; do not rinse it off.

Apply this green tea toner once or twice daily after cleansing. It’s a refreshing and effective addition to your skincare routine, promoting better skin health and helping to banish blackheads with consistent use.

5. Lemon Juice and Sugar Scrub

Lemon juice contains alpha-hydroxy acids (AHAs), which are natural chemical exfoliants that can help break down the bonds between dead skin cells, promoting cell turnover and unclogging pores. Sugar acts as a physical exfoliant, gently scrubbing away surface impurities. This combination is a potent DIY remedy for improving skin texture and addressing skin imperfections.

  1. Squeeze the juice from half a fresh lemon into a small bowl.
  2. Add one tablespoon of granulated sugar and mix well to form a coarse scrub.
  3. Apply the scrub to your clean facial skin, focusing on areas with blackheads.
  4. Gently massage in circular motions for about 1 minute.
  5. Rinse thoroughly with lukewarm water.

Use this scrub no more than once a week due to its potency. Lemon juice can make your skin very sensitive to the sun, so it’s essential to apply sunscreen diligently after using this remedy. Avoid if you have very sensitive skin or open cuts.

6. Apple Cider Vinegar (ACV) Toner

Apple cider vinegar is a natural astringent and antibacterial agent. It can help balance the skin’s pH, tighten visible pores, and dissolve the excess oil and dead skin cells that lead to blackheads. Its antiseptic properties also help prevent further skin blemishes and maintain overall skin health. Dilution is crucial for this powerful natural remedy.

  1. Mix one part raw, unfiltered apple cider vinegar with two to three parts distilled water. For example, one tablespoon of ACV with two or three tablespoons of water.
  2. After cleansing your face, apply the diluted ACV to your facial area with a cotton ball.
  3. Let it air dry; there’s no need to rinse.

Start by using this toner once a day, and if your skin tolerates it well, you can increase to twice daily. The smell can be strong initially but dissipates quickly. Always dilute ACV properly to avoid irritation, especially if you have sensitive facial skin.

7. Clay Mask (Bentonite or Kaolin)

Clay masks, particularly those made from bentonite or kaolin clay, are excellent for drawing out impurities and absorbing excess oil from deep within the pores. These natural remedies work by having a negative electrical charge, which attracts positively charged toxins and oils, effectively performing deep pore cleansing and helping to banish blackheads. They are fantastic topical solutions for improving skin texture and reducing dark spots.

  1. Mix one tablespoon of bentonite or kaolin clay powder with enough water or apple cider vinegar to form a smooth paste.
  2. Apply an even layer of the mask to your clean facial skin, focusing on areas with blackheads.
  3. Allow the mask to dry completely, which usually takes 10-15 minutes. You’ll feel a tightening sensation.
  4. Rinse thoroughly with lukewarm water, gently massaging as you rinse to aid in exfoliation.

Use a clay mask once a week. If you have dry skin, you might want to use it less frequently or only on oily zones. These masks are a staple in many skincare routines for addressing various skin concerns, including stubborn comedones.

8. Egg White Mask

Egg whites are known for their ability to temporarily tighten the skin and visible pores. They can also help absorb excess oil and gently pull out impurities from clogged pores as they dry, making them a simple yet effective DIY remedy for blackheads. The proteins in egg whites can also contribute to a smoother skin texture.

  1. Separate the white from one egg.
  2. Whisk the egg white lightly until it’s slightly frothy.
  3. Apply a thin layer of the whisked egg white to your clean facial area, particularly where you have blackheads.
  4. Place a thin piece of tissue paper or toilet paper over the wet egg white, pressing it gently onto your skin.
  5. Apply another thin layer of egg white over the tissue paper.
  6. Let it dry completely, which can take 15-20 minutes. You’ll feel your skin tighten.
  7. Once dry, carefully peel off the tissue paper.
  8. Rinse your face with lukewarm water to remove any residue.

This mask can be used once a week. Avoid if you have an egg allergy. While it won’t permanently shrink pores, it can give a temporary tightening effect and aid in the removal of surface blackheads, improving the overall look of your facial skin.

Maintaining Clear Skin Long-Term

Removing existing blackheads is just one part of the battle; preventing new ones from forming is equally important for lasting skin health. A consistent and gentle skincare routine is your best defense against clogged pores and skin blemishes. Remember that healthy human skin thrives on balance, not harsh treatments.

  • Cleanse Regularly: Wash your face twice daily with a mild, non-comedogenic cleanser to remove excess oil, makeup, and environmental pollutants.
  • Exfoliate Gently: Incorporate a gentle exfoliant (either chemical like salicylic acid or physical like a soft scrub) 2-3 times a week to prevent the buildup of dead skin cells.
  • Moisturize: Use a lightweight, non-comedogenic moisturizer daily, even if you have oily skin. Dehydrated skin can sometimes produce more oil to compensate, leading to more blackheads.
  • Avoid Picking: Resist the urge to squeeze or pick at blackheads. This can push bacteria deeper, cause inflammation, and lead to scarring or more severe acne.
  • Check Your Products: Ensure all your makeup, sunscreen, and other skincare products are labeled “non-comedogenic” or “non-acnegenic,” meaning they won’t clog pores.
  • Hydrate from Within: Drink plenty of water to keep your skin hydrated and help flush out toxins.

When to Seek Professional Help

While DIY remedies can be very effective for many people, sometimes blackheads and other skin concerns require professional intervention. If your blackheads are persistent, widespread, or accompanied by painful cysts or nodules (indicating more severe acne), it’s a good idea to consult a dermatologist. They can offer stronger topical solutions, prescription medications, or in-office treatments like extractions or chemical peels to address your specific skin health needs and help you achieve clearer skin.

Effective Treatments and Prevention for Razor Burn and Ingrown Hairs

Soothe Your Skin: Taming Razor Burn and Banish Ingrown Hairs

Razor burn and ingrown hairs are common skin irritations that can turn a smooth shave into a painful ordeal. Understanding why they happen is the first step to preventing them and finding effective remedies.

Understanding the Culprits: Razor Burn vs. Ingrown Hairs

Razor burn often appears as redness and a burning sensation immediately after shaving. It’s essentially a mild form of skin inflammation caused by the friction of the razor blade against the skin, especially when the skin is dry or the blade is dull.

Ingrown hairs, on the other hand, are hairs that curl back or grow sideways into the skin instead of rising out of the hair follicle. This can lead to small, red, inflamed bumps that might resemble pimples, and sometimes they can become infected, causing more significant discomfort and even pus. This particular skin concern is often seen with stubble growth.

Prevention is Key: Strategies for a Smoother Shave

The best approach to dealing with razor burn and ingrown hairs is to prevent them from occurring in the first place. Implementing a few simple changes to your shaving routine can make a world of difference.

Prep Your Skin for Success

Don’t just jump straight to the razor. Your skin needs preparation.

  1. Warm Water is Your Friend: Before you even pick up a razor, spend a few minutes in a warm shower or apply a warm, damp cloth to the area you plan to shave. This softens the hair and opens up the pores, making hair removal easier and reducing the chance of the hair being pulled or cut unevenly below the skin’s surface.
  2. Exfoliate Gently: A gentle exfoliation before shaving can help lift hairs away from the skin and remove dead skin cells that might trap hairs. You can use a soft washcloth, a gentle scrub, or an exfoliating brush. Be careful not to overdo it, as too much scrubbing can also cause irritation.

Choose the Right Tools and Techniques

Your razor and shaving cream play a significant role.

  • Sharp Blade, Happy Skin: Always use a sharp, clean razor blade. A dull blade tugs at the hair and skin, increasing the likelihood of razor burn and ingrown hairs. Change your razor blades frequently – typically every 5-10 shaves, or as soon as you notice any pulling or tugging.
  • Shaving Cream or Gel: Never shave dry. Use a good quality shaving cream, gel, or oil. These products create a slick barrier between the razor and your skin, allowing the blade to glide smoothly and reducing friction. Look for formulas designed for sensitive skin if you’re prone to irritation.
  • Shave with the Grain: This is a big one for preventing ingrown hairs. Shave in the direction that your hair grows. Shaving against the grain might give you a closer shave initially, but it’s a major contributor to ingrown hairs and irritation because it can cut the hair too close to the follicle, allowing it to curl back into the skin. If you need a closer shave, go over the area a second time, but always try to follow the direction of hair growth.
  • Rinse Frequently: Rinse your razor blade under hot water after every stroke or two. This prevents hair clippings and shaving cream from clogging the blade, ensuring a cleaner, more efficient shave.
  • Avoid Over-Shaving: Don’t go over the same spot repeatedly. If you’ve shaved an area and need a little more, reapply shaving cream and shave gently.

Post-Shave Care Matters

The work isn’t done once the razor is put away.

  • Rinse with Cool Water: After you’ve finished shaving, rinse your skin thoroughly with cool water. This helps to close the pores and soothe any immediate redness or irritation.
  • Pat Dry, Don’t Rub: Gently pat your skin dry with a clean, soft towel. Rubbing can further irritate sensitive skin.
  • Moisturize: Apply a gentle, fragrance-free moisturizer or a post-shave balm. This helps to rehydrate the skin and create a protective barrier. Look for ingredients like aloe vera, chamomile, or hyaluronic acid, which are known for their soothing and hydrating properties.

Effective Treatments for Existing Razor Burn and Ingrown Hairs

Despite your best efforts, you might still experience razor burn or ingrown hairs. Fortunately, there are several effective remedies to help calm your skin and get rid of those pesky bumps.

Calming Razor Burn

Razor burn often resolves on its own within a day or two, but these steps can speed up the healing process and provide immediate relief.

  • Cool Compresses: Apply a cool, damp cloth or an ice pack wrapped in a thin towel to the affected area for 10-15 minutes at a time. This can help reduce redness and inflammation.
  • Aloe Vera Gel: Pure aloe vera gel is a natural anti-inflammatory and can be incredibly soothing for irritated skin. Apply it liberally to the burned areas.
  • Oatmeal Baths: For larger areas of irritation, an oatmeal bath can be very beneficial. Colloidal oatmeal has anti-inflammatory and skin-soothing properties.
  • Hydrocortisone Cream: Over-the-counter hydrocortisone cream (0.5% or 1%) can help reduce redness and itching associated with razor burn. Use it sparingly for a few days.
  • Avoid Further Irritation: Stay away from shaving, tight clothing, and harsh skincare products on the affected areas until the skin has healed.

Tackling Ingrown Hairs

Ingrown hairs can be more stubborn, but with patience and the right approach, you can help them resolve and prevent future occurrences.

  • Warm Compresses: Similar to razor burn, applying warm compresses can help soften the skin and encourage the ingrown hair to surface. Do this several times a day.
  • Gentle Exfoliation: Once the inflammation has subsided a bit, gentle exfoliation can help release the trapped hair. You can use a soft washcloth, a gentle scrub, or a chemical exfoliant containing salicylic acid or glycolic acid. These ingredients are particularly effective at breaking down the debris that can trap hairs.
  • Tweezers (with Caution): If the ingrown hair has surfaced and you can clearly see the hair loop, you can carefully try to lift it out with a sterile pair of tweezers. Sterilize the tweezers with rubbing alcohol first. Do NOT dig into your skin. If you can’t easily access the hair, leave it alone and let it resolve on its own or seek professional help. Attempting to dig out a deeply embedded hair can lead to infection and scarring.
  • Topical Treatments: Products containing salicylic acid or benzoyl peroxide can help unclog pores and reduce inflammation. They can be applied directly to the ingrown hair bump.
  • Prevent Re-occurrence: Once the ingrown hair has resolved, continue with your preventative measures, especially shaving with the grain and exfoliating regularly.

When to Seek Professional Help

While most cases of razor burn and ingrown hairs can be managed at home, there are times when you should consult a healthcare professional, such as a dermatologist.

  • Signs of Infection: If an ingrown hair becomes very painful, swollen, filled with pus, or if you develop a fever, it could be infected. This requires medical attention.
  • Persistent or Severe Issues: If you experience frequent, severe ingrown hairs or razor burn that doesn’t improve with home care, a dermatologist can offer stronger prescription treatments or discuss alternative hair removal methods.
  • Scarring: If you are concerned about scarring from ingrown hairs, a dermatologist can recommend treatments to minimize their appearance.

Beyond the Razor: Alternative Hair Removal Methods

For some individuals, the best way to avoid razor burn and ingrown hairs altogether is to explore alternative hair removal methods. While each has its own pros and cons, they might offer a solution to persistent skin concerns.

  • Waxing: This method removes hair from the root. While it can sometimes cause temporary irritation or ingrown hairs if not done correctly, many find it leads to smoother skin for longer periods and can reduce the incidence of ingrown hairs over time compared to shaving.
  • Sugaring: Similar to waxing, sugaring removes hair from the root. It’s often considered gentler on the skin and can be a good option for sensitive individuals.
  • Epilating: Epilators are devices that pull multiple hairs out from the root. Like waxing, it can cause initial irritation but may lead to fewer ingrown hairs with regular use.
  • Laser Hair Removal/IPL: These are longer-term solutions that target hair follicles to reduce hair growth. They require multiple sessions and are an investment, but many find them highly effective in preventing ingrown hairs and razor burn permanently or for extended periods.
  • Depilatory Creams: These creams dissolve hair at the skin’s surface. While they can be convenient, some people experience allergic reactions or irritation. Always patch-test first.

Managing razor burn and ingrown hairs is largely about adopting a mindful approach to hair removal and skincare. By understanding your skin, preparing it properly, using the right tools, and following up with consistent care, you can significantly reduce these common skin irritations and enjoy smoother, more comfortable skin.

Exit mobile version