Chalkboard Yoga Infographic Explores Diverse Yoga Styles Visually

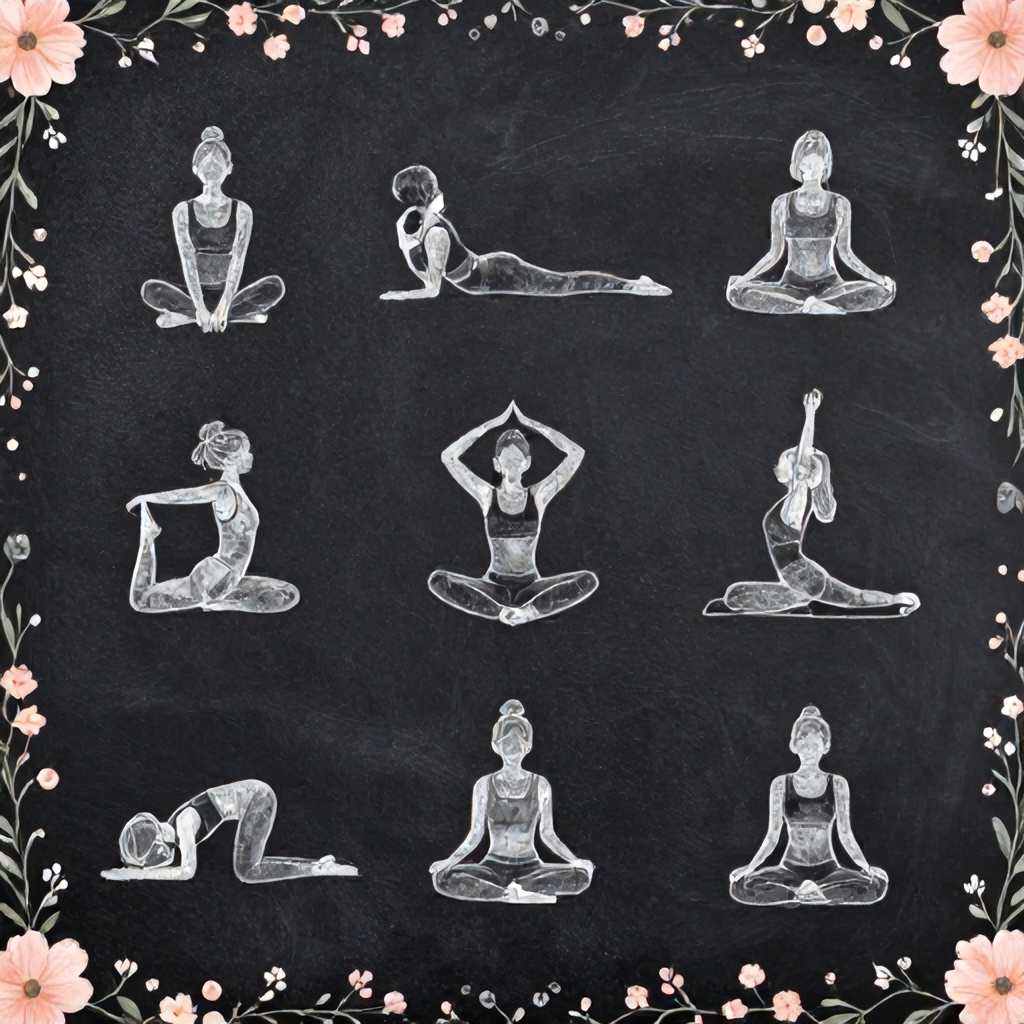
A chalkboard yoga infographic simplifies the often-overwhelming world of diverse yoga styles, presenting complex information in an easy-to-digest and visually appealing format for everyday readers.

Why a Chalkboard Yoga Infographic?

Imagine a beautiful visual aid that breaks down the many paths of yoga. That’s precisely what a well-designed infographic can do. Its purpose is to be both informative and engaging, offering a quick yet comprehensive overview of various yoga practices without feeling like a textbook. The charm of a chalkboard background, for instance, evokes a sense of nostalgic learning, making the educational content feel approachable and warm.

This particular thematic design uses a chalk-like aesthetic to present different yoga types, making the learning process feel less intimidating and more like a delightful discovery. It’s a fantastic way to introduce newcomers to the breadth of yoga variations available, helping them find a style that resonates with their personal goals and preferences.

The Visual Appeal

The beauty of such an infographic lies in its artistic style. Picture a dark, rich chalkboard background, perhaps with subtle texture, acting as the canvas. Around the edges, a delicate floral border in soft pastel hues adds a touch of organic elegance, softening the overall look and inviting the eye to linger. Each distinct yoga style would be represented by a colorful icon, rendered with a chalk-like effect, making it pop against the darker surface. This visual representation isn’t just pretty; it helps differentiate each section immediately.

These decorative elements, from the border to the individual icons, contribute to a cheerful mood, making the infographic not just useful but also a pleasure to behold. The thematic background ensures consistency, while the illustrative content uses simple, clear drawings or symbols to convey the essence of each practice. It’s an artistic rendering that makes learning about yoga feel like an inspiring journey, not a chore.

Exploring Diverse Yoga Styles

The heart of this infographic is its exploration of diverse yoga styles. It aims to provide descriptive text for each, highlighting their unique characteristics, benefits, and typical approaches. This isn’t about deep philosophical dives, but rather practical insights that help you understand what to expect from each type of class or practice. From the gentle to the vigorous, there’s truly a yoga style for everyone, and this visual guide helps illuminate those options.

Each section on the infographic would feature a concise summary, perhaps a few bullet points detailing key aspects, and an illustrative pose or symbol. This content illustration makes it easy to skim and absorb information quickly, fulfilling the promise of an informative visual aid.

Hatha Yoga: The Foundation

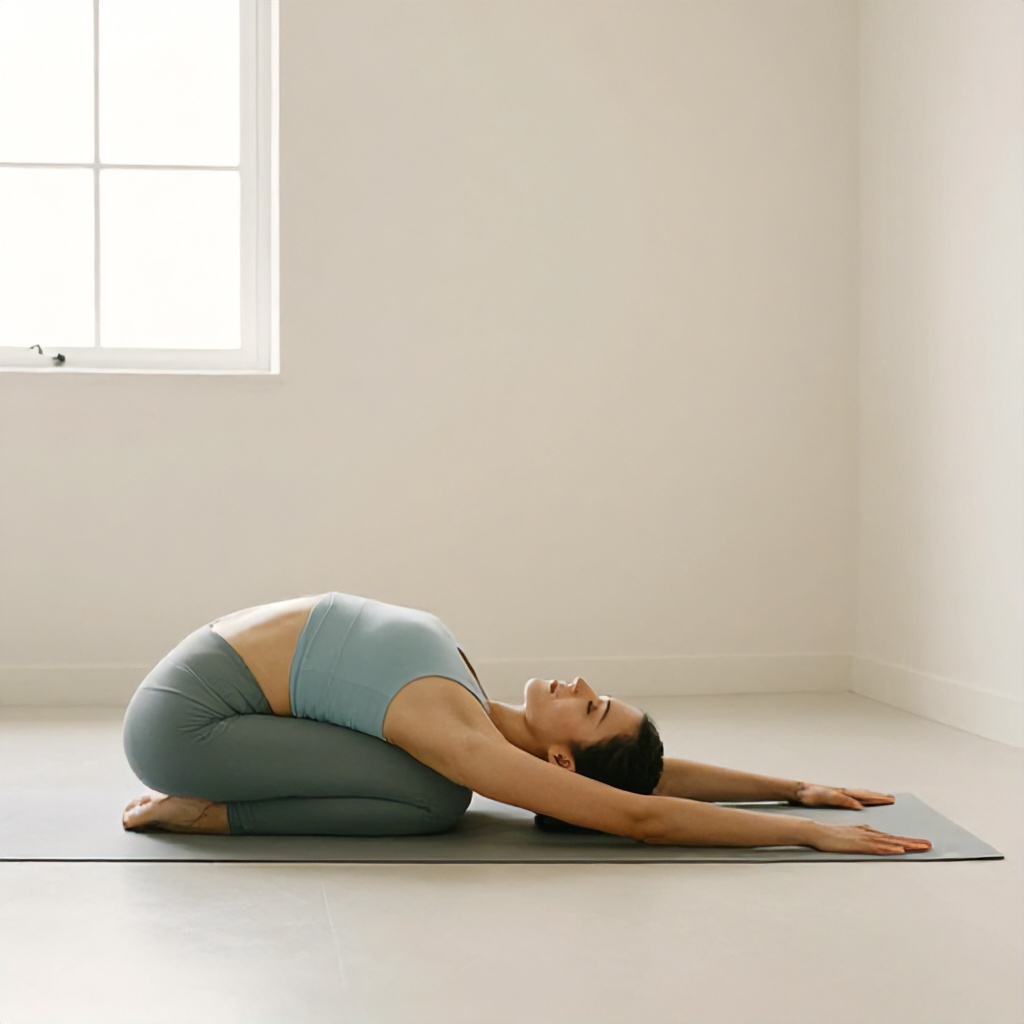
Hatha yoga is often considered the root of many modern yoga practices. It focuses on basic poses (asanas) and breathing techniques (pranayama), holding each pose for several breaths. This style is excellent for beginners because it moves at a slower pace, allowing ample time to learn proper alignment and build foundational strength and flexibility. The infographic would show a simple, stable pose, perhaps Mountain Pose or Warrior II, with a brief explanation of its emphasis on balance and stillness.

It’s a wonderful entry point for anyone curious about yoga, providing a gentle introduction to the physical and mental aspects of the practice. The descriptive text for Hatha would highlight its accessibility and its role in building body awareness, making it a popular choice among various yoga types.

Vinyasa Yoga: Flow and Movement

Vinyasa yoga, often called “flow yoga,” links breath to movement, creating a dynamic and fluid sequence of poses. Unlike Hatha, where poses are held for longer durations, Vinyasa transitions smoothly from one pose to the next. Classes vary widely depending on the teacher, offering a creative and often energetic experience. This style builds heat, strength, and flexibility while improving cardiovascular health.

An infographic representation might feature a series of flowing lines connecting different poses, visually conveying the continuous movement. The colorful icon for Vinyasa could be a dynamic figure in motion, capturing the essence of its vibrant yoga practices. It’s one of the most popular yoga variations for those seeking a more athletic and dance-like practice.

Ashtanga Yoga: Structured and Demanding

Ashtanga yoga is a rigorous and physically demanding style characterized by a fixed sequence of poses. Practitioners move through the same series of postures in every class, building strength, stamina, and mental focus. It’s a disciplined practice that generates internal heat and purifies the body. Ashtanga is not for the faint of heart, but its consistent structure offers profound benefits for dedicated students.

The chalkboard background would highlight Ashtanga with clear, sequential numbering for its series, emphasizing its structured nature. The descriptive text would mention its challenging yet rewarding aspects, appealing to those who enjoy a disciplined approach to their yoga practices.

Restorative Yoga: Deep Relaxation

Restorative yoga is all about slowing down and opening your body through passive stretching. It utilizes props like blankets, bolsters, and blocks to support the body, allowing you to hold poses for extended periods—sometimes 5 to 20 minutes. The goal is deep relaxation, stress reduction, and gentle opening of the body. It’s a perfect antidote to a busy life, promoting a sense of calm and well-being.

The infographic’s colorful icon for Restorative yoga might show a person comfortably supported by props, radiating tranquility. The pastel hues used for this section would further emphasize its calming nature, making it clear this is one of the yoga types focused on rest and recovery.

Yin Yoga: Holding and Releasing

Yin yoga targets the deep connective tissues of the body – the ligaments, joints, bones, and fascia – rather than the muscles. Poses are held for longer durations, typically three to five minutes or more, often with the support of props. This practice aims to increase circulation in the joints and improve flexibility, particularly in the hips, pelvis, and spine. It’s a quiet, meditative practice that encourages introspection and patience.

For Yin yoga, the illustrative content might show a figure in a deep, seated forward fold, emphasizing stillness and internal focus. The descriptive text would explain its unique approach to flexibility and its meditative qualities, appealing to those seeking profound release and mental quietude among the various yoga styles.

Iyengar Yoga: Precision and Alignment

Iyengar yoga places a strong emphasis on precision and alignment in every pose. It uses a wide array of props – such as belts, blocks, and blankets – to help students achieve the correct form and deepen their understanding of each posture. This meticulous approach helps build strength, flexibility, and stability while preventing injury. It’s highly beneficial for those recovering from injuries or seeking a detailed understanding of their body mechanics.

The chalkboard background could feature an outline of a pose with arrows indicating precise alignment points, a perfect content illustration for Iyengar. The colorful icon might be a detailed representation of a prop being used correctly, highlighting the educational aspect of this particular yoga style.

Bikram Yoga: Heat and Sequence

Bikram yoga consists of a specific series of 26 postures and two breathing exercises, performed in a heated room (typically 105°F with 40% humidity) for 90 minutes. The heat is said to help detoxify the body, increase flexibility, and prevent injury. Each class follows the exact same sequence, providing a predictable and challenging experience. It’s a demanding practice that builds mental fortitude and physical endurance.

For Bikram, the descriptive text would clearly state the temperature and sequence, while the illustrative content might show a drop of sweat or a sun icon to convey the heat. This specific set of yoga practices offers a unique, intense experience.

Kundalini Yoga: Energy and Awareness

Kundalini yoga is a dynamic, powerful practice that focuses on awakening the energy at the base of the spine (kundalini energy) through a combination of physical postures, breathing techniques, chanting, meditation, and mudras (hand gestures). It is often referred to as the “yoga of awareness,” aiming to expand consciousness and cultivate spiritual growth. Classes are often very different from other styles, incorporating a wide range of elements.

The chalkboard background could represent Kundalini with a swirling energy symbol or a lotus flower, symbolizing spiritual awakening. The colorful icon might feature a meditating figure with an aura, reflecting the emphasis on inner energy and awareness, making it one of the more spiritually-focused yoga types.

Aerial Yoga: Defying Gravity

Aerial yoga, also known as anti-gravity yoga, combines traditional yoga poses with elements of acrobatics, dance, and Pilates, all performed while suspended in a fabric hammock. The hammock supports the body, allowing for deeper stretches, inversions without compression on the spine, and a sense of weightlessness. It builds core strength, improves flexibility, and offers a playful new perspective on familiar poses.

The infographic’s illustrative content for Aerial yoga would undoubtedly show a person gracefully hanging from a hammock, perhaps in an inverted pose, showcasing the unique nature of these yoga practices. This visual aid immediately conveys the fun and challenge of defying gravity.

AcroYoga: Partnership and Play

AcroYoga blends the spiritual wisdom of yoga, the dynamic power of acrobatics, and the loving kindness of Thai massage. It involves two or more people working together – a “base” who supports, a “flyer” who is lifted, and often a “spotter” for safety. This practice builds trust, communication, and strength in a playful, community-oriented setting. It’s a fantastic way to connect with others and explore movement in a new way.

The chalkboard background for AcroYoga would feature two figures in a balanced pose, highlighting the partnership aspect. The descriptive text would emphasize collaboration and fun, making it clear this is one of the more interactive yoga variations. The colorful icon could be two interlocking figures, symbolizing connection.

Designing Your Own Infographic Inspiration

This chalkboard yoga infographic serves as an excellent example of how to make complex subjects accessible and appealing. It’s an educational tool that uses a thematic background and artistic rendering to create an informative and engaging piece. You might even feel inspired to create your own illustrative content for other topics you’re passionate about.

The goal is always to provide clear, concise information that’s easy to understand at a glance. The use of pastel hues and a cheerful mood makes the learning experience more enjoyable. This visual representation truly helps demystify the vast world of yoga, making it less daunting for anyone looking to start their journey.

Key Elements for Each Style on the Infographic:

  • Style Name: Clearly labeled at the top of its section.
  • Brief Description: A one-sentence summary of its core focus.
  • Key Benefits: A few bullet points highlighting what you gain from the practice (e.g., flexibility, strength, relaxation).
  • Typical Poses/Movements: Mentioning a characteristic pose or type of movement.
  • Intensity Level: A simple visual indicator (e.g., 1-5 stars, or “Gentle,” “Moderate,” “Vigorous”).
  • Focus: What the practice primarily emphasizes (e.g., physical, mental, spiritual, alignment).
  • Colorful Icon: A unique, chalk-like symbol for quick identification.

This structured approach ensures that the content illustration remains consistent and highly useful, making it a powerful visual aid for understanding diverse yoga styles and their unique yoga practices.

Why This Visual Approach Works for Learning

A well-crafted visual aid like this chalkboard infographic excels at conveying information quickly and effectively. Our brains process images much faster than text, making an infographic an ideal format for introducing a wide range of yoga types. It breaks down the barrier of overwhelming text, inviting readers to explore and learn at their own pace.

The combination of a charming chalk-like aesthetic, clear descriptive text, and engaging illustrative content makes the learning experience not only informative but also enjoyable. It’s a practical guide that encourages exploration of various yoga variations without feeling prescriptive. This thematic design provides a welcoming entry point into the world of yoga, making it less intimidating and more approachable for everyone.

Gentle Morning Yoga Stretches to Improve Flexibility and Reduce Stiffness

Starting your day with a gentle morning yoga stretch routine can significantly enhance your flexibility, setting a positive tone for hours ahead and easing stiffness that builds overnight.

Why Morning Yoga is a Game-Changer for Flexibility

Many people wake up feeling stiff, a natural result of hours spent in one position. A dedicated morning stretch routine helps to gently warm up your muscles, lubricate your joints, and increase blood flow throughout your body. This isn’t just about feeling less “creaky”; it’s about actively improving your range of motion over time.

Beyond the physical benefits, morning yoga offers a valuable mental reset. It provides a quiet moment before the day’s demands begin, allowing you to connect with your breath and body. This mindful practice can reduce stress, improve focus, and cultivate a sense of calm that carries you through your busy schedule. Consistency is often easier to achieve in the morning, before other commitments derail your plans.

Getting Started: Your Simple Setup

You don’t need much to begin a morning yoga practice. The beauty of these stretches is their accessibility.

  • A Yoga Mat: While not strictly necessary, a mat provides cushioning and grip, making poses more comfortable and stable. If you don’t have one, a soft rug or even a towel on a non-slip floor works just fine.
  • Comfortable Clothing: Choose clothes that allow for a full range of movement without restricting your breath or pinching your skin. Think soft, stretchy fabrics.
  • A Quiet Space: Find a corner where you won’t be disturbed for 15-30 minutes. Natural light can be invigorating, but any peaceful spot will do.
  • No Equipment Needed: Forget about fancy blocks, straps, or bolsters for now. Your body is all you need.

Essential Principles for Your Morning Stretch

Approaching your morning routine with intention makes all the difference. Keep these guidelines in mind as you move.

  • Listen to Your Body: This is perhaps the most important rule. Never force a stretch or push into pain. Your body’s sensations are your best guide. Some days you’ll feel more open, other days less so. Honor that.
  • Breath is Key: Connect your movement with your breath. Inhale to lengthen, exhale to deepen. Deep, steady breaths, often through the nose, oxygenate your muscles and calm your nervous system. Try to make your inhales and exhales roughly equal in length.
  • Hold Poses Gently: Aim to hold each stretch for 3-5 slow breaths. This gives your muscles time to relax and lengthen without triggering a “stretch reflex” that can cause them to contract.
  • Be Gentle, Not Aggressive: Morning muscles are often cooler and less pliable. Approach your stretches with kindness and patience. Think of it as waking up your body, not conquering it.
  • Consistency Over Intensity: A short, regular practice is far more effective than sporadic, intense sessions. Even 10-15 minutes daily will yield noticeable results over time.

Your Morning Yoga Stretch Routine for Enhanced Flexibility

This routine is designed to be gentle yet effective, progressively opening your body from head to toe. Remember to move slowly and mindfully through each pose.

1. Gentle Awakening: Grounding and Spinal Mobility

Child’s Pose (Balasana)

Start your practice here, grounding yourself. Kneel on your mat, bringing your big toes to touch and spreading your knees wide, or keep them hip-width apart for a more restorative feel. Sink your hips back towards your heels. Extend your arms forward, resting your forehead on the mat. Allow your shoulders to relax and your spine to lengthen. Breathe deeply into your back body, feeling your rib cage expand with each inhale. This pose calms the mind and gently stretches the hips, thighs, and ankles.

Cat-Cow Stretch (Marjaryasana-Bitilasana)

From Child’s Pose, shift onto your hands and knees, aligning your wrists directly under your shoulders and your knees under your hips. Your fingers should be spread wide. This dynamic movement warms up the spine.

  1. Cow Pose: As you inhale, drop your belly towards the mat, lift your chest and tailbone towards the ceiling. Gaze gently forward or slightly up, without crunching your neck.
  2. Cat Pose: As you exhale, round your spine towards the ceiling, tucking your chin to your chest and drawing your navel towards your spine. Imagine pressing the mat away from you.

Flow between Cat and Cow for 5-8 rounds, coordinating each movement with your breath. Feel the articulation of each vertebra. This improves spinal flexibility and mobility.

Gentle Supine Spinal Twist

Lie on your back with your knees bent and feet flat on the floor, hip-width apart. Extend your arms out to a “T” shape, palms facing up or down.

  1. Lift your hips slightly and shift them a few inches to the right.
  2. Let both knees fall slowly to the left, keeping your right shoulder grounded as much as possible.
  3. You can gaze to the right, opposite your knees, for a deeper neck stretch.

Hold for 5 breaths, feeling the gentle twist in your lower back and the stretch across your chest and shoulder. Bring your knees back to center, recenter your hips, then repeat on the other side, letting your knees fall to the right and gazing left. This pose releases tension in the spine and hips.

2. Standing Stretches: Building Warmth and Lengthening

Standing Forward Fold (Uttanasana)

Stand at the top of your mat with your feet hip-width apart.

  1. Inhale, lengthen your spine.
  2. Exhale, hinge from your hips, folding forward. Keep a slight bend in your knees, especially if your hamstrings are tight. The goal is to lengthen your spine, not necessarily to touch your toes with straight legs.
  3. Let your head hang heavy. You can grab opposite elbows, let your hands dangle, or place them on your shins or the floor.

Hold for 5 breaths, feeling the stretch in your hamstrings and along your spine. This pose calms the brain and helps relieve stress, while stretching the hamstrings and calves.

Low Lunge (Anjaneyasana)

From a Standing Forward Fold, step your right foot back into a lunge position, dropping your right knee to the mat. You can place a blanket under your knee for comfort.

  1. Ensure your left knee is stacked directly over your left ankle.
  2. Keep your left hand on the floor or a block for balance, or bring both hands to your left thigh.
  3. Gently press your hips forward and down, feeling the stretch in the front of your right hip and thigh (hip flexor).
  4. For an added stretch, inhale and sweep your arms overhead, palms facing each other.

Hold for 5 breaths, then release and switch sides. This pose is excellent for opening tight hip flexors, which often become stiff from prolonged sitting.

Triangle Pose (Trikonasana)

Step your feet wide apart, about 3-4 feet. Turn your right foot out 90 degrees, and your left foot slightly in.

  1. Extend your arms out to a “T” shape, parallel to the floor.
  2. Inhale, reach forward with your right hand, lengthening your right side.
  3. Exhale, hinge at your right hip, bringing your right hand to your shin, ankle, or a block. Your left arm reaches straight up towards the ceiling.
  4. Keep your chest open and stacked. Imagine you’re between two panes of glass.
  5. Gaze up at your left thumb, forward, or down at your right foot for neck comfort.

Hold for 3-5 breaths, feeling the stretch in your hamstrings, groin, and along the side of your torso. Inhale to come back up, then repeat on the other side. Triangle Pose strengthens the legs and core while stretching the hamstrings, groin, hips, and spine.

3. Floor Stretches: Deepening Flexibility and Release

Seated Forward Fold (Paschimottanasana)

Sit on your mat with your legs extended straight out in front of you, feet flexed (toes pointing up).

  1. Inhale, sit tall, lengthening your spine.
  2. Exhale, hinge from your hips, folding forward over your legs. Keep your spine long, avoiding rounding your back.
  3. Rest your hands on your shins, ankles, or feet.
  4. Keep a micro-bend in your knees if your hamstrings are very tight.

Hold for 5-8 breaths, allowing your body to soften into the stretch. This pose deeply stretches the hamstrings, calves, and back, and can calm the brain.

Bound Angle Pose (Baddha Konasana)

From Seated Forward Fold, bring the soles of your feet together, letting your knees fall open to the sides. You can bring your heels closer to your groin for a deeper stretch, or further away for a gentler one.

  1. Hold onto your feet, ankles, or shins.
  2. Inhale, sit tall, lengthening your spine.
  3. Exhale, gently fold forward from your hips, allowing your elbows to press lightly into your inner thighs if you wish to deepen the stretch.

Hold for 5-8 breaths, feeling the opening in your inner thighs and hips. This pose stimulates abdominal organs, improves general circulation, and stretches the inner thighs, groin, and knees.

Happy Baby Pose (Ananda Balasana)

Lie on your back.

  1. Bend your knees and draw them towards your chest.
  2. Grab the outside edges of your feet with your hands, keeping your knees bent and stacked over your ankles.
  3. Open your knees wider than your torso, drawing them towards your armpits.
  4. Keep the soles of your feet parallel to the ceiling.
  5. Gently press your lower back into the mat. You can rock gently side to side for a massage.

Hold for 5-8 breaths. This pose gently stretches the inner groins and back, and calms the brain and helps relieve stress.

Reclined Pigeon Pose (Eka Pada Rajakapotasana Variation)

Lie on your back with your knees bent and feet flat on the floor.

  1. Cross your right ankle over your left thigh, just above the knee.
  2. If you already feel a stretch in your right hip, stay here.
  3. For a deeper stretch, lift your left foot off the floor and interlace your fingers behind your left thigh.
  4. Gently draw your left thigh towards your chest, keeping your right foot flexed to protect your knee.

Hold for 5-8 breaths, feeling the deep stretch in your outer right hip and glute. Release and repeat on the other side. This is an excellent stretch for the outer hips and piriformis muscle.

4. Cool-down and Relaxation: Integrating Your Practice

Savasana (Corpse Pose)

Extend your legs long on the mat, letting your feet fall open naturally. Let your arms rest alongside your body, palms facing up, slightly away from your torso. Close your eyes. Allow your entire body to relax and surrender to the mat. Feel the effects of your practice. Let your breath be natural. Stay here for 5-10 minutes, allowing your body and mind to fully integrate the benefits of the stretches. This final pose is essential for relaxation and absorbing the practice.

Making It a Consistent Habit

Building a new routine takes time and patience. Don’t expect perfection from day one.

  • Start Small: Even 5-10 minutes of gentle stretching is better than nothing. You can gradually increase the duration as you feel more comfortable and dedicated.
  • Set a Specific Time: Waking up 15-30 minutes earlier and dedicating that time to your yoga practice can create a powerful anchor for your day.
  • Be Patient with Progress: Flexibility doesn’t happen overnight. Celebrate small improvements, like reaching a little further or feeling less tension in a particular area.
  • Focus on How it Feels: Shift your attention from how a pose looks to how it feels in your body. This internal focus makes the practice more personal and sustainable.
  • Listen to Your Body’s Signals: Some days you might feel more flexible than others. Adjust your practice accordingly.

Common Mistakes to Avoid

Even with the best intentions, it’s easy to fall into habits that hinder progress or risk injury.

  • Holding Your Breath: Restricting your breath creates tension. Always focus on smooth, steady breathing to help your muscles relax and lengthen.
  • Forcing Stretches: Pushing past your body’s natural limits can lead to muscle strains or injury. A gentle pull is good; sharp pain is a warning sign to back off.
  • Comparing Yourself to Others: Everyone’s body is different. Your flexibility journey is unique. Focus on your own progress and sensations, not on what others can do.
  • Skipping Warm-up or Cool-down: These phases are crucial. The warm-up prepares your muscles, and the cool-down allows your body to relax and integrate the benefits.
  • Ignoring Discomfort: While some sensation is normal during a stretch, sharp or shooting pain is not. Always adjust or back out of a pose if you feel pain.

Benefits Beyond Flexibility

While enhanced flexibility is a primary goal, a morning yoga routine offers a cascade of other positive effects that ripple through your entire day.

  • Improved Posture: By lengthening your spine and strengthening your core, yoga helps counteract the slouching that often comes from sitting at desks or looking at screens.
  • Reduced Stress and Anxiety: The combination of mindful movement and deep breathing actively calms the nervous system, providing a natural antidote to daily stressors.
  • Increased Energy Levels: Moving your body and increasing blood flow in the morning can be more invigorating than a cup of coffee, without the jitters.
  • Better Sleep Quality: Even a morning practice can contribute to better sleep by regulating your body’s rhythms and reducing overall stress throughout the day.
  • Stronger Mind-Body Connection: Regular practice fosters a deeper awareness of your physical sensations and emotional states, leading to greater self-understanding and presence.

Embracing a morning yoga stretch routine is a simple yet profound act of self-care. It doesn’t require hours of dedication, just a willingness to show up for yourself, even for a few minutes. Over time, you’ll discover not only a more flexible body but also a calmer, more focused mind ready to meet the day with renewed energy and grace.

Printable Illustrated Yoga Poses Guide for Boosting Flexibility

A printable illustrated yoga poses guide offers a direct, screen-free way to boost your flexibility, providing a clear visual reference for effective physical postures right where you need it.

Why Flexibility Matters for Everyone

Flexibility often gets overlooked in our daily fitness routines, yet it’s a fundamental component of overall wellness. It’s not just about touching your toes; it deeply impacts how your body moves through life, from simple tasks to more strenuous physical activity. Improving your flexibility means enhancing your range of motion in joints, which allows for smoother, more efficient body movements.

Think about the everyday actions you perform: bending down to tie your shoes, reaching for something on a high shelf, or even turning your head to check your blind spot while driving. All these actions rely on a certain degree of flexibility. When your muscles are tight and restricted, these movements become more challenging, sometimes even painful. A consistent yoga practice, even with gentle exercises, can significantly improve these aspects of your physical well-being.

Beyond daily convenience, flexibility plays a crucial role in injury prevention. Stiff muscles are more prone to strains and tears, especially during sudden movements or intense exercise. By gradually lengthening your muscles and increasing joint mobility through a dedicated flexibility guide, you create a more resilient body, better equipped to handle the demands of life and sport. This also contributes to better posture, as flexible muscles allow your body to naturally align itself more effectively, reducing strain on your spine and other joints.

  • Reduced muscle stiffness and tension
  • Improved posture and body alignment
  • Enhanced athletic performance and range of motion
  • Significant injury prevention
  • Better circulation and reduced muscle soreness
  • Increased body awareness and relaxation

The Power of a Printable Illustrated Guide

In a world saturated with digital content, a physical, printable resource stands out as a uniquely effective tool for learning and practicing yoga. It removes the distractions of screens and notifications, allowing for a more focused and intentional yoga practice. This kind of instructional content is designed to be immediately accessible and incredibly practical.

Why Visual Learning Works Best

Our brains are wired for visual learning. When it comes to understanding complex physical postures, seeing an image is often far more effective than reading a detailed description. An illustrated guide breaks down each yoga pose into its core visual components, showing you exactly where your limbs should be, how your spine should align, and the general shape your body should form. This visual guide streamlines the learning process, making yoga instruction approachable for beginners and a quick reference for experienced practitioners alike.

A well-designed visual guide uses stylized illustrations to highlight key alignment points, making it easier to grasp the nuances of each pose. These exercise illustrations act as a silent teacher, guiding your body movements without the need for constant verbal cues. This method of learning is particularly beneficial for developing a strong foundation in your yoga practice, ensuring you’re performing each pose safely and effectively.

The Benefits of a Physical Resource

Having a physical, printable resource offers several distinct advantages over digital alternatives. You can place it on the floor next to your yoga mat, tape it to a wall, or even laminate it for durability. This means no more fumbling with a phone, no more screen glare, and no more interruptions from incoming messages. It’s a dedicated tool for your fitness routine, fostering a deeper connection to your physical activity.

  • No screen distractions, allowing for full immersion in your yoga practice.
  • Easy to position anywhere in your practice space for constant reference.
  • Durable when printed on sturdy paper or laminated, enduring many sessions.
  • Personalization potential; you can mark favorite poses or add notes.
  • Accessible to everyone, regardless of tech savviness or device availability.
  • A tangible reminder of your commitment to your wellness routine.

What Makes a Great Illustrated Guide?

Not all illustrated guides are created equal. A truly effective printable illustrated yoga poses guide prioritizes clarity, simplicity, and accuracy. The best guides feature clean, clear, and simple illustrations that are easy to interpret at a glance. They avoid overly complex backgrounds or busy details that might distract from the pose itself.

Look for a minimalist design, often employing a flat graphic style. This ensures that the focus remains squarely on the body movements and the physical postures. Each illustration should accurately depict the pose, with subtle cues for proper alignment—perhaps an arrow indicating the direction of a stretch, or a highlighted area showing where to engage a muscle. This type of instructional content becomes an invaluable part of your health and fitness journey, supporting a safe and effective exercise routine.

  • Clear, simple illustrations that are easy to understand.
  • Accurate posture depiction with correct body alignment.
  • Minimalist design and a clean aesthetic.
  • A flat graphic style that emphasizes form over unnecessary detail.
  • Inclusion of key alignment cues and modifications where appropriate.
  • Sequential layout for building a logical yoga sequence.

Getting Started: Your Flexibility Journey

Beginning a flexibility routine, especially with a new yoga practice, can feel exciting. The key is to approach it with patience and self-awareness. Your printable resource will be your constant companion, guiding you through each step.

Preparing Your Space and Mind

Before you even unroll your mat, take a moment to prepare your practice space. Find a quiet corner where you won’t be disturbed. Clear any clutter to create a sense of calm and openness. Lay out your yoga mat, and place your printable resource nearby, easily visible. You might want to wear comfortable athletic wear that allows for a full range of motion without restriction.

Equally important is preparing your mind. Take a few deep breaths to center yourself. Let go of any stress or distractions from your day. This brief mental preparation helps you transition into a mindful state, allowing you to fully engage with your body movements and the present moment. This dedicated time becomes a sacred part of your wellness routine.

Understanding Your Body’s Limits

Yoga is not about competition or pushing yourself into painful positions. It’s about listening to your body and respecting its current capabilities. Every body is different, and your flexibility guide is there to support your journey, not to dictate perfection. As you move through the physical postures, pay close attention to any sensations. A gentle stretch is good; sharp pain is a signal to ease off.

Consistency over intensity is the mantra for flexibility. It’s far better to practice gentle exercises regularly than to attempt extreme stretches sporadically. Over time, with consistent yoga instruction and mindful practice, you’ll notice gradual improvements in your range of motion. Remember, this is your personal fitness routine, tailored to your body’s unique needs.

Essential Yoga Poses for Flexibility

A good printable resource will feature a range of yoga poses specifically chosen to target major muscle groups and enhance overall flexibility. These exercise illustrations will guide you through a balanced yoga sequence, ensuring you work various parts of your body effectively. Here are some fundamental poses that are excellent for building flexibility.

Gentle Warm-Up Poses

Always begin your yoga practice with a few warm-up poses to prepare your muscles and joints for deeper stretches. These gentle movements increase blood flow and awaken your body.

  • Cat-Cow Stretch (Marjaryasana-Bitilasana): This flowing movement warms the spine, shoulders, and hips. On an inhale, arch your back and lift your head (Cow). On an exhale, round your spine and tuck your chin (Cat). Repeat several times.
  • Child’s Pose (Balasana): A calming and restorative pose that gently stretches the hips, thighs, and ankles while relieving stress and fatigue. Kneel on your mat, sit your hips back towards your heels, and fold your torso forward, resting your forehead on the mat.

Standing Poses for Leg and Hip Flexibility

These poses build strength while simultaneously lengthening the muscles in your legs and opening your hips, which are often tight from sitting.

  • Downward-Facing Dog (Adho Mukha Svanasana): A foundational pose that stretches the hamstrings, calves, and shoulders while strengthening the arms and legs. It’s an excellent full-body stretch.
  • Triangle Pose (Trikonasana): This pose stretches the hamstrings, groin, and hips, while also opening the chest and shoulders. It improves balance and strengthens the legs.
  • Warrior II (Virabhadrasana II): Strengthens the legs and core while opening the hips and stretching the groins. This pose also builds stamina and focus.

Seated Poses for Spine and Hamstrings

Seated poses are wonderful for deepening stretches, particularly in the hamstrings and along the spine, promoting a more flexible back.

  • Seated Forward Fold (Paschimottanasana): A classic pose for stretching the entire back of the body, especially the hamstrings and spine. It also calms the mind.
  • Bound Angle Pose (Baddha Konasana): Excellent for opening the hips and inner thighs. Sit with the soles of your feet together, knees out to the sides, gently pulling your heels towards your pelvis.
  • Spinal Twist (Ardha Matsyendrasana): This pose deeply twists the spine, improving spinal mobility and digestion. It also stretches the hips, shoulders, and neck.

Cool-Down and Relaxation

Always conclude your yoga sequence with poses that help your body and mind relax, integrating the benefits of your practice.

  • Supine Spinal Twist (Supta Matsyendrasana): A gentle, restorative twist that releases tension in the spine, hips, and lower back. Lie on your back, hug one knee to your chest, then let it fall across your body.
  • Savasana (Corpse Pose): The ultimate relaxation pose. Lie flat on your back, arms and legs extended, palms facing up. Allow your body to completely relax, absorbing the benefits of your yoga practice. This pose is vital for physical and mental integration.

Building Your Personalized Yoga Sequence

One of the greatest advantages of a printable resource is the ability to customize your exercise routine. You can select the yoga poses that best suit your current needs and goals, creating a truly personalized fitness routine. This movement guide empowers you to be your own instructor, drawing from a library of effective physical postures.

Creating a Daily Exercise Routine

Start by assessing your current flexibility and identifying areas you want to improve. Your illustrated guide will provide a visual learning roadmap. For a balanced routine, aim to include poses that target different parts of your body. A good yoga sequence typically lasts between 15-30 minutes, but even 10 minutes of focused stretching can make a difference.

  1. Choose 5-7 yoga poses from your flexibility guide. Select a mix of warm-ups, standing poses, seated poses, and a cool-down.
  2. Begin with 2-3 gentle warm-up poses to prepare your body. Hold each for 30 seconds to 1 minute.
  3. Move into your main flexibility poses. Hold each stretch for 30 seconds to 1 minute, focusing on deep, steady breaths.
  4. Finish with 1-2 cool-down and relaxation poses, like a gentle twist and Savasana, for 2-5 minutes.
  5. Listen to your body throughout. If a pose feels too intense, ease off or choose a modification.

Consistency is more important than duration. Even short, daily sessions of gentle exercises will yield better results than long, infrequent ones. Your printable resource makes it easy to stick to this schedule, providing a constant visual reminder and instruction.

Making It a Consistent Wellness Routine

Integrating a new physical activity into your daily life requires intention and strategy. A printable illustrated guide can be a powerful tool for habit formation. By making your yoga instruction visible and accessible, you increase the likelihood of sticking with it.

  • Set a specific time each day for your yoga practice, even if it’s just 10 minutes. This creates a routine.
  • Keep your printable resource visible and ready, perhaps rolled up with your mat or taped to a wall in your practice area.
  • Track your progress. Notice how you feel after each session, and celebrate small improvements in your flexibility.
  • Pair your yoga routine with another existing habit, like having your morning coffee or winding down before bed.
  • Consider inviting a friend or family member to join you, creating a shared commitment to health and fitness.
  • Remember your “why.” Reconnect with the reasons you started this wellness routine whenever motivation wanes.

Maintaining Your Illustrated Yoga Poses Guide

To ensure your printable resource serves you well for a long time, consider how you’ll print and store it. A durable guide means consistent, uninterrupted access to your yoga instruction, supporting your ongoing health and fitness goals.

Printing and Lamination Tips

For the best experience, print your illustrated guide on sturdy paper, such as cardstock. This will prevent it from tearing easily and make it more resistant to wear and tear. If you plan to use it frequently or in an area where it might get damp (like near a water bottle), consider laminating the pages. Lamination protects the exercise illustrations from spills, creases, and general handling, ensuring your posture guide remains pristine and readable.

You can also bind the pages together using a simple ring binder or spiral binding, creating a compact and easy-to-flip booklet. This keeps all your yoga poses organized and prevents individual sheets from getting lost. A well-maintained printable resource is a long-term investment in your physical activity and overall wellness routine.

Keeping Your Practice Fresh

While your flexibility guide provides a solid foundation, remember to keep your yoga practice engaging. As your flexibility improves, you might explore variations of poses or introduce new ones from your guide. The beauty of a comprehensive visual guide is that it offers a wealth of options, allowing you to continually challenge yourself.

Don’t be afraid to experiment with different yoga sequences or focus on specific areas of your body on different days. One day might be dedicated to hip openers, another to hamstring stretches. This dynamic approach keeps your fitness routine exciting and prevents plateaus. Your journey to greater flexibility is ongoing, and your printable illustrated yoga poses guide is an adaptable tool designed to support every step of the way.

Exit mobile version