Yoga Sequence Guide: Sun Salutations and Foundational Standing Postures

Foundations of a Balanced Yoga Sequence

A consistent yoga practice relies on the rhythmic integration of breath and movement, often referred to as a vinyasa flow. By linking specific yoga asanas together, you create a heat-building routine that improves flexibility, muscle tone, and mental clarity. This yoga sequence focuses on the classic Surya Namaskar, or Sun Salutation, followed by foundational standing yoga poses designed to build stability from the ground up. Proper body alignment remains the most important factor in preventing injury and ensuring that each yoga posture serves its intended purpose for your physical health.

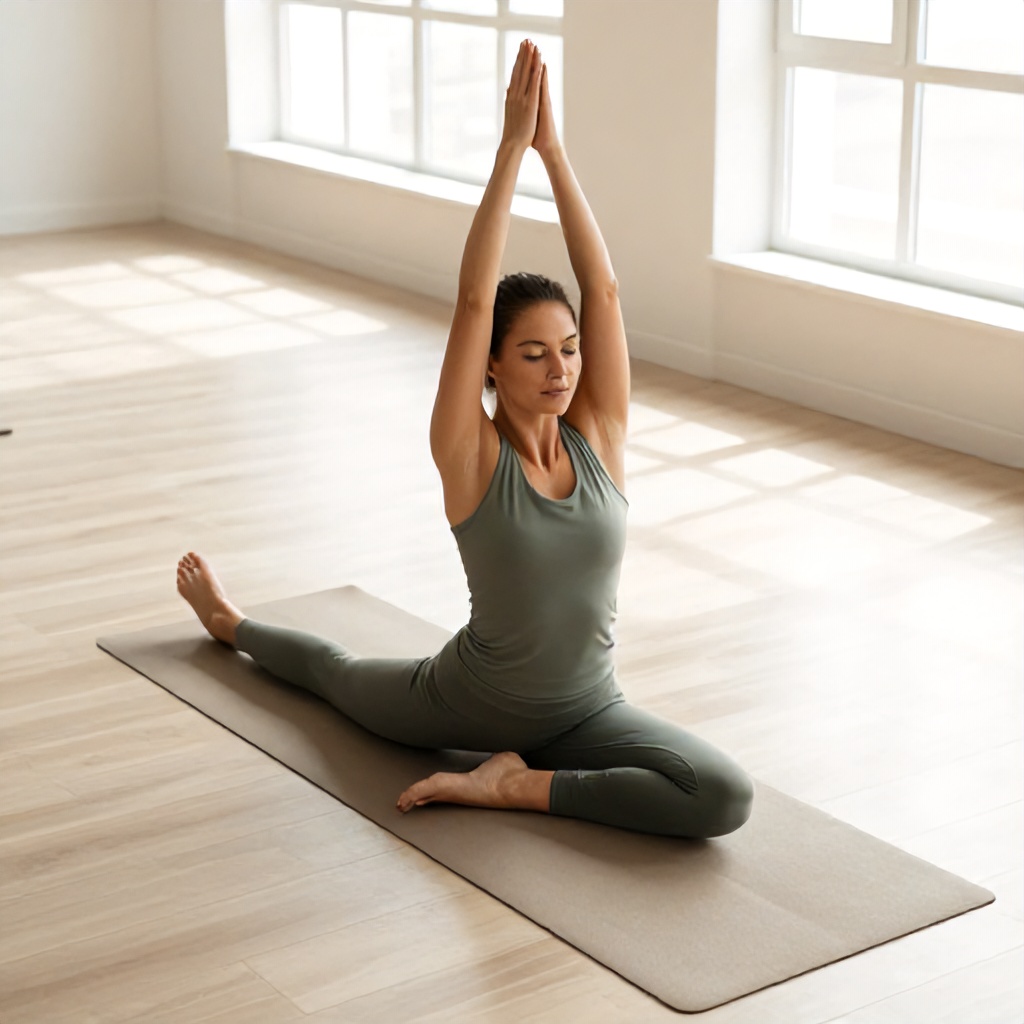
Before beginning any yoga session, clear a space that allows for full extension of your limbs. Wear comfortable clothing that does not restrict your range of motion. If you are new to this yoga discipline, keep a pair of yoga blocks nearby to bring the floor closer to your hands during forward folds. Consistency matters more than intensity. Even a fifteen-minute yoga routine performed daily provides more long-term benefits than a single, grueling two-hour session once a week. Focus on the quality of your breath, aiming for deep, steady inhalations and exhalations through the nose throughout the entire yoga flow.

Mastering Surya Namaskar

Surya Namaskar serves as the backbone of many yoga methodologies because it warms the entire body in a short amount of time. This sequence of yoga movement patterns coordinates the breath with a series of forward bends, lunges, and backbends. You should perform these movements slowly at first to ensure your joints are properly lubricated and your muscles are ready for deeper work. Think of this as the engine of your yoga practice, preparing your cardiovascular system and warming your core temperature.

Step-by-Step Sun Salutation A

  1. Start in Mountain Pose at the top of your mat, feet hip-width apart, palms facing forward.
  2. Inhale and sweep your arms overhead, lengthening your spine toward the ceiling.
  3. Exhale as you hinge at your hips, folding forward into a standing forward bend. Keep a slight bend in your knees if your hamstrings feel tight.
  4. Inhale to a halfway lift, placing your hands on your shins or thighs to create a flat back.
  5. Exhale and step or jump back into a high plank position, keeping your core engaged to protect your lower back.
  6. Lower your body halfway down, keeping elbows tucked close to your ribs in a low push-up position.
  7. Inhale as you transition into Upward Facing Dog, lifting your chest and thighs off the mat while pressing into the tops of your feet.
  8. Exhale as you lift your hips high and back into Downward Facing Dog, creating an inverted V shape with your body.
  9. Hold Downward Facing Dog for five full breaths, spreading your fingers wide and pressing your heels toward the floor.
  10. Exhale, step or jump your feet to your hands, and return to a forward fold before inhaling to rise back to standing.

The beauty of this yoga technique lies in its repetition. As you become more familiar with the rhythm, the movements begin to feel more fluid. Avoid rushing through the transitions. If you feel lightheaded or short of breath, pause in Child’s Pose until your heart rate returns to a resting state. This is not a race; it is a dedicated time for your body to move with intention and awareness.

Essential Standing Yoga Poses

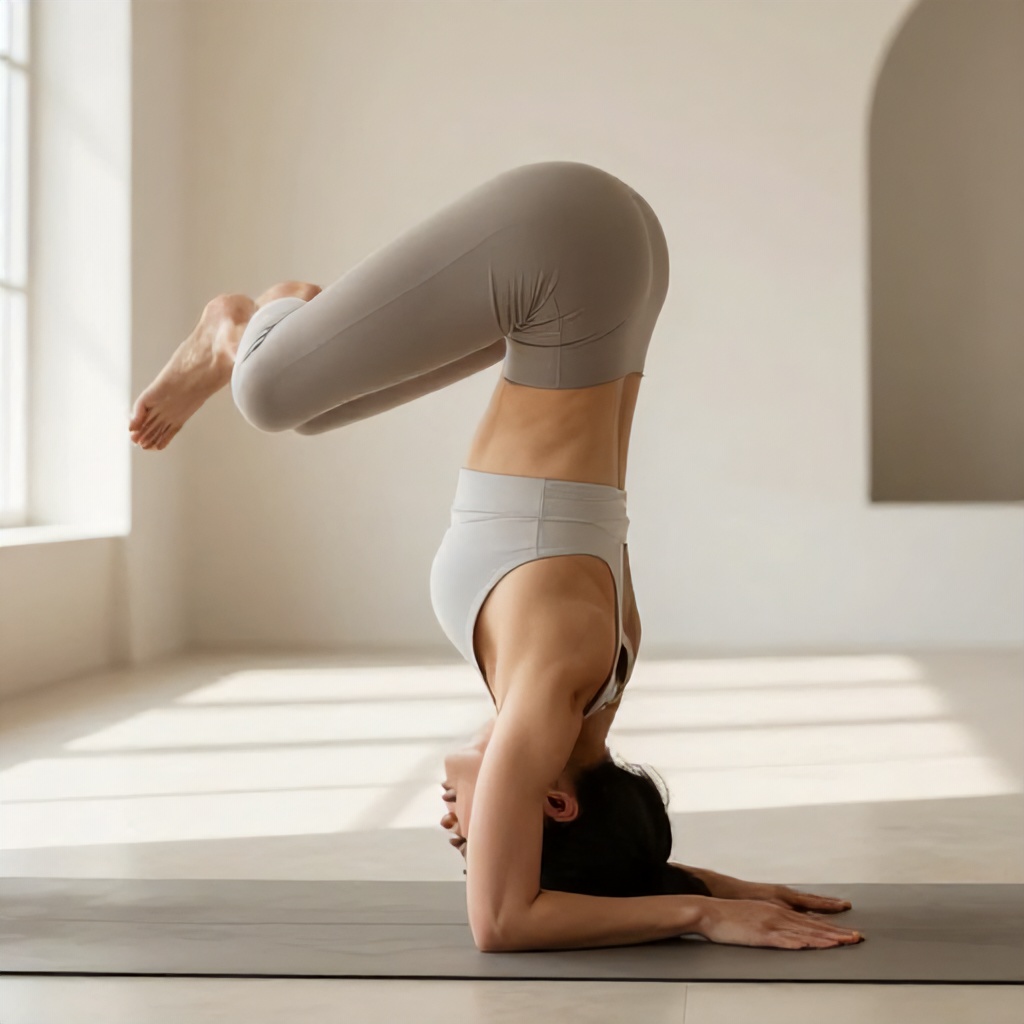
Standing yoga poses are the bedrock of strength-based yoga training. These postures require you to engage your legs, stabilize your pelvis, and maintain a tall spine. When you hold these shapes, you are actively building endurance in the quadriceps, hamstrings, and glutes. Standing postures also help improve your balance and proprioception, which is your body’s ability to sense its position in space. Incorporating these into your yoga session helps ground your energy after the faster-paced Sun Salutations.

Warrior I and II

Warrior I focuses on forward-facing stability. Step one foot back about three to four feet, turning your back heel down at a forty-five-degree angle. Bend your front knee until it is stacked directly over your ankle. Reach your arms toward the sky, keeping your shoulders relaxed away from your ears. This pose stretches the hip flexors and strengthens the legs. If you experience knee pain, shorten your stance slightly to reduce the pressure on the joint.

Warrior II requires a wider stance. Turn your back foot so it is parallel to the short edge of your mat. Extend your arms out to the sides at shoulder height, gazing over your front middle finger. This posture opens the hips and builds significant stamina in the lower body. Ensure your front knee does not collapse inward; keep it tracking toward your second toe to maintain safe body alignment. Hold these poses for five to ten breaths, focusing on keeping your core firm and your breath steady.

Triangle Pose

Triangle Pose is excellent for stretching the hamstrings and the side body. From a wide stance, turn your front foot forward and your back foot slightly inward. Reach your front arm forward as far as possible before hinging at the hip to lower your hand to your shin, a block, or the floor. Extend your top arm toward the ceiling, creating a straight line from your bottom hand to your top hand. Keep your chest open and avoid collapsing your torso toward the floor. If your neck feels strained, look down at your front foot instead of up at your top hand.

Anatomy and Alignment Principles

Understanding the basic yoga anatomy behind these movements helps you practice safely. Your spine should remain neutral in most standing postures, meaning you avoid excessive arching or rounding. Engage your abdominal muscles by drawing your navel slightly toward your spine; this provides internal support for your lower back. When performing forward folds, hinge from the hip joints rather than the waist to prevent strain on the lumbar discs.

Weight distribution is another key aspect of your yoga routine. In standing poses, distribute your weight evenly between the ball of your big toe, the ball of your little toe, and your heel. This tripod foot position creates a stable base that prevents wobbling. If you find yourself gripping the mat with your toes, soften your feet and focus on pressing down through the center of your heel. This simple adjustment often improves balance immediately.

Pay attention to your joints. Never lock your knees or elbows in any yoga posture. A micro-bend in the joints keeps the muscles engaged and protects the ligaments from overstretching. If you feel sharp or shooting pain, exit the pose immediately. Discomfort from a deep stretch is normal, but pain in the joints is a signal to back off. Your yoga practice should be a sustainable physical exercise that supports your long-term health rather than causing wear and tear.

Structuring Your Yoga Session

A well-rounded yoga sequence follows a logical progression. Start with gentle movements to wake up the spine, move into the heat-building Sun Salutations, transition to standing poses for strength, and finish with cooling stretches and relaxation. This structure ensures that your body is adequately prepared for more challenging poses and that you end your practice in a state of calm.

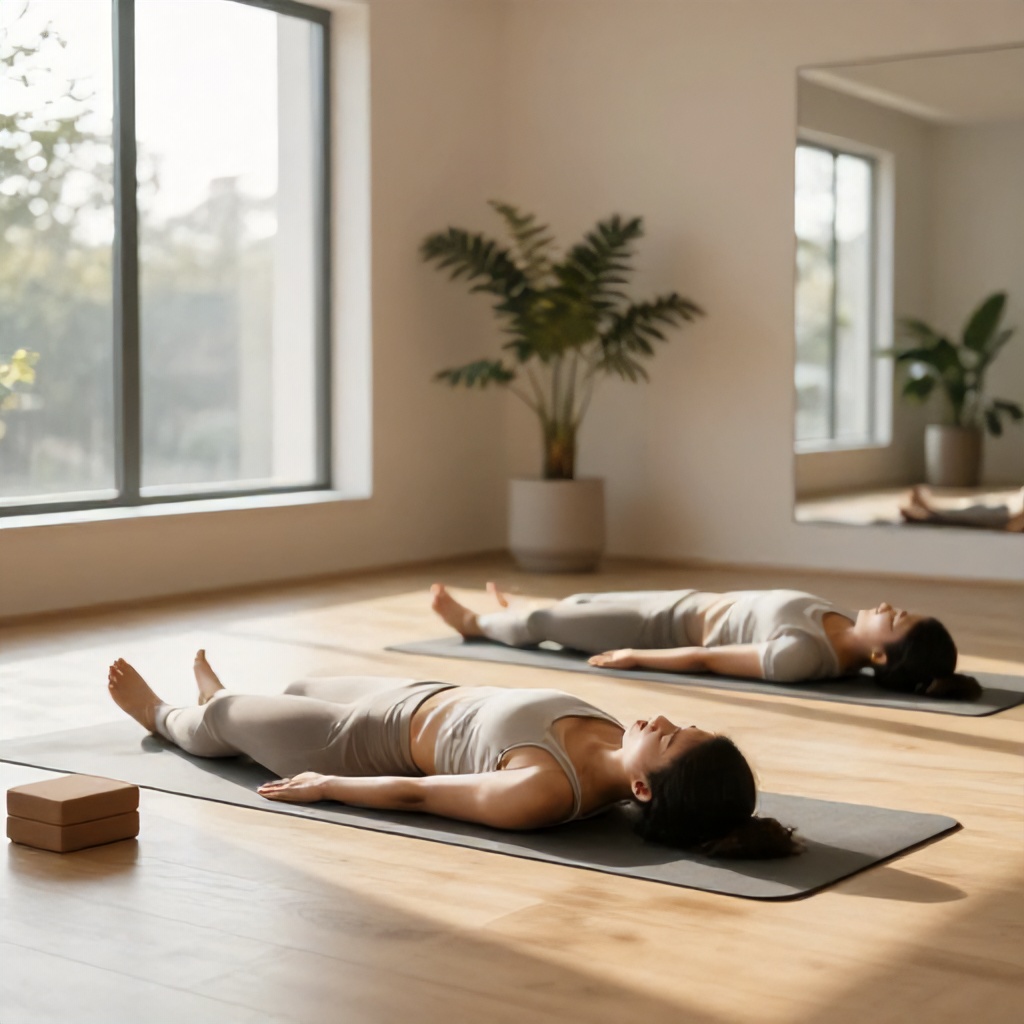
Beginners often benefit from a consistent 30-minute yoga session. Spend the first five minutes on breathing and gentle neck rolls. Dedicate the next ten minutes to three to five rounds of Sun Salutations. Use the following ten minutes for standing poses, holding each for several breaths. Spend the final five minutes in a seated forward fold or a gentle twist, followed by two minutes of lying flat on your back in Savasana. This final resting pose is essential for integrating the work you have done and allowing your nervous system to reset.

If you have limited time, you can condense this yoga flow. Even a ten-minute session consisting of two Sun Salutations and two standing poses can provide a significant boost to your mood and energy levels. The key is to maintain the sequence so your body learns the patterns. Over time, you will find that your strength and flexibility improve, allowing you to hold poses longer and move with greater ease.

Common Mistakes and How to Fix Them

Many practitioners struggle with holding their breath during difficult poses. This is a natural reaction to physical stress, but it limits the oxygen available to your muscles. If you notice yourself holding your breath, consciously slow down your movement and return to a rhythmic inhale and exhale. Your breath acts as a guide; if you cannot breathe smoothly, you are likely pushing too hard.

Another common error involves over-stretching. It is tempting to try and touch your toes or get your chest to your thighs immediately, but flexibility is a slow process. Use props like yoga blocks or straps to maintain proper alignment while you work toward deeper ranges of motion. Forcing a stretch can lead to micro-tears in the muscles, which will set your progress back by weeks. Respect your body’s current limits and focus on the sensation of the stretch rather than the visual appearance of the pose.

Finally, avoid comparing your practice to others. Yoga is a personal discipline. Your body structure, history of activity, and current energy levels are unique. A pose that looks effortless for one person might be challenging for another, and that is perfectly acceptable. Focus on your own internal experience. When you stop worrying about how the pose looks, you gain the freedom to feel how the pose works for your specific anatomy.

Integrating Yoga into Daily Life

You do not need a studio or expensive equipment to maintain a high-quality yoga practice. A simple mat and a quiet corner are sufficient. By making yoga a part of your daily routine, you create a reliable tool for managing stress and maintaining physical health. Start by setting a specific time for your practice, such as early in the morning before the day begins or in the evening to unwind.

Keep a journal of your yoga sessions to track your progress. Note which poses feel easier over time and which ones remain challenging. This helps you stay motivated and provides insight into your body’s changing needs. Remember that some days your body will feel stiff, and other days it will feel open. Both experiences are part of the process. The goal is to show up consistently and listen to what your body needs on any given day.

As you continue your yoga training, consider exploring different variations of the poses mentioned here. Once you master the basics, you can add small movements to increase the intensity or focus on specific areas of the body. Always prioritize safety and alignment above all else. With patience and regular practice, you will build a sustainable yoga routine that supports your physical and mental well-being for years to come.

Final Thoughts on Sustaining Your Practice

The journey of yoga is not about reaching a final destination but about the ongoing process of self-awareness. By focusing on the fundamentals of Sun Salutations and standing postures, you build a strong foundation that supports all other aspects of your physical fitness. Keep your movements intentional, your breath steady, and your mind focused on the present moment. This approach ensures that your yoga practice remains a source of vitality and balance in your life.

Stay curious about your body. Notice how your posture changes throughout the day when you are not on the mat. You may find that the strength you build in Warrior II helps you stand taller while waiting in line, or that the deep breathing you practice in Savasana helps you remain calm during a stressful meeting. Yoga is a practice that extends far beyond the edges of your mat, influencing how you move through the world and how you treat your body every single day.

If you ever feel uninspired, return to the basics. Sometimes, a simple round of Sun Salutations is exactly what you need to reignite your interest. Do not feel pressured to perform complex or advanced poses. The most effective yoga practice is the one you actually do. By keeping it simple, practical, and consistent, you ensure that yoga remains a lifelong companion for your health and happiness.

Comprehensive Full-Body Vinyasa Yoga Flow Sequence and Illustrated Guide

A consistent yoga flow sequence builds strength, improves mobility, and encourages a deeper connection between your mind and body. This practice relies on linking breath with movement, an approach often called vinyasa flow, to create a kinetic flow that warms the muscles and prepares the joints for deeper work. By following a logical progression from standing poses to seated asanas and finally reclined yoga positions, you ensure a balanced physical exercise routine that supports overall wellness.

Establishing Your Foundation

Safe yoga practice begins with body alignment. Before moving through any yoga postures, take a moment to find your center. Stand at the top of your mat with feet hip-width apart, grounding through all four corners of your feet. Engage your core muscles gently and lengthen your spine toward the ceiling. This initial phase of your yoga practice guide sets the tone for mindful movement, helping you remain present throughout the session.

The Importance of Breath

Breath serves as the anchor for your yoga flow. Aim for slow, rhythmic inhales and exhales through the nose. When you match your movement to your breath, you avoid rushing through transitions. This methodology prevents injury and allows you to notice subtle sensations in your muscles. If you find your breath becoming jagged or shallow, pause in a resting pose until your heart rate stabilizes.

Standing Yoga Poses for Energy

Standing poses build heat and stability. These movements challenge your balance while strengthening the legs and core. Incorporate these shapes early in your routine to wake up the body.

  • Mountain Pose: Stand tall with arms at your sides, palms facing forward.
  • Warrior I: Step one foot back, keep the front knee bent, and reach your arms overhead.
  • Warrior II: Open your hips to the side, extending your arms parallel to the floor while gazing over your front middle finger.
  • Triangle Pose: Straighten the front leg and reach your hand toward your shin or a block, keeping your chest open.

Focus on your body mechanics during these standing shapes. Keep your knees tracking over your ankles rather than collapsing inward. If your shoulders feel tight, widen your stance or keep your hands on your hips. Consistency matters more than depth; you do not need to touch your toes to reap the benefits of flexibility training.

Transitioning to Seated Asanas

After building heat, move toward the floor to focus on lengthening the hamstrings and opening the hips. Seated asanas provide a necessary shift in intensity. These shapes allow for deeper stretching and invite a sense of calm into your wellness workout.

Gentle Hip Openers

Sit with your spine tall and your legs extended. Bend your right knee and place the sole of your foot against your left inner thigh. Fold forward slowly, keeping your back flat rather than rounding your shoulders. Hold this position for five to ten breaths. Switch sides to maintain symmetry. This focus on somatic movement helps release tension stored in the lower back and pelvis.

Spinal Twists

Twists are essential for maintaining a healthy range of motion in the torso. Sit with both legs extended. Cross your right foot over your left knee. Hug your right knee with your left arm and gently rotate your chest to the right. Keep your sit bones firmly on the mat. These movements act as a massage for your internal organs and help improve posture over time.

Reclined Yoga Positions for Recovery

The final phase of your yoga sequencing involves reclined postures. These shapes are restorative postures that signal to your nervous system that it is time to wind down. This part of your fitness routine is just as important as the active standing phase, as it allows your heart rate to return to resting levels.

  1. Bridge Pose: Lie on your back, bend your knees, and lift your hips toward the ceiling.
  2. Supine Twist: Bring your knees into your chest and let them fall gently to one side.
  3. Happy Baby: Hold the outside edges of your feet while lying on your back, pulling your knees toward your armpits.
  4. Savasana: Extend your legs, let your feet flop open, and rest your arms by your sides.

During Savasana, close your eyes and let your muscles go completely soft. Do not worry about controlling your breath anymore. Allow your body to absorb the work you just completed. This stillness is often the most challenging part of the practice, yet it provides the most significant mental clarity.

Safety and Practical Tips

Yoga is a personal discipline, not a competition. Listen to your body every single day, as your flexibility will fluctuate based on sleep, hydration, and stress levels. If a specific movement causes sharp pain, stop immediately and modify the shape.

Common Mistakes to Avoid

Avoid locking your joints, especially the knees and elbows. Keep a micro-bend in these areas to protect your ligaments. Do not hold your breath to force yourself deeper into a stretch; this triggers a fight-or-flight response that tightens the muscles you are trying to lengthen. Instead, use props like blocks, straps, or folded blankets to bring the floor closer to you.

Developing a Sustainable Routine

You do not need an hour to practice effectively. Even fifteen minutes of mindful movement can improve your mood and physical comfort. Create a space that feels inviting, whether that means clearing a corner of your living room or using a specific mat that you associate with your practice. Consistency is the primary factor in seeing improvements in your range of motion and overall strength.

When you approach your mat, view it as an opportunity to check in with yourself. The yoga aesthetics of a perfect pose matter far less than the internal experience of moving with intention. Keep your movements slow and deliberate. By focusing on the quality of your transitions rather than the final shape, you build a practice that supports your body for years to come.

Remember that every session is a chance to refine your technique. If you feel wobbly in a standing pose, use a wall for support. If your hamstrings feel tight during seated work, sit on a folded blanket to elevate your hips. These small adjustments are signs of a mature and thoughtful approach to your health. Stay patient with your progress, and enjoy the quiet space you create for yourself during each flow.

How to Master the Advanced Forearm Stand Backbend Yoga Pose

Mastering the Forearm Stand Backbend

Achieving a deep backbend within Pincha Mayurasana requires a precise blend of shoulder girdle strength, spinal flexibility, and core stability. This advanced yoga asana pushes the boundaries of traditional inversion practice by asking the body to maintain balance while the thoracic spine moves into significant extension. Most practitioners find that the challenge lies not just in the strength of the arms, but in the ability to distribute the arch evenly across the entire length of the spine rather than collapsing into the lower back.

Before attempting this movement artistry, ensure your foundational forearm stand is rock solid. You need to hold a straight-line inversion for at least sixty seconds consistently. If you struggle with balance in a standard vertical position, adding a backbend will likely lead to falling out of the pose or straining the lumbar region. Safety remains the priority in any advanced yoga discipline.

Anatomical Alignment for Deep Extension

Proper body alignment serves as the architecture for your inversion. When you kick up into your forearm stand, the elbows should be shoulder-width apart, with the forearms pressing firmly into the mat. Think of creating a solid base that acts like a tripod. If your elbows splay outward, you lose the structural integrity needed to support the weight of your legs as they move toward the floor.

The shoulder girdle strength required here is immense. You must actively push the floor away, engaging the serratus anterior muscles to keep the shoulder blades stable. If the shoulders collapse, the neck takes on unnecessary pressure, which can lead to injury. Keep your gaze focused on a single point between your hands to maintain physical poise and mental clarity.

Engaging the Core for Spinal Protection

Core stability acts as the anchor for your spinal flexibility. Many people assume that a backbend is purely about loosening the back muscles, but the opposite is true. You need a strong, active core to protect the vertebrae. By drawing the lower ribs in and engaging the transverse abdominis, you create a supportive corset around your spine.

When you begin to move your feet toward your head, focus on lengthening the tailbone toward the heels. This creates space in the lumbar spine. Without this lengthening, the compression in the lower back becomes dangerous. Think of the movement as an expansion rather than a crunch. You are reaching through your toes while simultaneously grounding through your elbows.

Step-by-Step Progression for the Backbend

Progressing into this pose takes time, patience, and consistent movement artistry. Do not rush the process. Start by practicing against a wall to build confidence and muscle memory. The wall provides a safety net, allowing you to explore the limits of your range of motion without the fear of falling.

  1. Begin in a standard forearm stand with your heels resting lightly against a wall.
  2. Walk your feet down the wall just a few inches, keeping your core engaged and your shoulders active.
  3. Focus on lifting your chest away from the floor, creating a gentle curve in the upper back.
  4. Breathe deeply into the ribcage, allowing the lungs to expand against the resistance of the pose.
  5. Return to the vertical position slowly, using your abdominal muscles to pull your legs back over your hips.

As you gain comfort with this, you can move away from the wall. The transition from a straight line to a deep backbend requires significant body control. Start by bending one knee, then the other, allowing the weight of the legs to pull the spine into a natural arc. Keep the glutes engaged to support the pelvis, but avoid clenching them so tightly that they restrict movement.

Developing Shoulder Girdle Strength

The shoulders are the foundation of your inversion therapy. If your shoulders are tight, your backbend will be limited. Incorporate daily stretches that target the pectorals and the lats. Open shoulders allow for a greater range of motion in the thoracic spine, which is the area that should be doing the majority of the bending.

Try using yoga blocks to assist your training. Place the blocks under your hands in a forearm stand to elevate the chest slightly. This extra height provides more room for the head and neck, reducing the intensity of the stretch while you build the necessary strength. Consistent practice of these drills will improve your athletic yoga performance over time.

Common Mistakes to Avoid

Avoiding common errors is essential for long-term progress. One frequent mistake is allowing the head to hang loosely. Keep the neck in a neutral position, aligned with the rest of the spine. Looking too far back too soon can strain the cervical vertebrae. Only drop the head back when you have achieved a significant arch in the upper back.

Another issue is the collapse of the lumbar spine. This usually happens when the practitioner lacks the necessary flexibility in the thoracic region and tries to compensate by bending the lower back. If you feel a pinching sensation in your lower back, stop immediately. Back off the pose and focus on thoracic mobility exercises, such as cat-cow stretches or puppy pose, before trying the inversion again.

  • Do not hold your breath. Deep, rhythmic breathing helps regulate the nervous system and keeps the muscles oxygenated.
  • Do not practice on a surface that is too soft. A firm yoga mat provides the stability needed for balance training.
  • Do not force the pose. If your body feels tight or resistant, listen to those signals.
  • Do not neglect your warm-up. Spend at least fifteen minutes preparing the spine and shoulders before attempting advanced inversions.

The Role of Flexibility Training

Flexibility training is not just about stretching; it is about conditioning the nervous system to feel safe in extreme ranges of motion. When you move into a deep backbend, your body may trigger a protective reflex that causes muscles to tighten. By practicing consistently, you teach your brain that these positions are safe, allowing the muscles to relax and lengthen.

Incorporate dynamic stretching into your routine. Instead of just holding static poses, move through them. For example, transition from a bridge pose into a wheel pose, then back down. This movement helps the body understand how to engage and release muscles in sequence. This is the essence of yoga technique—fluidity combined with precision.

Refining Your Yoga Form

Aesthetic yoga photography often highlights the beauty of the pose, but the internal experience is what matters most. Focus on the internal sensations. Where do you feel the stretch? Is it in the chest, the shoulders, or the abdomen? By paying attention to these details, you can adjust your alignment to make the pose more sustainable and effective.

Consider recording your practice. Watching yourself on video can reveal alignment issues that you might not feel. You might notice that your hips are shifting to one side or that your elbows are drifting apart. Use this information to refine your yoga form. Small adjustments often lead to the biggest breakthroughs in advanced yoga.

Integrating Balance Training

Balance training is a critical component of any inversion practice. When you are upside down, your sense of equilibrium is challenged. You must rely on proprioception—the body’s ability to sense its position in space. To improve this, practice balancing on one leg in standing poses like tree pose or warrior three. These poses build the same neural pathways needed for inversions.

When you are in the forearm stand, focus on the contact points between your forearms and the mat. Imagine rooting down through the elbows to create a stable foundation. If you feel yourself tipping, use your fingers to grip the mat, acting like claws. This small adjustment can provide the extra stability needed to hold the pose for longer durations.

Building Endurance in the Pose

Endurance comes from repetition and steady progress. Do not expect to hold a deep backbend for minutes on end during your first few attempts. Start with five-second holds and gradually increase the time as your muscles adapt. The goal is to maintain a steady, controlled breath throughout the entire duration of the hold.

If you find that your muscles start to shake, this is a sign of fatigue. It is better to come out of the pose with control than to collapse. Controlled exits are just as important as the entry. Use your core to bring your legs back to center before lowering them to the floor. This prevents sudden drops that can cause injury.

Mental Focus and Discipline

The mental aspect of yoga discipline is just as important as the physical. Advanced poses require a high level of concentration. When you are upside down, distractions can easily lead to a loss of balance. Create a quiet, focused environment for your practice. Turn off your phone and minimize external noise.

Before you begin, set an intention for your practice. This could be as simple as focusing on your breath or maintaining a specific alignment cue. Having a clear focus helps keep the mind steady. When the mind is calm, the body follows. This connection is the foundation of all successful yoga practice.

Safety Considerations for Inversion Therapy

Inversion therapy can be beneficial for spinal health, but it is not for everyone. If you have high blood pressure, glaucoma, or any history of neck or back injuries, consult with a medical professional before attempting these poses. Your health is the most important factor in your yoga journey.

Always listen to your body. Pain is a clear signal to stop. Discomfort, such as the feeling of a muscle stretching, is normal, but sharp or shooting pain is not. If you experience any pain, back off immediately and rest. There is no prize for forcing a pose, and the risk of injury is not worth the temporary satisfaction of achieving a shape.

Consistency and Long-Term Progress

The path to mastering the forearm stand backbend is a marathon, not a sprint. It takes months, sometimes years, of consistent practice to build the necessary strength and flexibility. Celebrate the small wins along the way. Maybe today you held the pose for two seconds longer than yesterday. Maybe today your shoulders felt a little more open.

Keep a journal of your practice. Note what worked and what didn’t. Tracking your progress can be incredibly motivating. It allows you to see how far you have come and provides a roadmap for where you want to go. Remember that every session is a chance to learn and grow.

As you continue your practice, you will find that the benefits extend far beyond the mat. The strength and flexibility you build will translate into better posture, reduced tension, and a greater sense of body awareness in your daily life. This is the true power of yoga—it empowers you to move through the world with more ease and confidence.

Stay committed to the process. Focus on the quality of your movement rather than the quantity of your poses. By prioritizing safety, alignment, and mindful practice, you will eventually achieve the deep backbend you are working toward. Keep showing up, keep breathing, and keep exploring the possibilities of your own body.

Final Thoughts on Advanced Yoga Practice

Advanced yoga is a personal journey of discovery. It is about understanding your own limits and gently pushing them, always with respect and care. The forearm stand backbend is a beautiful expression of this journey, combining strength, grace, and flexibility in a single, powerful pose.

Whether you are a seasoned practitioner or someone looking to take their practice to the next level, remember that the most important part of yoga is the practice itself. The pose is just a tool to help you connect with your body and mind. Enjoy the process, stay patient, and trust that with time and dedication, you will achieve your goals.

Continue to explore different variations and modifications. Every body is different, and what works for one person may not work for another. Be willing to experiment and find what feels best for you. Your yoga practice should be a source of joy and vitality, not a source of stress or frustration. Keep it light, keep it fun, and keep practicing.

Exit mobile version