5 Things Learned From Daily Legs-Up-The-Wall Pose Practice

5 Surprising Benefits of Daily Legs-Up-The-Wall Pose Practice

Practicing the legs-up-the-wall pose, also known as Viparita Karani, every day can lead to noticeable improvements in your physical well-being, especially if you spend a lot of time standing or sitting. This simple inversion uses gravity to your advantage, helping to alleviate common issues like fluid retention and promoting a sense of calm.

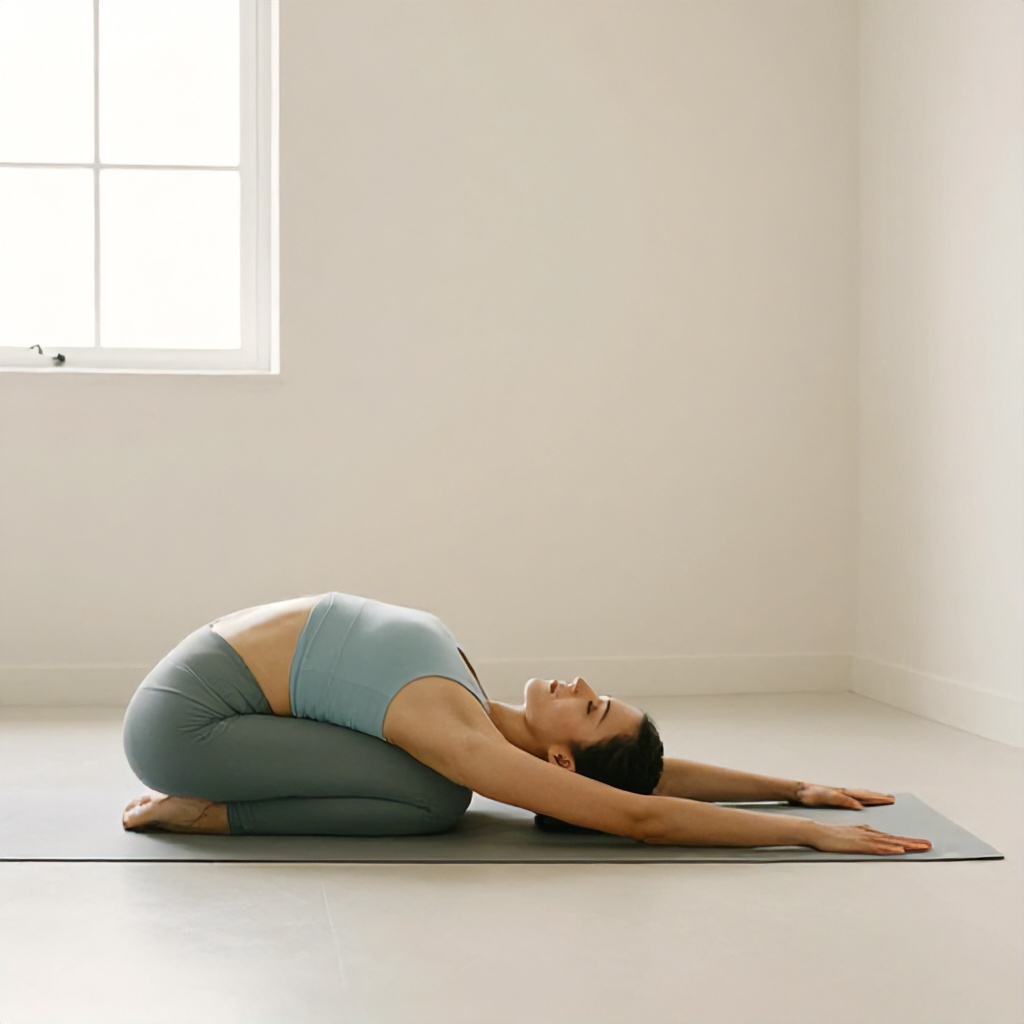
What Exactly Is Legs-Up-The-Wall Pose?

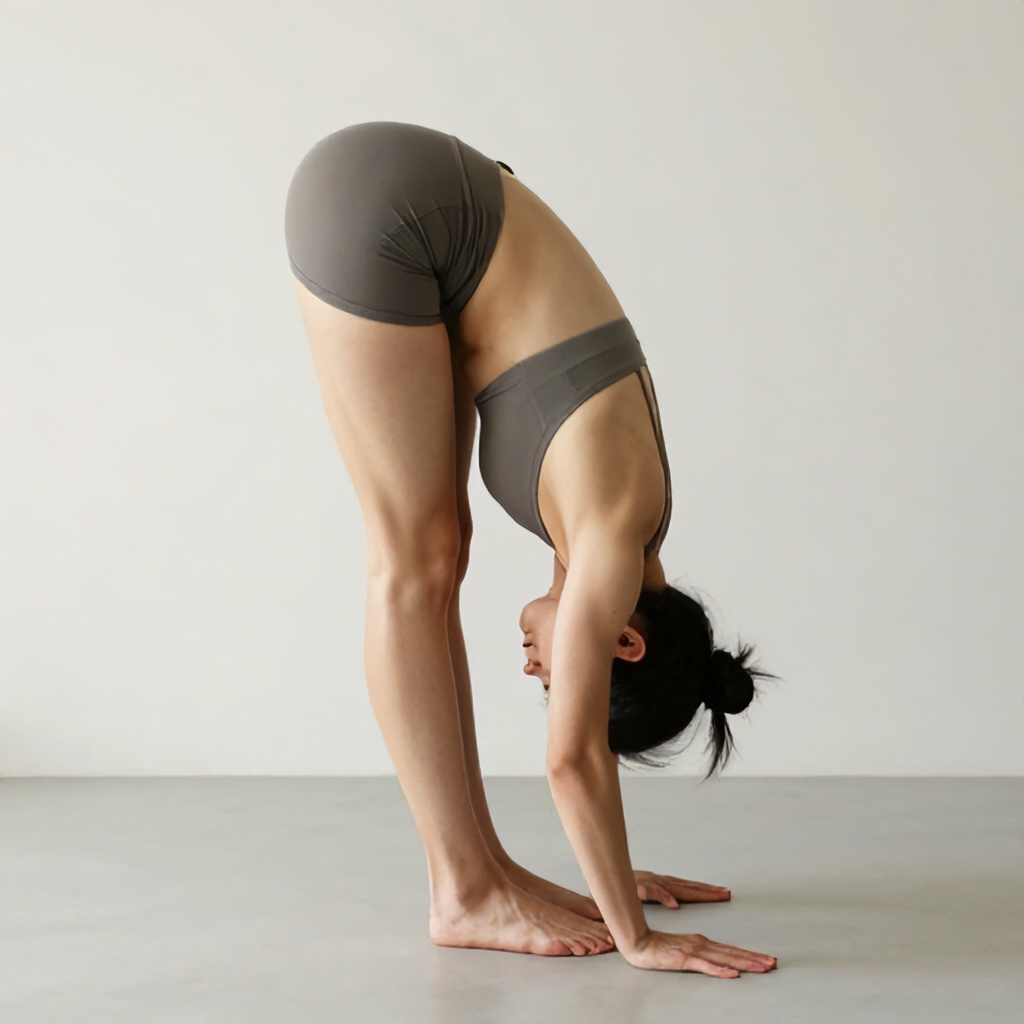
Legs-up-the-wall pose is a restorative yoga posture where you lie on your back with your legs extended straight up against a wall. Your hips can be close to the wall or a few inches away, depending on your comfort level. It’s a gentle inversion, meaning your legs are higher than your heart, which creates a unique physiological effect.

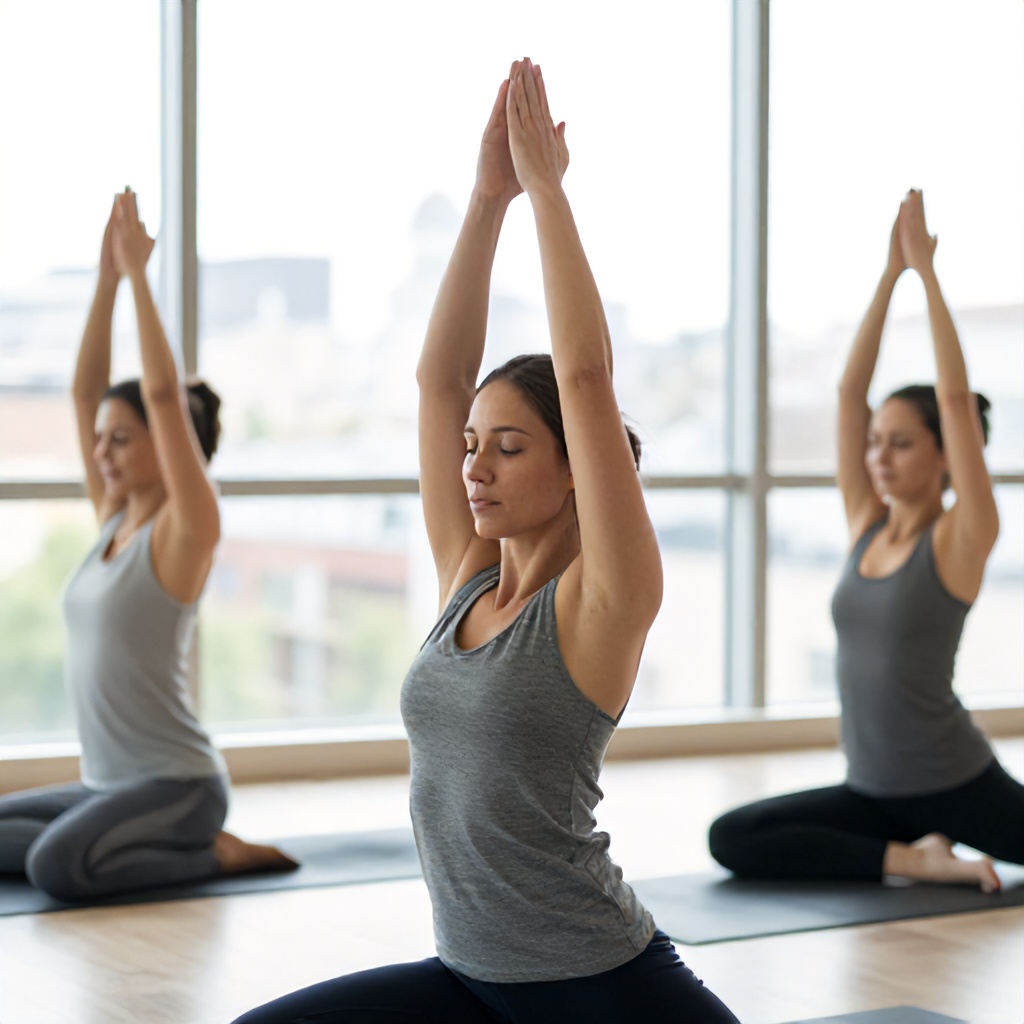
This pose is a cornerstone of restorative yoga, designed to relax the body and mind. It’s accessible to most people, regardless of their yoga experience, and can be done with minimal props. The beauty of Viparita Karani lies in its simplicity and profound therapeutic effects.

Why This Simple Pose Makes a Big Difference

The primary reason legs-up-the-wall pose is so effective is its ability to counteract the constant pull of gravity we experience throughout the day. When we stand or sit for extended periods, fluids can pool in our lower extremities, leading to that familiar heavy, tired feeling. By flipping the script and elevating your legs, you encourage these stagnant fluids to move back towards your core.

This movement is key to improving circulation and reducing swelling. It’s not just about feeling lighter; it’s about supporting your body’s natural processes. Think of it as giving your circulatory and lymphatic systems a gentle, much-needed break.

The 5 Key Things I Learned from Daily Practice

1. Relief from Edema and Swelling

One of the most immediate and noticeable benefits I experienced was a significant reduction in edema in my legs and feet. If you’ve ever dealt with fluid retention, or swelling due to long hours on your feet, you know how uncomfortable it can be. Viparita Karani directly addresses this by reversing the effects of gravity.

By allowing stagnant fluids to drain away from the lower limbs, the pose helps to alleviate that puffy, heavy sensation. This is particularly helpful for those with conditions that contribute to swelling or for anyone who simply wants to give their tired legs a break. The improved venous return is palpable.

2. A Calming Effect on the Nervous System

Beyond the physical, this pose is a powerful tool for mental and emotional well-being. The gentle inversion and the act of stillness encourage a deep sense of relaxation. It’s a signal to your nervous system that it’s safe to switch off the “fight or flight” mode and enter a state of rest and digest.

This can be incredibly beneficial for stress management. In our often-hectic lives, finding moments of true calm is essential. The quiet contemplation that comes with holding legs-up-the-wall pose can help to quiet a racing mind and promote a more balanced emotional state. It’s a form of mindful movement that nourishes the soul.

3. Improved Body Alignment and Posture

While it might seem counterintuitive, spending time with your legs elevated can actually improve your overall body alignment and posture. When you’re upright all day, your spine is constantly working against gravity. This pose offers a gentle release for the lower back and hips.

As the muscles in your legs and back relax, it allows for a natural release of tension. This can lead to a subtle lengthening of the spine and a more open chest over time. Practicing Viparita Karani can help undo some of the postural habits we develop from prolonged sitting or standing, contributing to better body awareness and support.

4. A Gentle Boost to Circulation

The inversion aspect of legs-up-the-wall pose is fantastic for encouraging better blood flow. When your legs are raised, gravity assists the blood in returning to your heart, which can help improve overall circulation. This is especially beneficial for those who experience poor circulation in their extremities.

This isn’t about intense physical exertion; it’s about creating an environment where your body’s natural circulatory mechanisms can work more efficiently. The gentle flow helps to oxygenate tissues and remove waste products, contributing to a feeling of rejuvenation. It’s a simple yet effective way to support your cardiovascular health.

5. Enhanced Flexibility and Stretching

While not a deep stretch in the traditional sense, holding legs-up-the-wall pose for an extended period provides a wonderful, passive stretch for the hamstrings, calves, and the backs of the knees. For many, especially those with tight hamstrings, this can be a welcome release.

The sustained, gentle stretch helps to improve flexibility over time. It allows the muscles to lengthen and release without strain. This can be particularly helpful for preparing the body for more active forms of exercise or simply for increasing overall range of motion and comfort in daily activities. It’s a key component of a holistic yoga practice focused on well-being.

Incorporating Legs-Up-The-Wall Pose into Your Daily Routine

Making Viparita Karani a part of your day is incredibly easy. You don’t need a dedicated yoga studio or a lot of time. Find a quiet spot near a wall and simply lie down.

  1. Find your spot: Choose a wall that is free of obstructions.
  2. Position yourself: Sit sideways against the wall, then gently lie down on your back, swinging your legs up the wall as you do so.
  3. Get comfortable: Scoot your hips as close to the wall as is comfortable. Some people like to place a folded blanket or bolster under their hips for added support or a deeper release.
  4. Relax: Let your arms rest by your sides, palms facing up, or place one hand on your belly and the other on your heart. Close your eyes and breathe deeply.
  5. Hold: Aim to stay in the pose for at least 5-10 minutes. You can stay longer if you feel comfortable and benefit from it.
  6. Come out gently: Bend your knees and roll onto one side before slowly pressing yourself back up to a seated position.

Quick Tip:

If your hamstrings feel tight, try placing a folded blanket or pillow under your hips. You can also bend your knees slightly and let the soles of your feet rest against the wall, creating a modified version of the pose.

Important Note:

While generally safe, if you have any medical conditions, especially those related to blood pressure or glaucoma, it’s always a good idea to consult with your doctor or a qualified yoga instructor before starting a new practice, including daily inversion poses like legs-up-the-wall.

The beauty of this practice is its adaptability. You can do it first thing in the morning to energize your day, during a midday break to de-stress, or in the evening to wind down before sleep. The key is consistency.

Even just a few minutes each day can make a significant difference in how your body feels. It’s a simple act of self-care that yields profound results, supporting your overall well-being and promoting better body alignment through mindful movement.

Illustrated Guide to Yoga Poses and Their Anatomical Benefits

Yoga poses function as a physical language that communicates directly with your nervous system. When you look at high-quality yoga illustrations, you notice how specific shapes create stability or release tension. These yoga postures are not just about flexibility; they are about understanding your own anatomy through intentional movement. Whether you are practicing on a mat in a room with muted purple walls or following a digital guide set against a peachy-pink background, the goal remains the same: finding alignment.

Foundational Standing Poses

Standing asanas provide the bedrock for your entire yoga practice. They build heat, improve balance, and ground your energy. When you look at a profile view of a standing pose, you can clearly see the line of energy traveling from the crown of the head down to the heels. This is where yoga alignment becomes visible.

Mountain Pose (Tadasana)

Mountain pose looks deceptively simple. You stand with your feet hip-width apart, rooting down through all four corners of your feet. Imagine a string pulling the top of your head toward the ceiling. Your shoulders should be relaxed, away from your ears, and your palms face forward. This posture teaches you how to stand with intention. It is the starting point for almost all yoga sequences. Focus on keeping your spine neutral and your breath steady. Avoid locking your knees; keep a micro-bend to maintain active engagement in your quadriceps.

Warrior II (Virabhadrasana II)

Warrior II is a powerful shape that builds strength in the legs and opens the hips. Step your feet wide apart, turning your front foot forward and your back foot slightly inward. Bend your front knee until it aligns directly over your ankle. Extend your arms out to the sides, parallel to the floor, with a clean sans-serif font style of focus—sharp, clear, and direct. Keep your torso centered between your legs. Many people lean forward, but your goal is to keep your shoulders stacked directly over your hips. This pose is a staple in most yoga diagrams because it effectively demonstrates the balance between effort and ease.

Seated and Floor-Based Shapes

Floor-based yoga positions allow you to slow down and focus on deep stretching. These movements are often used at the end of a session to calm the mind. When you study yoga art, you will notice that seated poses often involve concentric circles of energy, representing the way breath moves through the torso.

Child’s Pose (Balasana)

Child’s pose is a resting position that provides a gentle stretch for the hips, thighs, and ankles. Kneel on the floor, touch your big toes together, and sit on your heels. Separate your knees about as wide as your hips. Exhale and lay your torso down between your thighs. Rest your forehead on the mat. You can extend your arms forward or bring them back alongside your body. This is a restorative shape that helps you reconnect with your breath. If your hips feel tight, place a folded blanket under your seat for extra support.

Seated Forward Fold (Paschimottanasana)

This pose targets the hamstrings and the lower back. Sit on the floor with your legs extended straight in front of you. Flex your feet, pointing your toes toward the ceiling. Inhale to lengthen your spine, and exhale to fold forward from your hips, not your waist. Reach for your shins, ankles, or feet. Keep your chest open rather than rounding your back. The visual representation of this pose often emphasizes the long, straight line of the spine. If you cannot reach your feet, use a strap around the soles to maintain proper alignment without straining your shoulders.

Balancing and Inversion Basics

Balancing poses require intense concentration and core stability. They are the most challenging yoga movements for many beginners, but they offer the greatest rewards in terms of focus. Yoga visuals often highlight the gaze point, or drishti, which is essential for maintaining balance.

Tree Pose (Vrksasana)

Tree pose helps improve balance and concentration. Stand in Mountain pose, then shift your weight onto your left foot. Bend your right knee and place the sole of your right foot on your inner left thigh or calf. Avoid placing the foot directly on the knee joint to prevent injury. Bring your hands to your heart in prayer position or extend them overhead like branches. Find a fixed point in front of you to gaze at. This helps keep your body steady. If you wobble, simply reset and try again. The beauty of this pose lies in the minor adjustments your body makes to stay upright.

Downward-Facing Dog (Adho Mukha Svanasana)

This is perhaps the most iconic of all yoga postures. Start on your hands and knees, then lift your hips toward the ceiling, forming an inverted V-shape. Spread your fingers wide and press firmly into the mat. Your head should hang freely between your upper arms. Focus on lengthening your spine rather than getting your heels to the floor. If your hamstrings are tight, keep your knees bent. This pose is a full-body stretch that engages the arms, back, and legs simultaneously. It is frequently used as a transition in yoga sequences to reset the body.

Refining Your Yoga Alignment

Alignment is the secret to a sustainable practice. When your joints are stacked correctly, you can hold poses longer and with less risk of injury. Think of your body as a series of levers and pulleys. When you move into a pose, check your foundation first. Are your feet grounded? Is your core engaged? Is your breath flowing?

Many people struggle with yoga anatomy because they try to force their bodies into shapes they see in magazines. Instead, focus on how the pose feels. If you are practicing in a space with muted purple decor, let that calm environment influence your pace. Move slowly. Use props like blocks, straps, and bolsters to bring the floor closer to you. There is no shame in using equipment; it is a sign of a smart practitioner who values longevity over ego.

When you look at yoga illustrations, pay attention to the angles. A slight tilt of the pelvis can change the entire sensation of a pose. For example, in a lunge, tucking your tailbone slightly can protect your lower back and deepen the stretch in your hip flexors. These small, subtle shifts are what separate a casual stretch from a true yoga practice.

Integrating Yoga into Your Daily Routine

You do not need an hour to reap the benefits of yoga. Even ten minutes of intentional movement can shift your mood and energy levels. Create a small corner in your home that feels inviting. A peachy-pink background or a simple mat in a neutral color can make your practice space feel like a sanctuary. Consistency matters more than intensity.

Start by picking three poses you enjoy. Maybe you love the grounding nature of Mountain pose, the stretch of Downward-Facing Dog, and the restfulness of Child’s pose. Create a simple flow that moves you from one to the other. Use your breath as the bridge between these shapes. Inhale as you expand, and exhale as you fold or twist. This rhythmic breathing is what turns a series of yoga positions into a moving meditation.

Keep a journal of your progress. Note which poses feel tight and which feel fluid. Over time, you will see how your body changes. You might notice that your shoulders feel less tense after a long day at the desk, or that your balance has improved during everyday activities. These are the real markers of progress, not how deep you can fold or how high you can lift your leg.

Common Mistakes to Avoid

One of the most common errors is holding the breath. When a pose becomes difficult, the natural tendency is to clench the jaw or hold the breath. This signals to your nervous system that you are in danger, which creates tension. Instead, consciously soften your face and deepen your breath. If you find yourself gasping, back out of the pose slightly.

Another mistake is over-stretching. Flexibility is a byproduct of yoga, not the primary goal. Never push into a sharp or shooting pain. If you feel a dull, aching sensation, that is usually a sign that you are pushing too hard. Listen to your body. It will tell you exactly what it needs if you are willing to pay attention. Remember that every day is different; some days you will feel open and flexible, while other days you will feel stiff and tired. Both are perfectly normal.

Finally, avoid comparing yourself to others. Yoga is an individual practice. The person next to you might have a different skeletal structure, a different history of injuries, or a different level of experience. Focus on your own mat. Your yoga practice is a conversation between you and your body, not a performance for anyone else.

The Role of Props and Modifications

Props are not just for beginners. They are tools that help you achieve better alignment. A block under your hand in a triangle pose can prevent you from collapsing your chest. A strap can help you maintain a straight spine in a seated fold. A bolster under your knees in Savasana can release tension in your lower back. Using these items allows you to experience the full benefit of the pose without compromising your form.

Think of your yoga practice as a lifelong project. You are building a relationship with your physical self. As you age, your needs will change, and your practice should evolve with you. What works for you today might look different in five years, and that is perfectly fine. The key is to remain curious and open to the process.

When you are looking for inspiration, seek out high-quality yoga diagrams that explain the mechanics of the pose. Understanding the anatomy—which muscles are lengthening and which are contracting—can help you perform the movements with more precision. This knowledge empowers you to practice safely at home, even without a teacher present.

Creating Your Own Sequences

Once you are comfortable with individual poses, you can start to link them together. A good sequence usually follows a logical progression: starting with gentle warm-ups, moving into more active standing poses, and finishing with cooling floor-based stretches. This structure helps prepare the body for deeper work and ensures a safe transition back to a resting state.

For a morning sequence, focus on poses that wake up the spine and increase circulation. Cat-Cow stretches are excellent for this. Start on your hands and knees. Inhale as you drop your belly and look up, and exhale as you round your spine and tuck your chin. Repeat this ten times to lubricate the vertebrae. Follow this with a few rounds of Sun Salutations to build heat.

For an evening sequence, focus on poses that release the day’s stress. Legs-Up-The-Wall is a fantastic restorative pose. Simply lie on your back and rest your legs vertically against a wall. This helps drain fluid from the legs and calms the nervous system. Stay here for five to ten minutes, focusing on slow, deep breaths. It is the perfect way to signal to your body that it is time to wind down.

Final Thoughts on Your Practice

Yoga is a practice of showing up. It is about the commitment to spend time with yourself, moving in ways that feel good and restorative. Whether you are following a complex sequence or just doing a few simple stretches, the value lies in the attention you bring to the moment. Keep your space clean and inviting, use your props wisely, and always prioritize your breath over the depth of your pose.

As you continue your journey, remember that the poses are just shapes. The real yoga happens in the space between the shapes—in the way you handle the challenge of a difficult pose, the way you breathe through discomfort, and the way you treat yourself with kindness when you fall out of balance. This is the essence of a sustainable and rewarding practice. Enjoy the process of learning your body, one pose at a time.

Stay consistent, stay curious, and keep your practice grounded in the reality of your own experience. There is no right or wrong way to feel in a pose, only the way that is right for you in this exact moment. By focusing on alignment, breath, and mindful movement, you create a foundation that will support you for years to come. Your mat is always there for you, waiting for your next session.

Muscles Stretched in Forward Fold Pose (Uttanasana) Explained

The Forward Fold Pose, a fundamental yoga and stretching exercise, primarily targets and lengthens the entire posterior chain of the body, from the heels up through the spine, promoting significant flexibility in the hamstrings, glutes, and spinal extensors.

Understanding the Forward Fold Pose

The Forward Fold Pose, often called Uttanasana in yoga, involves bending forward from the hips, bringing your torso towards your legs. It’s a classic posture found in many flexibility training routines because of its profound effects on the back of the body. This pose is more than just touching your toes; it’s a deep stretch that encourages spinal flexion and releases tension throughout the posterior muscle groups.

Practicing this forward-folding pose regularly helps improve overall body alignment and can be a powerful tool for stress reduction. It’s a physical exercise that requires both strength and surrender, allowing gravity to assist in lengthening tight areas. Many people find it to be a calming and grounding posture, making it a staple in a balanced yoga practice.

Key Muscle Groups Stretched in Forward Fold

An anatomical illustration of the human body in a forward fold would highlight several key muscle groups undergoing significant lengthening. Understanding which muscles are at work helps you perform the pose more effectively and safely. This visual guide details the primary and secondary muscles stretched.

The Hamstrings: The Stars of the Show

When you bend into a Forward Fold, your hamstrings are arguably the most intensely stretched muscle group. These powerful muscles run along the back of your thigh, from your sitting bones down to just below your knee. They consist of three distinct muscles: the biceps femoris, semitendinosus, and semimembranosus.

The primary function of the hamstrings includes hip extension and knee flexion. In the Forward Fold Pose, your hips are in deep flexion, and if your knees are straight (or only slightly bent), these muscles are stretched significantly. Tight hamstrings are a common issue, often contributing to lower back discomfort and limiting overall flexibility. A consistent hamstring stretch from poses like the forward fold is essential for maintaining healthy movement patterns and relieving tension.

As you hinge at your hips, the hamstrings are elongated. This lengthening is what creates that sensation of stretch in the back of your thighs. It’s important to feel this stretch evenly across all three hamstring muscles, which can be achieved by keeping your weight balanced in your feet and maintaining a gentle engagement of your quadriceps to protect your knees.

Gluteal Muscles: Supporting the Stretch

The gluteal muscles, commonly known as the glutes, are another significant muscle group engaged and stretched in the Forward Fold Pose. Comprising the gluteus maximus, medius, and minimus, these muscles form the bulk of your buttocks. Their main roles include hip extension, abduction, and external rotation.

In a forward fold, as your hips flex deeply, the gluteus maximus, in particular, undergoes a substantial stretch. This muscle is a powerful hip extensor, so when you move into the opposite action (hip flexion), it lengthens considerably. The glutes work in tandem with the hamstrings, and often, tightness in one group can impact the other. Releasing tension in the glutes can contribute to a deeper and more comfortable forward fold.

While the gluteus maximus is the most prominent, the deeper gluteal muscles also experience some lengthening, especially if there’s any slight internal rotation of the thighs. This deep stretch helps improve hip mobility and can alleviate stiffness in the lower back and hips.

Erector Spinae: The Spinal Extensors

The erector spinae muscles are a group of muscles that run vertically along your spine, from your sacrum all the way up to your skull. This group includes the iliocostalis, longissimus, and spinalis muscles. Their main job is to extend the spine, allowing you to stand upright, and to provide stability for your torso.

In the Forward Fold Pose, as you perform spinal flexion, these muscles are lengthened along the entire length of your back. This is a passive stretch for the erector spinae, meaning they are relaxing and elongating rather than actively contracting. A gentle release in these muscles can significantly reduce tension in the upper and lower back, improving overall posture.

For many individuals, chronic back pain is linked to tightness in these spinal muscles. The Forward Fold offers a therapeutic stretch, helping to decompress the spine and create more space between the vertebrae. It’s a fantastic way to counteract the effects of prolonged sitting or standing, which can shorten and stiffen the back muscles.

Calf Muscles: Gastrocnemius and Soleus

While not the primary focus, the calf muscles also receive a beneficial stretch in the Forward Fold, particularly if your heels remain grounded and your knees are relatively straight. The calves consist of two main muscles: the gastrocnemius (the larger, more superficial muscle) and the soleus (a deeper muscle underneath the gastrocnemius).

Both muscles are responsible for plantarflexion (pointing your toes). The gastrocnemius also assists in knee flexion because it crosses the knee joint. In the Forward Fold, especially if you actively press your heels down and lift your toes slightly, you’ll feel a stretch through the back of your lower legs. This stretching technique helps improve ankle flexibility and can alleviate tightness that might travel up into the hamstrings.

This secondary stretch is important for overall lower body flexibility. Tight calves can restrict ankle movement, which in turn can affect knee and hip mechanics. Including the calves in your overall flexibility exercise routine, even passively through a forward fold, contributes to better movement and reduced risk of injury.

Adductors: Inner Thigh Muscles

The adductor muscles are located on the inner thigh and include the adductor magnus, longus, brevis, pectineus, and gracilis. Their main function is to bring the legs towards the midline of the body (adduction). They also play a role in hip flexion and extension, depending on the specific muscle.

In a Forward Fold, especially if your feet are hip-width apart or slightly wider, the adductors receive a stretch as your hips flex and your legs might subtly abduct (move away from the midline) to accommodate the fold. This stretch is often more pronounced if you have particularly tight inner thighs. Releasing tension in the adductors can improve hip mobility and contribute to a more open and balanced lower body.

The adductors are often overlooked but are crucial for hip health and stability. A gentle stretch in these muscles can prevent imbalances that might affect walking, running, and other daily movements. The Forward Fold, while primarily a posterior chain stretch, still offers a valuable release for these inner thigh muscles.

Achieving Proper Body Alignment for a Safe Stretch

To truly benefit from the Forward Fold Pose and ensure a safe, effective deep stretch, proper body alignment is paramount. It’s not about how far down you can go, but how mindfully you move into the pose.

  • Hinge from the Hips: The movement should initiate from your hip joints, not your lower back. Imagine your pelvis tilting forward, leading with your chest. This ensures the stretch primarily targets your hamstrings and glutes, rather than putting strain on your lumbar spine.

  • Micro-Bend Your Knees: Always maintain a slight bend in your knees, especially if your hamstrings are tight. This protects your knee joints from hyperextension and allows for a more accessible and deeper stretch in the hamstrings without overstretching the connective tissue around the knees. As your flexibility improves, you might straighten your legs more, but never lock your knees.

  • Lengthen Your Spine: Initially, focus on lengthening your spine as you fold, keeping your back relatively flat. Only when your torso is parallel to the floor or you feel a significant stretch in your hamstrings should you allow your upper back to round gently. This two-part movement ensures you get the most out of the spinal flexion without compressing your vertebrae.

  • Engage Your Core: Lightly drawing your navel towards your spine helps support your lower back and deepens the stretch. Core engagement provides stability and prevents excessive rounding in the lumbar region, which can be detrimental over time.

  • Relax Your Neck and Shoulders: Once you are in the deepest part of your fold, allow your head to hang heavy, releasing any tension in your neck. Your shoulders should be relaxed, away from your ears. This helps to further release tension throughout the upper back and neck, contributing to the overall calming effect of the pose.

Benefits of Regular Forward Folding

Consistent practice of the Forward Fold Pose offers a wealth of physical and mental benefits, extending far beyond simple muscle lengthening. This flexibility exercise is a holistic tool for well-being.

  • Increased Flexibility: The most obvious benefit is improved flexibility in the hamstrings, glutes, and back muscles. This enhanced range of motion can make everyday movements easier and reduce the risk of injury.

  • Improved Posture: By lengthening the posterior chain, the Forward Fold helps counteract the effects of prolonged sitting, which often leads to tight hamstrings and a rounded upper back. Releasing these muscles can help you stand taller and with better alignment.

  • Stress Reduction and Calming Effect: Inversions, even partial ones like a forward fold where the head is below the heart, can stimulate the parasympathetic nervous system, promoting relaxation. The act of folding inward can be very grounding and meditative.

  • Relief from Back Pain: For many, tightness in the hamstrings and glutes contributes to lower back pain. Stretching these muscles can alleviate pressure on the lumbar spine, offering significant relief. The spinal flexion also helps decompress the vertebrae.

  • Enhanced Body Awareness: Paying attention to the sensations in your body as you stretch helps cultivate greater proprioception, your body’s sense of its position in space. This heightened awareness is valuable both on and off the yoga mat.

  • Improved Digestion: The gentle compression of the abdominal organs in a forward fold can stimulate digestion and relieve constipation. This internal massage is a subtle but beneficial aspect of the pose.

Tips for a Deeper, Safer Forward Fold

To deepen your Forward Fold safely and effectively, consider these practical tips. Remember, progress is gradual, and listening to your body is always the best approach.

  1. Warm Up First: Never go into a deep forward fold with cold muscles. A few minutes of gentle movement, like sun salutations, cat-cow stretches, or walking, will prepare your body for the stretch.

  2. Use Props: Yoga blocks can be your best friend. If your hands don’t comfortably reach the floor, place them on blocks. This allows you to maintain a long spine and focus on the hamstring stretch without straining your back. A strap can also be used around your feet to gently pull yourself deeper into the pose, again, keeping the spine long.

  3. Breathe Deeply: Use your breath as a guide. Inhale to lengthen your spine, and as you exhale, allow yourself to fold a little deeper, releasing tension. Never hold your breath in this pose; shallow breathing can create tension rather than release it.

  4. Hold for Time: For a significant flexibility gain, hold the Forward Fold for 30 seconds to a minute or even longer, if comfortable. Static stretching, where you hold a stretch for an extended period, is effective for increasing muscle length.

  5. Focus on Sensation, Not Depth: Instead of striving to touch your toes, focus on the sensation of the stretch in your hamstrings and along your spine. If you feel a sharp pain, ease out of the pose immediately. A healthy stretch should feel intense but never painful.

  6. Engage Antagonist Muscles: Actively engaging your quadriceps (the muscles on the front of your thighs) can help your hamstrings relax and lengthen more effectively. This reciprocal inhibition is a powerful stretching technique.

Common Mistakes to Avoid in Forward Fold

While the Forward Fold is a beneficial yoga pose, certain common mistakes can hinder your progress or even lead to discomfort. Being aware of these pitfalls helps ensure a safer and more effective stretching experience.

  • Rounding the Lower Back Excessively: This is perhaps the most common mistake. Folding from the lower back instead of hinging at the hips puts undue pressure on the lumbar spine and can lead to injury. Always prioritize a long spine over reaching the floor.

  • Locking the Knees: Hyperextending your knees can strain the ligaments and tendons around the knee joint. Always maintain a soft micro-bend in your knees to protect them and allow for a deeper, safer hamstring stretch.

  • Forcing the Stretch: Pushing too hard, too fast, can lead to muscle strains or tears. Flexibility is built gradually. Listen to your body’s signals and respect its current limits. The goal is release, not aggression.

  • Holding Your Breath: Tension often manifests as held breath. Holding your breath increases tension in the body, making it harder for muscles to relax and lengthen. Continuous, deep breathing is essential for releasing into the pose.

  • Ignoring Discomfort: While a stretch should feel intense, it should never be sharp or painful. Any sharp pain indicates you’ve gone too far or are stretching incorrectly. Back off immediately if you feel this.

  • Not Warming Up: Attempting a deep forward fold with cold muscles significantly increases the risk of injury. Always precede your deep stretches with a proper warm-up to prepare your muscles and connective tissues.

The Forward Fold Pose is a powerful and accessible flexibility exercise that offers profound benefits for your entire body. By understanding the anatomical diagram of muscles stretched and applying proper stretching technique, you can cultivate greater physical ease, improve your posture, and enhance your overall well-being. Incorporating this deep stretch into your regular yoga practice or daily routine, perhaps on a comfortable yoga mat while wearing activewear, will yield lasting positive results for your human anatomy.

8 Gentle Yoga Poses to Reduce Stress and Calm Inflammation

Gentle Yoga for a Stronger You: Poses to Ease Stress and Inflammation

Calm inflammation and reduce stress with these gentle immune-boosting yoga poses.

It feels like everyone is catching a bug these days, doesn’t it? And when you add the pressure of daily life to that, it can make you feel even more vulnerable to getting sick. Stress has a way of weakening your immune system and actually ramping up chronic inflammation in your body. That’s a double whammy for your well-being. But here’s the good news: yoga can be a fantastic ally in keeping your immune system humming along nicely. Seriously, a look at 15 different studies revealed that a regular yoga practice can give your immunity a significant boost by tackling both stress and inflammation. And if you’re already feeling under the weather, yoga can even help by lowering those inflammatory markers in your system.

Sidebar: 8 Yoga Poses to Reduce Inflammation and Boost Immunity

Calm inflammation and reduce stress with these gentle immune-boosting yoga poses. As if it isn’t bad enough that every other person you know is catching a bug, adding stress to the mix can make you even more susceptible to getting sick. Stress can actually weaken your immune system and increase chronic inflammation. ( 1 ) Fortunately, yoga can help keep your immune system in tip-top shape. A review of 15 studies showed that yoga can boost immunity by both reducing stress and decreasing inflammation in the body. Yoga can also be beneficial

To truly reap the consistent immune-boosting benefits, a regular yoga practice is key. Aim to practice these yoga poses daily. Before you begin, make sure you have a comfortable yoga mat and perhaps a bolster or a long pillow handy for extra support.

Why Yoga Works Wonders

Think of your body like a finely tuned instrument. When it’s out of tune, things can feel off. Stress causes a cascade of reactions in your body, often leading to increased inflammation. This isn’t just about feeling achy; chronic inflammation is linked to a whole host of health issues. Yoga, on the other hand, offers a powerful antidote. The combination of physical movement, deep breathing, and mindfulness helps to quiet the nervous system, signaling your body to relax. This shift from “fight or flight” to “rest and digest” mode is incredibly beneficial for reducing stress hormones like cortisol. Lower stress levels directly translate to a less inflamed body and a more robust immune system.

Beyond stress reduction, the physical practice of yoga also encourages better circulation. Improved blood flow means that oxygen and nutrients can reach your cells more efficiently, and waste products can be cleared away more effectively. This supports overall cellular health and can help to reduce the inflammatory processes that might be simmering beneath the surface. It’s a holistic approach to well-being, touching on physical health, mental clarity, and emotional balance.

Getting Started with Your Yoga Practice

Starting a yoga practice doesn’t need to be intimidating. The focus here is on gentle, restorative movements that anyone can do. You don’t need to be flexible or have years of experience. All you need is willingness and a little bit of space. Having a yoga mat provides a stable and comfortable surface, preventing slips and adding cushioning. A bolster or a long pillow can be a game-changer, offering support in poses and allowing you to relax more deeply into the stretches. This is about self-care, not performance.

Consistency is more important than intensity. Even a short, daily yoga session can make a significant difference over time. Think of it as a small investment in your overall health and resilience. You might also find that incorporating elements of mindfulness, like focusing on your breath, enhances the benefits of your yoga stretches.

8 Gentle Yoga Poses to Try

These poses are chosen for their ability to gently stretch the body, calm the mind, and support your immune system. Remember to listen to your body and modify poses as needed. The goal is to feel good, not to push yourself into pain.

Wide-Legged Forward Fold with Twist

This pose is wonderful for releasing tension in the hips and spine, while also providing a gentle twist that can aid digestion and detoxification. It’s a great way to unwind after a long day.

  1. Start standing sideways on your mat with your feet wide apart, about three to four feet, and your toes pointing straight ahead.
  2. Place your hands on your hips and gently engage your abdominal muscles.
  3. As you inhale, lengthen your spine. Then, exhale and begin to fold your torso forward from your hips.
  4. Bring your hands to the ground, placing them directly underneath your shoulders. You can bend your knees slightly if your hamstrings feel tight.
  5. Keep your right hand firmly planted on the ground. As you inhale, reach your left arm up towards the sky, opening your chest. Spread your fingers wide and aim to keep your hips level by imagining lifting your right hip up.
  6. Hold this twist for about 5 breaths, focusing on your breath and the gentle stretch.
  7. To release, exhale and bring your left hand back down to the ground.
  8. Inhale to rise halfway up, then switch sides. Place your left hand down, and inhale to lift your right arm towards the sky for 5 breaths.
  9. Exhale to release both hands to the ground and inhale to slowly rise back up to standing.

Plank Pose

Plank Pose might seem simple, but it’s a powerhouse for building core strength, which is essential for good posture and stability. It also engages your entire body, promoting circulation and a sense of grounding.

  1. Begin by getting into a high plank position. Your body should form a straight line from your head to your heels.
  2. Ensure your shoulders are stacked directly over your wrists. Spread your fingers wide to create a stable base.
  3. Lift your heels high, engaging your calf muscles. Keep your hips in line with your shoulders – avoid letting them sag or lift too high.
  4. Actively engage your abdominal muscles by drawing your navel towards your spine, and also engage your quadriceps (the muscles in the front of your thighs).
  5. Hold this strong pose for about 5 breaths, feeling the energy and stability it creates.
  6. To release, gently lower your knees to the mat.

Cobra Pose

Cobra Pose is a gentle backbend that helps to open the chest and shoulders, counteracting the effects of prolonged sitting or slouching. It can also stimulate the abdominal organs and improve respiratory health.

  1. Lie down on your belly on your yoga mat.
  2. Engage your abdominal muscles by gently drawing your navel up and in towards your spine. This protects your lower back.
  3. Bend your elbows and place your hands flat on the mat, positioned next to your ribs, with your fingertips pointing forward.
  4. Keep your thighs and the tops of your feet pressing into the mat.
  5. As you inhale, press gently into your palms and begin to lift your chest off the mat. Keep a slight bend in your elbows and actively squeeze your shoulder blades together, drawing them down your back.
  6. Your gaze should be slightly forward and down, keeping your neck long.
  7. Hold this pose for about 5 breaths, breathing into the expansion of your chest.
  8. To release, exhale and slowly lower your chest back down to the mat.

Low Lunge Prayer Twist

This pose is fantastic for improving hip flexibility and creating a deep twist that can help detoxify the body and stimulate digestion. It also builds strength in the legs and core.

  1. Start on your hands and knees in a tabletop position.
  2. Step your right foot forward between your hands, ensuring your knee is stacked directly over your ankle.
  3. As you inhale, lift your chest and lengthen your spine. Bring your palms together in a prayer position at the center of your chest and engage your abdominal muscles.
  4. On an exhale, begin to twist your torso to the right.
  5. If it feels accessible, you can hook your left tricep (the back of your upper left arm) on the outer right thigh. This deepens the twist.
  6. With each inhale, focus on lengthening your spine, creating space. With each exhale, gently twist a little deeper.
  7. Hold here for five to eight breaths, allowing the twist to work its magic.
  8. To release, bring your hands back to the mat and step your right foot back to tabletop.
  9. Repeat the pose on the other side, stepping your left foot forward and twisting to the left for five to eight breaths.

Dolphin Pose

Dolphin Pose is a wonderful inversion that strengthens the shoulders, arms, and core, while also providing a gentle stretch for the hamstrings and calves. It can help to calm the nervous system and improve circulation.

  1. Begin on your hands and knees in a tabletop position.
  2. Lower down onto your forearms, ensuring your elbows are directly beneath your shoulders and your forearms are parallel.
  3. Step your feet back, coming into a forearm plank position, with your body in a straight line from head to heels.
  4. Take an inhale to prepare. Then, exhale and begin to walk your feet towards your elbows as you lift your hips up and back towards the sky.
  5. Your body should resemble an inverted V shape. You can keep a slight bend in your knees if your hamstrings are tight.
  6. Focus on pressing actively through your forearms and palms, and drawing your shoulder blades away from your ears.
  7. Hold this pose for about 5 breaths, feeling the stretch and the strength building.
  8. To release, exhale and gently lower your hips back down to the mat.

Tree Pose

Tree Pose is a classic balancing pose that cultivates focus, stability, and a sense of groundedness. It’s excellent for improving balance and strengthening the ankles, legs, and core. It also encourages a sense of inner peace.

  1. Stand tall on your yoga mat with your feet together or hip-width apart.
  2. Shift your weight onto your left foot.
  3. Bring the sole of your right foot to your inner left ankle, calf, or inner thigh (avoid pressing directly on your knee joint).
  4. Bring your hands together in prayer position at your heart center.
  5. Find a steady point to focus your gaze on (a “drishti”) to help with balance.
  6. Engage your core muscles to help stabilize your body.
  7. Hold this pose for about 5 breaths, feeling the strength and balance you are cultivating.
  8. To release, gently lower your right foot back to the mat.
  9. Repeat on the other side, shifting your weight onto your right foot and bringing your left foot to your inner leg.

Tip: Don’t worry if you wobble in Tree Pose! It’s a natural part of the process. The goal is to find your balance, not to be perfectly still. You can always use a wall for support if needed.

Child’s Pose

Child’s Pose is a deeply restorative pose that offers a gentle stretch for the back, hips, and thighs. It’s a wonderful pose for calming the nervous system and promoting relaxation, making it perfect for stress reduction.

  1. Start on your hands and knees on your yoga mat.
  2. Bring your big toes to touch and widen your knees apart, as much as is comfortable for your hips.
  3. Exhale and sink your hips back towards your heels.
  4. Rest your torso down between your thighs.
  5. Extend your arms forward on the mat, or rest them alongside your body with your palms facing up.
  6. Rest your forehead on the mat.
  7. Allow your breath to deepen and your body to relax completely. Stay here for as long as you need, letting go of any tension.

Seated Forward Bend

This pose is a soothing way to stretch the hamstrings, spine, and shoulders. It’s also known for its calming effect on the brain, helping to reduce stress and anxiety.

  1. Sit on your yoga mat with your legs extended straight out in front of you.
  2. Flex your feet, drawing your toes towards your shins.
  3. Inhale and lengthen your spine, reaching the crown of your head towards the ceiling.
  4. As you exhale, hinge forward from your hips, keeping your back as straight as possible.
  5. Reach your hands towards your feet, shins, or the floor. If your hamstrings are tight, you can place a bolster or pillow under your knees.
  6. Allow your head and neck to relax.
  7. Hold for 5-10 breaths, breathing into the stretch.
  8. Inhale to slowly rise back up to a seated position.

Tip: If sitting with straight legs is uncomfortable, you can bend your knees slightly or sit on a folded blanket to elevate your hips. The key is to maintain a long spine as you fold forward.

Integrating Yoga into Your Life

Making yoga a consistent part of your routine is where the magic happens. It’s not about perfection; it’s about practice. Even 15-20 minutes a day can yield significant benefits for your immune system and overall well-being. Try to schedule your yoga practice at a time that works best for you, whether it’s first thing in the morning to set a calm tone for the day, or in the evening to unwind and prepare for restful sleep. Your stretching routine doesn’t have to be complicated; these simple poses can form the foundation of a beneficial yoga journey.

Consider exploring different styles of yoga as you progress. While these poses are gentle, there are many other forms of yoga that can offer varied benefits. The important thing is to find a practice that resonates with you and supports your health goals. Remember, physical activity, combined with mindfulness, is a powerful duo for holistic health. You might also find that complementing your yoga practice with mindful eating, such as following an AIP Meal Plan, further supports your body’s natural healing processes and reduces inflammation.

Important Note: Always consult with your healthcare provider before starting any new exercise program, especially if you have any underlying health conditions. Listen to your body and never push yourself into pain.

Common Yoga Alignment Mistakes for Newbies and How to Avoid Them

Common Yoga Alignment Mistakes for Newbies and How to Avoid Them

If your New Year’s resolution was to start a yoga routine, you’re probably enjoying your downward dogs and tree poses. But as a yoga newbie, you might be making common alignment mistakes that could actually be working against the benefits of your practice, potentially leading to more postural imbalances and injuries.

The biggest pitfall? Getting competitive in your yoga class and rushing into advanced poses instead of building strength gradually. As expert yoga teacher Kirsty Gallagher notes, “We all do it. But it’s far better to master a beginner’s pose than to push yourself and feel awful in the hardest variation.”

She emphasizes that in her yoga classes, the focus is on feeling and intention, not just how advanced you look. “If you’re just clinging on for dear life in a handstand, you’ve lost the essence of yoga in that pose.”

So, how can you refine your yoga technique to get the most out of your yoga classes? Let’s tackle these common beginner’s mistakes in popular poses. Remember, perfection isn’t the goal, as Kirsty wisely advises: “It’s okay not to have perfected every yoga move, as long as by the end of your practice your body feels better. You’re winning all around.”

1. Mastering Downward Dog

Downward dog is frequently done incorrectly, according to Kirsty. The main culprits are postural misalignment and tight muscles. As you progress in yoga, down dog becomes more comfortable as your body opens up and tightness lessens. However, before you reach that stage, tight shoulders and hamstrings can be significant obstacles.

The common issue arises when people with tight muscles try to straighten their legs too soon. This often leads to a rounded upper back. Instead, it’s better to bend the knees slightly to help lift the back of the hipbones. Another frequent mistake is putting too much weight into the hands and arms because the shoulders can’t externally rotate enough, resulting in a rounded back sensation when the goal is a straight and aligned spine.

How to Fix Downward Dog Alignment

Kirsty suggests always encouraging students to keep their knees bent. Don’t force your heels to the floor, as this can encourage the rounding sensation in your back. Focus on lengthening your spine and sending your hips up and back.

2. Perfecting Chaturanga

A primary challenge with Chaturanga for beginners is a lack of the necessary strength to perform the pose correctly. Kirsty observes that many people drop their shoulders and lift their hips too high. This compresses the front of the shoulder, putting excessive strain on that area rather than distributing the effort to the triceps and core.

Some instruction methods involve a “knees chest chin” movement, which doesn’t always build the specific strength needed in the triceps and core for a proper Chaturanga. This can lead to improper form and potential injury.

How to Build Chaturanga Strength

From a plank position, drop your knees directly to the floor. Keep your shoulders lifted away from your ears. Focus on engaging your core and triceps. As you build strength, you can gradually work towards lowering your body with control, keeping your elbows tucked in towards your ribs. If Chaturanga feels too challenging, modify by keeping your knees down throughout the movement.

3. Understanding Warrior II

Warrior II is a foundational pose, but subtle alignment errors can cause problems. A common mistake is not properly aligning the front heel with the arch of the back foot. This can lead to instability and strain on the front knee.

Another frequent issue is allowing the front knee to collapse inward, rather than tracking over the ankle. This puts undue pressure on the knee joint and can contribute to postural imbalances. Over-extending the arms or letting the shoulders creep up towards the ears also detracts from the pose’s benefits.

Aligning Your Warrior II

Ensure your front heel is in line with the arch of your back foot. Keep your front knee tracking directly over your ankle, forming roughly a 90-degree angle. Actively press down through the outer edge of your back foot. Draw your shoulder blades down your back and extend your arms strongly out to the sides, keeping your neck long.

4. Finding Stability in Tree Pose

Tree pose, or Vrksasana, is a popular balancing pose that tests your stability. A common pitfall for a yoga newbie is relying too heavily on external support, like leaning against a wall, without first understanding the foundational elements of the pose. Another mistake is placing the foot too high on the standing leg, directly on the knee joint, which can cause strain.

Simply lifting the lifted leg without grounding through the standing foot also undermines the pose. The intention is to create a strong, stable base, much like a tree’s roots.

Rooting Down in Tree Pose

Begin by finding a steady gaze point (drishti). Press your standing foot firmly into the mat, engaging your thigh muscles. You can place your lifted foot on your ankle or calf, avoiding the knee. If you’re ready for more, you can bring your foot to your inner thigh. Focus on drawing your hipbones forward and engaging your core to maintain balance. It’s okay to start with your hands at heart center or even lightly touching a wall for support as you build strength and proprioception.

5. The Nuances of Triangle Pose

Triangle pose (Trikonasana) is excellent for stretching the hamstrings and opening the chest, but beginners often make alignment errors that limit its effectiveness and can even be harmful. A frequent mistake is not creating enough space between the feet, which makes it difficult to achieve the correct angles.

Another common issue is allowing the front knee to bend excessively, turning it into more of a lunge. This compromises the hamstring stretch and the integrity of the pose. Some people also tend to reach too far down with their top hand, causing their torso to collapse and their chest to round, rather than staying open and lifted.

Perfecting Triangle Pose

Ensure your feet are about three to four feet apart, with your front foot turned slightly inward and your back foot parallel to the top of the mat. Keep your front leg straight but avoid locking the knee. Hinge from your hips, reaching your front hand down your shin or ankle, or even to a block. Extend your top arm straight up towards the ceiling, stacking your shoulders. Keep your chest open and your gaze lifted if comfortable for your neck.

6. Cobra Pose and Backbends

When practicing Cobra Pose (Bhujangasana) or other backbends, beginners often make the mistake of relying too much on momentum or pushing up with their hands, rather than engaging their back muscles. This can lead to compression in the lower spine and strain on the wrists and shoulders.

Another common error is letting the hips lift off the mat in Cobra, which shifts the focus away from the intended backbend. Some also tend to crunch their neck or look too far forward, creating tension.

Safe Backbending in Cobra

Lie on your belly with your legs extended and the tops of your feet pressing into the mat. Place your hands under your shoulders, with your elbows tucked in. Inhale and gently peel your chest off the floor, using the strength of your back muscles. Keep your hips grounded. Press lightly into your hands for support, but avoid pushing up too high. Keep your neck long and gaze slightly forward.

7. Seated Forward Bend

The seated forward bend (Paschimottanasana) is meant to stretch the hamstrings and spine. However, many yoga newbies round their upper back significantly, trying to reach their toes. This often stems from tight hamstrings and a lack of core engagement.

Trying to force the forehead to the knees without a long spine defeats the purpose. It can also lead to discomfort in the lower back if the spine is excessively rounded.

Forward Bend with a Long Spine

Sit with your legs extended in front of you. If your hamstrings are tight, place a cushion under your sitting bones or bend your knees slightly. Inhale and lengthen your spine, reaching your chest forward. Exhale and hinge from your hips, folding forward. Allow your hands to rest on your shins, ankles, or feet. The focus is on creating length in the spine, not on touching your toes. If you have a rounded back, it’s better to keep your knees bent and a long spine.

The Importance of Feeling and Intention

As Kirsty Gallagher consistently reminds her students, the true essence of yoga lies in feeling and intention, not in achieving advanced poses. Competitive yoga can lead to injuries and a disconnect from the practice’s mindful benefits.

Focusing on how your body feels after a yoga routine is a much better indicator of progress than comparing yourself to others. Even simple yoga moves, performed with awareness and intention, can lead to a body that feels better and a mind that is more at ease.

Listen to Your Body

Never push through pain. If a pose doesn’t feel right, or if you experience sharp or persistent discomfort, ease out of it or modify it. Your body will thank you for it. It’s better to do a modified pose with correct alignment and good intention than to force an advanced variation incorrectly.

By understanding and addressing these common alignment mistakes, you can deepen your yoga practice, prevent injuries, and truly experience the transformative power of yoga. Remember, patience and consistent practice are key to building strength and flexibility, allowing you to move towards more advanced poses safely and effectively. Your journey as a yoga newbie is about exploration and self-discovery, not about reaching an endpoint.

Gentle Morning Yoga Stretches to Improve Flexibility and Reduce Stiffness

Starting your day with a gentle morning yoga stretch routine can significantly enhance your flexibility, setting a positive tone for hours ahead and easing stiffness that builds overnight.

Why Morning Yoga is a Game-Changer for Flexibility

Many people wake up feeling stiff, a natural result of hours spent in one position. A dedicated morning stretch routine helps to gently warm up your muscles, lubricate your joints, and increase blood flow throughout your body. This isn’t just about feeling less “creaky”; it’s about actively improving your range of motion over time.

Beyond the physical benefits, morning yoga offers a valuable mental reset. It provides a quiet moment before the day’s demands begin, allowing you to connect with your breath and body. This mindful practice can reduce stress, improve focus, and cultivate a sense of calm that carries you through your busy schedule. Consistency is often easier to achieve in the morning, before other commitments derail your plans.

Getting Started: Your Simple Setup

You don’t need much to begin a morning yoga practice. The beauty of these stretches is their accessibility.

  • A Yoga Mat: While not strictly necessary, a mat provides cushioning and grip, making poses more comfortable and stable. If you don’t have one, a soft rug or even a towel on a non-slip floor works just fine.
  • Comfortable Clothing: Choose clothes that allow for a full range of movement without restricting your breath or pinching your skin. Think soft, stretchy fabrics.
  • A Quiet Space: Find a corner where you won’t be disturbed for 15-30 minutes. Natural light can be invigorating, but any peaceful spot will do.
  • No Equipment Needed: Forget about fancy blocks, straps, or bolsters for now. Your body is all you need.

Essential Principles for Your Morning Stretch

Approaching your morning routine with intention makes all the difference. Keep these guidelines in mind as you move.

  • Listen to Your Body: This is perhaps the most important rule. Never force a stretch or push into pain. Your body’s sensations are your best guide. Some days you’ll feel more open, other days less so. Honor that.
  • Breath is Key: Connect your movement with your breath. Inhale to lengthen, exhale to deepen. Deep, steady breaths, often through the nose, oxygenate your muscles and calm your nervous system. Try to make your inhales and exhales roughly equal in length.
  • Hold Poses Gently: Aim to hold each stretch for 3-5 slow breaths. This gives your muscles time to relax and lengthen without triggering a “stretch reflex” that can cause them to contract.
  • Be Gentle, Not Aggressive: Morning muscles are often cooler and less pliable. Approach your stretches with kindness and patience. Think of it as waking up your body, not conquering it.
  • Consistency Over Intensity: A short, regular practice is far more effective than sporadic, intense sessions. Even 10-15 minutes daily will yield noticeable results over time.

Your Morning Yoga Stretch Routine for Enhanced Flexibility

This routine is designed to be gentle yet effective, progressively opening your body from head to toe. Remember to move slowly and mindfully through each pose.

1. Gentle Awakening: Grounding and Spinal Mobility

Child’s Pose (Balasana)

Start your practice here, grounding yourself. Kneel on your mat, bringing your big toes to touch and spreading your knees wide, or keep them hip-width apart for a more restorative feel. Sink your hips back towards your heels. Extend your arms forward, resting your forehead on the mat. Allow your shoulders to relax and your spine to lengthen. Breathe deeply into your back body, feeling your rib cage expand with each inhale. This pose calms the mind and gently stretches the hips, thighs, and ankles.

Cat-Cow Stretch (Marjaryasana-Bitilasana)

From Child’s Pose, shift onto your hands and knees, aligning your wrists directly under your shoulders and your knees under your hips. Your fingers should be spread wide. This dynamic movement warms up the spine.

  1. Cow Pose: As you inhale, drop your belly towards the mat, lift your chest and tailbone towards the ceiling. Gaze gently forward or slightly up, without crunching your neck.
  2. Cat Pose: As you exhale, round your spine towards the ceiling, tucking your chin to your chest and drawing your navel towards your spine. Imagine pressing the mat away from you.

Flow between Cat and Cow for 5-8 rounds, coordinating each movement with your breath. Feel the articulation of each vertebra. This improves spinal flexibility and mobility.

Gentle Supine Spinal Twist

Lie on your back with your knees bent and feet flat on the floor, hip-width apart. Extend your arms out to a “T” shape, palms facing up or down.

  1. Lift your hips slightly and shift them a few inches to the right.
  2. Let both knees fall slowly to the left, keeping your right shoulder grounded as much as possible.
  3. You can gaze to the right, opposite your knees, for a deeper neck stretch.

Hold for 5 breaths, feeling the gentle twist in your lower back and the stretch across your chest and shoulder. Bring your knees back to center, recenter your hips, then repeat on the other side, letting your knees fall to the right and gazing left. This pose releases tension in the spine and hips.

2. Standing Stretches: Building Warmth and Lengthening

Standing Forward Fold (Uttanasana)

Stand at the top of your mat with your feet hip-width apart.

  1. Inhale, lengthen your spine.
  2. Exhale, hinge from your hips, folding forward. Keep a slight bend in your knees, especially if your hamstrings are tight. The goal is to lengthen your spine, not necessarily to touch your toes with straight legs.
  3. Let your head hang heavy. You can grab opposite elbows, let your hands dangle, or place them on your shins or the floor.

Hold for 5 breaths, feeling the stretch in your hamstrings and along your spine. This pose calms the brain and helps relieve stress, while stretching the hamstrings and calves.

Low Lunge (Anjaneyasana)

From a Standing Forward Fold, step your right foot back into a lunge position, dropping your right knee to the mat. You can place a blanket under your knee for comfort.

  1. Ensure your left knee is stacked directly over your left ankle.
  2. Keep your left hand on the floor or a block for balance, or bring both hands to your left thigh.
  3. Gently press your hips forward and down, feeling the stretch in the front of your right hip and thigh (hip flexor).
  4. For an added stretch, inhale and sweep your arms overhead, palms facing each other.

Hold for 5 breaths, then release and switch sides. This pose is excellent for opening tight hip flexors, which often become stiff from prolonged sitting.

Triangle Pose (Trikonasana)

Step your feet wide apart, about 3-4 feet. Turn your right foot out 90 degrees, and your left foot slightly in.

  1. Extend your arms out to a “T” shape, parallel to the floor.
  2. Inhale, reach forward with your right hand, lengthening your right side.
  3. Exhale, hinge at your right hip, bringing your right hand to your shin, ankle, or a block. Your left arm reaches straight up towards the ceiling.
  4. Keep your chest open and stacked. Imagine you’re between two panes of glass.
  5. Gaze up at your left thumb, forward, or down at your right foot for neck comfort.

Hold for 3-5 breaths, feeling the stretch in your hamstrings, groin, and along the side of your torso. Inhale to come back up, then repeat on the other side. Triangle Pose strengthens the legs and core while stretching the hamstrings, groin, hips, and spine.

3. Floor Stretches: Deepening Flexibility and Release

Seated Forward Fold (Paschimottanasana)

Sit on your mat with your legs extended straight out in front of you, feet flexed (toes pointing up).

  1. Inhale, sit tall, lengthening your spine.
  2. Exhale, hinge from your hips, folding forward over your legs. Keep your spine long, avoiding rounding your back.
  3. Rest your hands on your shins, ankles, or feet.
  4. Keep a micro-bend in your knees if your hamstrings are very tight.

Hold for 5-8 breaths, allowing your body to soften into the stretch. This pose deeply stretches the hamstrings, calves, and back, and can calm the brain.

Bound Angle Pose (Baddha Konasana)

From Seated Forward Fold, bring the soles of your feet together, letting your knees fall open to the sides. You can bring your heels closer to your groin for a deeper stretch, or further away for a gentler one.

  1. Hold onto your feet, ankles, or shins.
  2. Inhale, sit tall, lengthening your spine.
  3. Exhale, gently fold forward from your hips, allowing your elbows to press lightly into your inner thighs if you wish to deepen the stretch.

Hold for 5-8 breaths, feeling the opening in your inner thighs and hips. This pose stimulates abdominal organs, improves general circulation, and stretches the inner thighs, groin, and knees.

Happy Baby Pose (Ananda Balasana)

Lie on your back.

  1. Bend your knees and draw them towards your chest.
  2. Grab the outside edges of your feet with your hands, keeping your knees bent and stacked over your ankles.
  3. Open your knees wider than your torso, drawing them towards your armpits.
  4. Keep the soles of your feet parallel to the ceiling.
  5. Gently press your lower back into the mat. You can rock gently side to side for a massage.

Hold for 5-8 breaths. This pose gently stretches the inner groins and back, and calms the brain and helps relieve stress.

Reclined Pigeon Pose (Eka Pada Rajakapotasana Variation)

Lie on your back with your knees bent and feet flat on the floor.

  1. Cross your right ankle over your left thigh, just above the knee.
  2. If you already feel a stretch in your right hip, stay here.
  3. For a deeper stretch, lift your left foot off the floor and interlace your fingers behind your left thigh.
  4. Gently draw your left thigh towards your chest, keeping your right foot flexed to protect your knee.

Hold for 5-8 breaths, feeling the deep stretch in your outer right hip and glute. Release and repeat on the other side. This is an excellent stretch for the outer hips and piriformis muscle.

4. Cool-down and Relaxation: Integrating Your Practice

Savasana (Corpse Pose)

Extend your legs long on the mat, letting your feet fall open naturally. Let your arms rest alongside your body, palms facing up, slightly away from your torso. Close your eyes. Allow your entire body to relax and surrender to the mat. Feel the effects of your practice. Let your breath be natural. Stay here for 5-10 minutes, allowing your body and mind to fully integrate the benefits of the stretches. This final pose is essential for relaxation and absorbing the practice.

Making It a Consistent Habit

Building a new routine takes time and patience. Don’t expect perfection from day one.

  • Start Small: Even 5-10 minutes of gentle stretching is better than nothing. You can gradually increase the duration as you feel more comfortable and dedicated.
  • Set a Specific Time: Waking up 15-30 minutes earlier and dedicating that time to your yoga practice can create a powerful anchor for your day.
  • Be Patient with Progress: Flexibility doesn’t happen overnight. Celebrate small improvements, like reaching a little further or feeling less tension in a particular area.
  • Focus on How it Feels: Shift your attention from how a pose looks to how it feels in your body. This internal focus makes the practice more personal and sustainable.
  • Listen to Your Body’s Signals: Some days you might feel more flexible than others. Adjust your practice accordingly.

Common Mistakes to Avoid

Even with the best intentions, it’s easy to fall into habits that hinder progress or risk injury.

  • Holding Your Breath: Restricting your breath creates tension. Always focus on smooth, steady breathing to help your muscles relax and lengthen.
  • Forcing Stretches: Pushing past your body’s natural limits can lead to muscle strains or injury. A gentle pull is good; sharp pain is a warning sign to back off.
  • Comparing Yourself to Others: Everyone’s body is different. Your flexibility journey is unique. Focus on your own progress and sensations, not on what others can do.
  • Skipping Warm-up or Cool-down: These phases are crucial. The warm-up prepares your muscles, and the cool-down allows your body to relax and integrate the benefits.
  • Ignoring Discomfort: While some sensation is normal during a stretch, sharp or shooting pain is not. Always adjust or back out of a pose if you feel pain.

Benefits Beyond Flexibility

While enhanced flexibility is a primary goal, a morning yoga routine offers a cascade of other positive effects that ripple through your entire day.

  • Improved Posture: By lengthening your spine and strengthening your core, yoga helps counteract the slouching that often comes from sitting at desks or looking at screens.
  • Reduced Stress and Anxiety: The combination of mindful movement and deep breathing actively calms the nervous system, providing a natural antidote to daily stressors.
  • Increased Energy Levels: Moving your body and increasing blood flow in the morning can be more invigorating than a cup of coffee, without the jitters.
  • Better Sleep Quality: Even a morning practice can contribute to better sleep by regulating your body’s rhythms and reducing overall stress throughout the day.
  • Stronger Mind-Body Connection: Regular practice fosters a deeper awareness of your physical sensations and emotional states, leading to greater self-understanding and presence.

Embracing a morning yoga stretch routine is a simple yet profound act of self-care. It doesn’t require hours of dedication, just a willingness to show up for yourself, even for a few minutes. Over time, you’ll discover not only a more flexible body but also a calmer, more focused mind ready to meet the day with renewed energy and grace.

Exit mobile version